

ASP.NET core has seen rapid development in the last years. Additionally, there were some breaking changes since version 1, for example, the project.json file got removed. Unfortunately, the documentation is lacking behind this rapid development. I had exactly this problem when I wanted to use NLog to log to my database. There was plenty of documentation but none of it worked because it was for .NET Core 1.x.
Today, I want to talk about how I implemented NLog with ASP.NET core 2.2 and how I configured it to log to my database. You can find the source code for the following demo on GitHub.
Installing Nlog
I created a new web project with .NET Core and the MVC template and added the NLog.Web.AspNetCore NuGet package. Next, I create a new file NLog.config in the root folder of my solution. This file will contain all the configs for NLog. Now it is time to fill the config file with some content. You can find the source code for this demo on GitHub.
Implementing the Nlog config
To get started, create a database and then the Log table. You can find the script to create the table at the bottom of my config file. Now let’s inspect the config file:
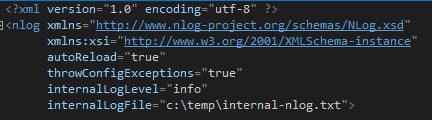
NLog internal logging
The first section of the file is for internal logs of Nlog. These logs come in handy when you have a problem with Nlog. There you can configure what level of logging you want and where the log file should be created. You can also configure whether the file should be reloaded on save with autoReload.

Configure the database connection
The next section is for configuring the database connection. The variables are read from the appsettings.json from the NlogConnection section. You can see the appsettings.json section on the following screenshot.
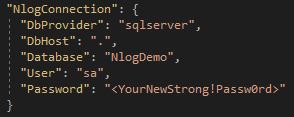
Settings for Nlog from appsettings.json
The commandText section defines the insert statement. This is straight forward and you don’t have to edit anything.
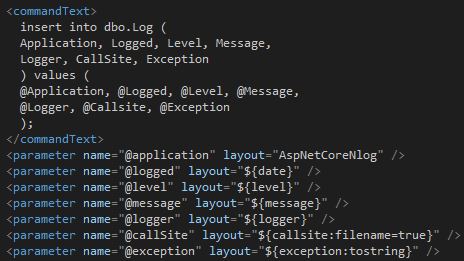
Setting up the insert statement for logging
The last section lets you specify rules about your log. You can configure which logger should log where. In my example, every logger logs messages with the log level Info and higher into the database. Another example could be to log information from one logger to the database and the information from another one to a file.

Rules for logging
Using Nlog
Using Nlog in your application is really simple. First, you have to tell your WebHost to use Nlog in the CreateWebHostBuilder by simply adding .UseNlog() at the end of the statement.
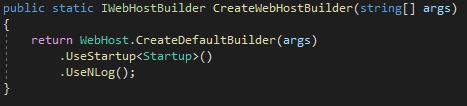
Use Nlog in the WebHostBuilder
That’s all you have to do. Now you can already use the logger in your application. To use the logger, inject the ILogger interface with the type of the class which uses it. The ILogger interface provides useful methods like LogInformation() or LogCritical(). Call one of the methods and insert your log message.
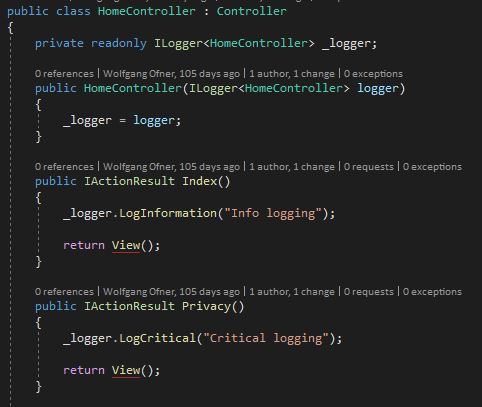
Use ILogger to log messages
Testing the implementation
To test that the logging is working, you have only to start your application and call one of the controllers which do some logging. Then you can check in your database in the Log table and you should see the log entries there.
On the following screenshot, you can see that I called the Index and the Privacy method once which create a log entry for both calls.

Log entries in the Log table
Conclusion
This post showed how simple it is to set up and use NLog with your ASP.NET MVC Core application. All you have to do is installing the NuGet, adding the nlog.config file and use it in your application.
You can find more information about NLog on their website and you can find the source code of today’s demo on GitHub.
Comments powered by Disqus.