

The Bundles feature is built-in into the MVC framework and helps to organize and optimize CSS and Javascript files. In this post, I will show what bundling is, how to use it and what effects it has on the performance of your application.
Setting up the project
To show how bundles word, I create a new empty ASP.NET MVC project with the MVC folders. Then I install the following NuGet packages:
- Bootstrap
- jQuery
- jQuery.Validation
- Microsoft.jQuery.Unobtrusive.Validation
- Microsoft.jQuery.Unobtrusive.Ajax
These CSS and Javascript libraries are often used, so they represent a real-world example. Then I create a simple view which uses at least one of the features of each package so that there are several files which need to be loaded.
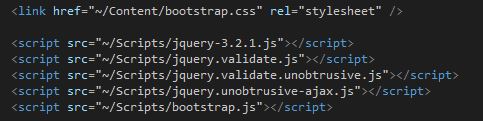
Adding CSS and Javascript files
Analyzing the network load
You can analyze the network load with every browser by pressing the F12 key. This opens the dev tools which shows some useful information for development and debugging. Switch to the Network tab and disable Caching. Then reload the website. This lists all files requested and also displays a summary of the number of files transferred and the number of bytes.
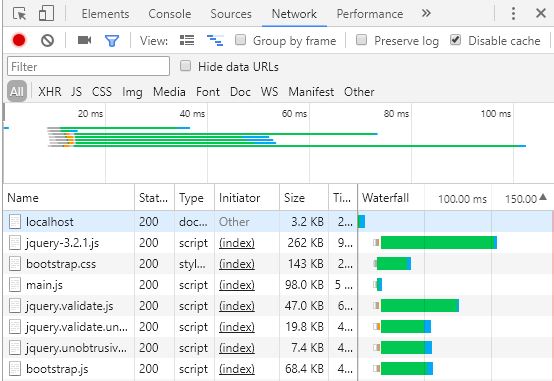
Network tab in the Chrome DevTools

Summary of the requests and transferred data
As you can see there were quite some files transferred for such a simple page. In total nine requests were sent and 649 KB of data. This is a lot of data for such a simple page and could be a problem when the page grows and hosts more content. The solution for too many requests and too many sent data is bundling.
What is Bundling?
In the bundling process, the ASP.NET MVC framework minifies Javascript and CSS files to reduce the file size and therefore the amount of data which needs to be sent to the browser. The reduction of the file size is achieved by removing white spaces and shortening variable and method names. Often these minified files are already downloaded when installing a NuGet package, for example, while installing jQuery, the Packet Manager also installed the minified version. You can detect such a file at the ending .min.js. Due to the minification, these files are hardly human readable.
Setting up Bundles
The first step to use Bundles is installing the Microsoft.AspNet.Web.Optimization packages from NuGet. Then add the BundleConfig class to the App_Start folder. You don’t have to do this if you use the MVC template when creating a new project. Then Visual Studio automatically creates the class and installs the NuGet package for you.
The BundleConfig class has one static method, RegisterBundles which takes a BundleCollection as parameter. Add your CSS files by adding a new StyleBundle to the BundleCollection and the Javascript files by adding a new ScriptBundle to the BundleCollection.

Adding CSS and Javascript Bundles to the BundleConfig class
You can add files with the full name or you could wildcards if you want to use all files from a folder, for example, you could add all Javascript files from the Scripts folder with “~/Scripts/*.js”. Note that I used the version variable for jQuery. This means that every jQuery version in the Scripts folder gets included. The advantage is that I can update jQuery and don’t have to think about adding the version number in the Bundle. The downside is that if I have several jQuery files in the folder, all get loaded.
If one file depends on the other one, make sure to add them in the right order. For example jQuery.validate needs jQuery, therefore the jQuery file needs to be added first.
Using Bundles in ASP.NET MVC
After creating the Bundles, I have to add the RegisterBundle method in the Global.asx file to make sure it is called at the start of the application. To register the RegisterBunle method in the Global.asx file add the following line of code: BundleConfig.RegisterBundles(BundleTable.Bundles);

Registering the Bundles in the Global.asax file
The next step is to add the System.Web.Optimization namespace to the web.config viel in the Views folder.
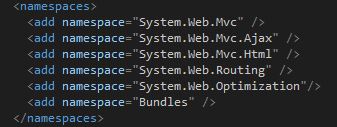
Adding the System.Web.Optimization namespace to the web.config file
The last step is adding the Bundles to your layout view and enabling CSS and Javascript optimization in the web.config file. To do that use Styles.Render and Scripts.Render with the name of the Bundle you provided while creating it.
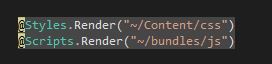
Adding the Bundles to the layout view
Then set the value of the debug attribute in the compilation tag in the web.config to false. If this is set to true, the browser requests all the files with separate requests and doesn’t use bundling.

Setting debug to false in the web.config
In theory, fewer files get requested and the transferred data size is smaller too now. To test this I start the application and open the DevTools again. Then I reload the page.
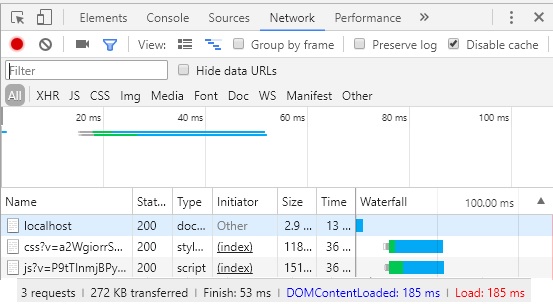
Network tab in the Chrome DevTools after bundling
As you can see only 3 requests and only 272 KB were sent. The request was finished after 53 ms instead of 127 ms without bundling.
Conclusion
In this post, I showed how to optimize your CSS and Javascript file by minimizing them using the ASP.NET MVS Bundling feature. With this feature, the number of requests, transferred data and time to finish got significantly decreased.
For more details about how bundles work, I highly recommend the books Pro ASP.NET MVC 5 and Pro ASP.NET MVC 5 Plattform.
You can find the source code on GitHub.
Comments powered by Disqus.