

In my last post, I talked about deploying database changes automatically. Today, I will show how to use SSDT (SQS Server Data Tools) to generate a Dacpac package and how to deploy it to your SQL server.
This post is part of “Microservice Series - From Zero to Hero”.
Prepare your Environment
Before you can get started, you have to download the custom SSDT Tools from GitHub. These custom tools are an extension of the MSBuild.Sdk.SqlProj project and are necessary to be able to open the SSDT project file (*.sqlproj) with Visual Studio.
Getting to know the SSDT Project Structure
You can find the code of the demo on GitHub.
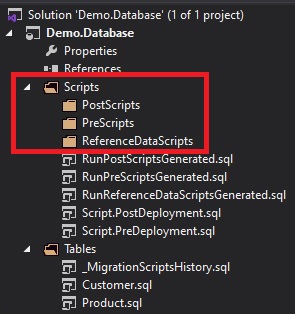
Open the .sqlproj file with Visual Studio and you will see the project structure. There are two relevant folders inside the project, Scripts, and Tables.
The Scripts folders
The Scripts folder contains the PostScripts, PreScripts, and ReferenceDataScripts subfolders.
The Scripts folder contains SQL scripts
Scripts in the PreScripts folder are executed before the deployment whereas scripts in the PostScripts and ReferenceDataScripts folders are executed after the deployment. There are two folders after the deployment for a better separation of concern but it would also be fine if you put all your scripts into the PostScripts folder. You can execute any SQL script you want, except schema changes. Schema changes are defined in the Tables folder.
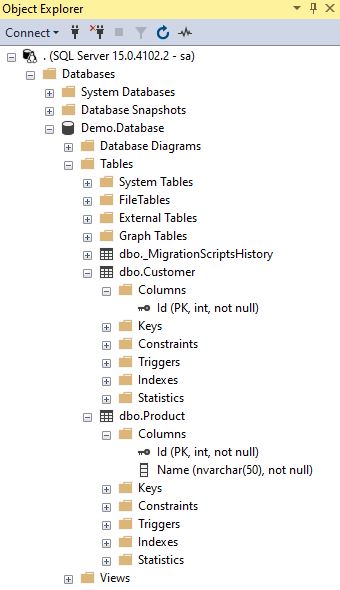
The Tables folder
The Tables folder contains the definition of your tables.
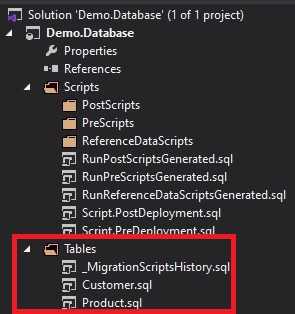
The definitions of all tables
The MigrationScriptsHistory table is needed to store all executed migrations. All other tables are customer-defined and you can add whatever tables you need, for example, the Product table:
If you double-click on the SQL file in Visual Studio, you can see the script file and the designer to edit the file.
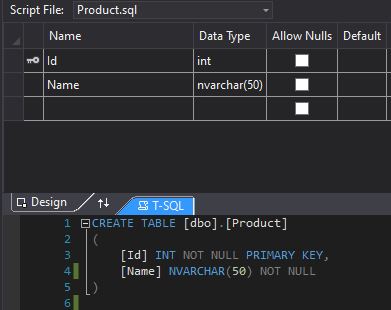
The SQL Designer in Visual Studio
Generate the Database using SSDT
I have added two tables, Customer and Product, and want to deploy this new database to my database server. Since Docker is awesome, I use a Docker container for my SQL Server. You can start an SQL Server 2019 with the following command:
If you connect to your server, using tools like the SQL Server Management Tool, you will see that there is no database yet.
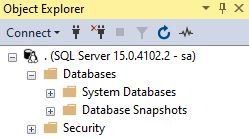
No database is on the server
To deploy the new database, right-click the .sqlproj file in Visual Studio and select Publish.
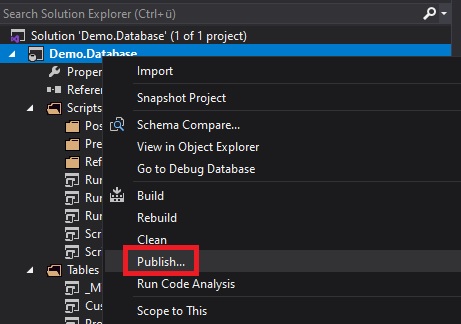
Publish the database
This opens the Publish Database window.
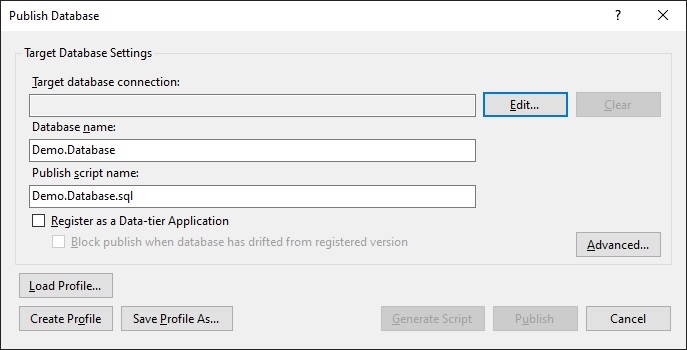
Configure the database deployment
As you can see, the connection string is empty. Click on edit and enter your database server information.
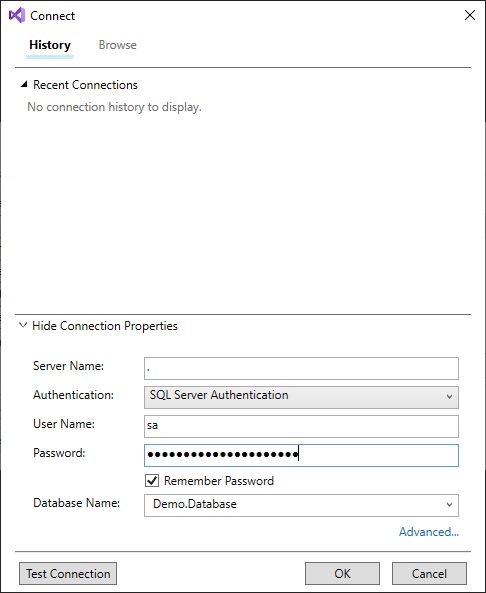
Provide the connection settings
This creates the connection string and now you can click on Publish to deploy your database.
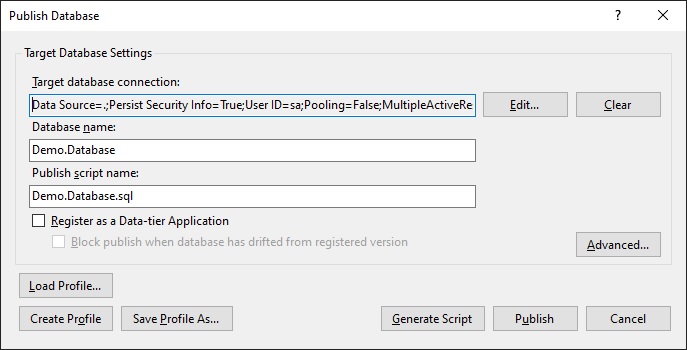
Deploy the database
The publish process should only take a couple of seconds and Visual Studio will tell you when it is finished.

The publish succeeded
That’s already it. Refresh your SQL server and you will see the new database with its three tables.
The database and tables got created
Applying changes to an existing Database
If you already have an existing database and want to apply changes, for example, adding a new column, you can simply add it to the existing table. Open the Product table and add a price column as a decimal. The code looks as follows:
That’s already all you have to do. Publish the project again to update your SQL server to see the new column in the Product table.
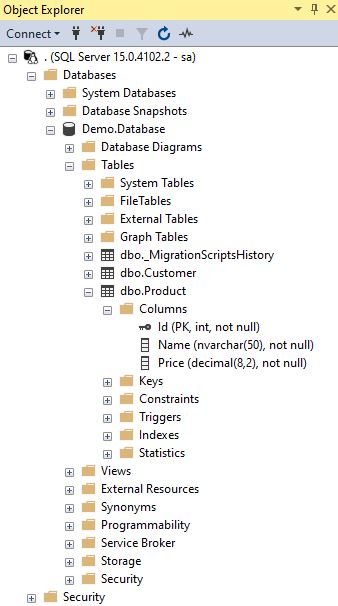
The Product table got a new column
Configure the Target Platform
If you don’t use an SQL Server 2019 then you have to configure your target platform before you can publish the project. Right-click the .sqlproj file and select Properties. Select the desired target platform in the Project Settings tab.
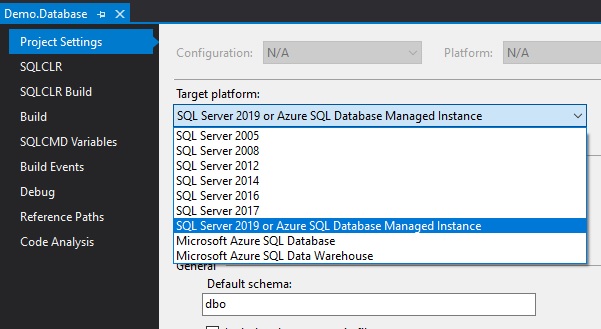
Configure the target platform
Conclusion
SSDT offers a simple solution to automating your database deployments. It automatically checks the schema on the deployed database and compares it with the schema in your SSDT project. If there is a change, these changes are applied. This allows for fast changes and even allows for setting up environments for new developers fast and easily. The demo was very simple but should give you enough knowledge to get started.
In my next post, I will show how to build the SSDT project in your CI/CD pipeline and how to deploy it to an Azure SQL Database.
You can find the code of the demo on GitHub.
This post is part of “Microservice Series - From Zero to Hero”.
Comments powered by Disqus.