

With the Azure bot framework and luis, Microsoft offers two great features to implement language understanding in your chat bot. This is the second part of my chat bot series and in this post, I will show you how to add a language understanding to your chat bot using luis. You can find the first part here.
Adding new answers to your Azure bot
If you created your Azure bot the same way as described in part 1, it will already have luis integration. To add new language features, go to the luis homepage and login with your Azure credentials. After you logged in, you should see your chat bot. Open it and you will see 4 already existing intents.
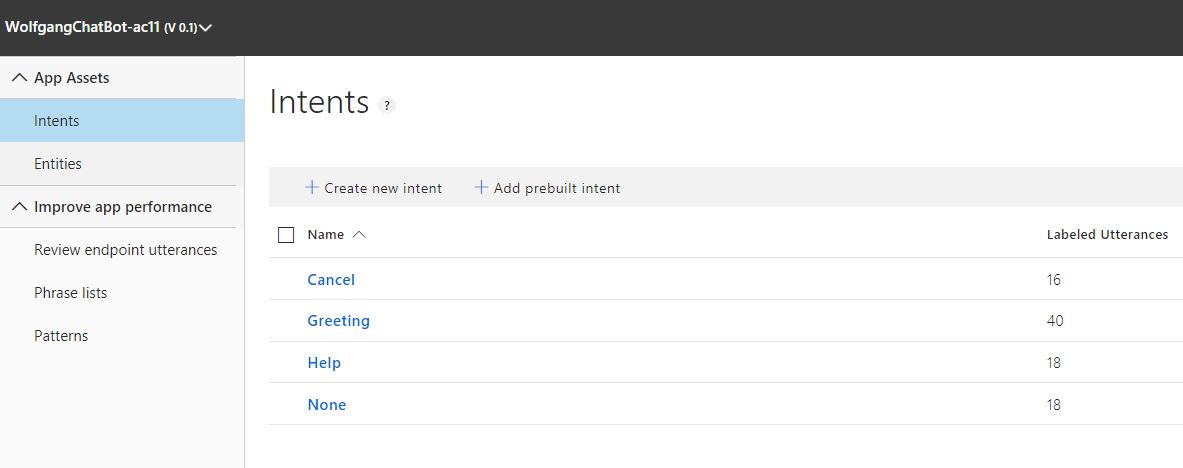
List of predefined intents
An intent is something the user wants to do. To teach your app what the user wants, you add a new intent and then add different utterances. Utterances are different phrases the user might use. For example, if the user is asking about the weather, he might ask “what is the weather today”, “Is it hot” or “Do I need an umbrella”. The more utterances you add to an intent, the better the application understands what the user wants. A rule of thumb is that there should be at least 5 utterances to train the Azure bot.
Create a new Intent
To create a new intent, click on + Create new intent and enter a name, for example, Weather. Now type in examples (utterances), the user might say.

Add a new intent
After you are done, click on Train in the right top corner and after the training on Publish.
Handle the new intent in your Azure bot application
Now that you have created a new intend, your bot has to handle it. To do something with the new intent, you have to add it to the switch statement in the OnTurnAsync method in the BasicBot.cs file. The simplest way to add the new intent is to add a new case with “Weather” and then return a message.
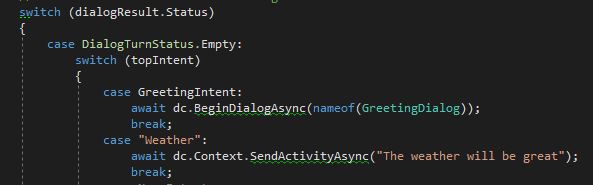
Handle the intent in the bot
Additionally, I remove the welcome message by commenting the following code:
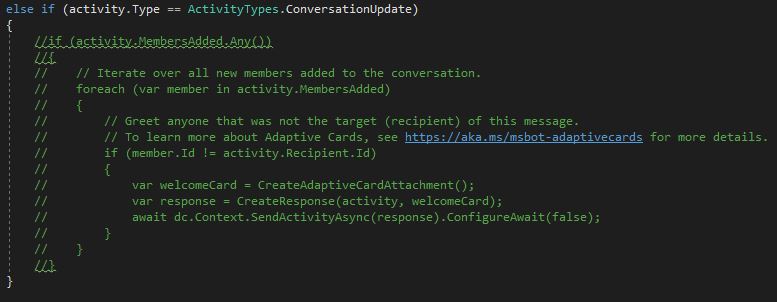
Remove welcome message
Check in your code and after it is deployed, you can test it.
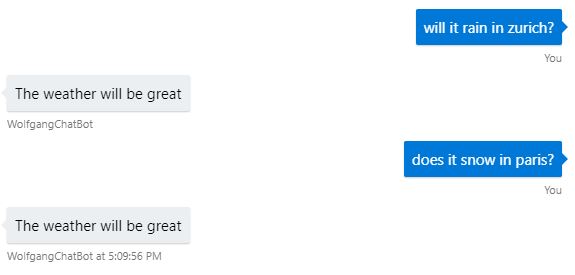
Testing the weather intent
The new intent is working, but as you can see, the bot is not really smart. It would be nice if I could get different answers depending on the city.
Making the Azure bot smarter
Currently, the bot always gives the same answer if the user asks for the weather. It would be nice if the bot would give a different answer, depending on the city, the user is asking about.
Add an entity to the intent
The bot should react to the city, the user enters. Therefore the bot has to know that the city is a special input. In Luis this is called an entity. After defining an entity, the C# code can behave differently, depending on the value of the intent.
To add the entity, add a new utterance to the intent, for example, is it sunny in zurich? Then click on zurich and enter City to create the City entity. In the next window set the Entity type to simple and click done.
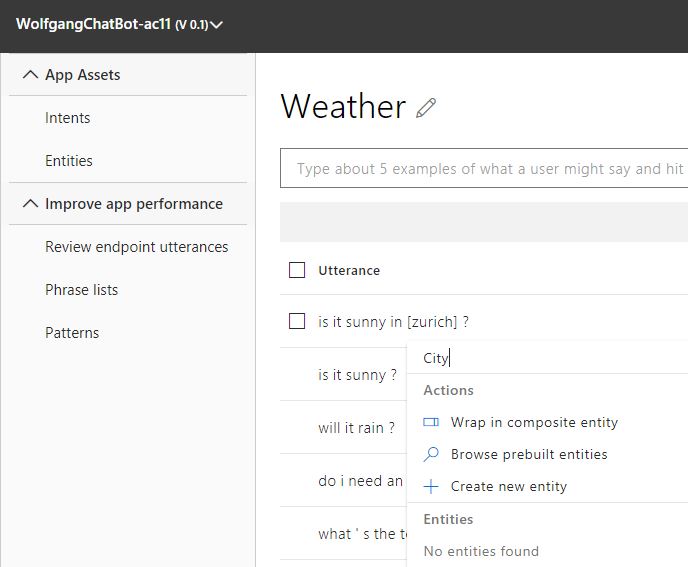
Define an entity in luis
Then I enter all previously used utterance but this time with a city. After all utterances are entered, I click on each city and select the city entity. This marks it as an entity.
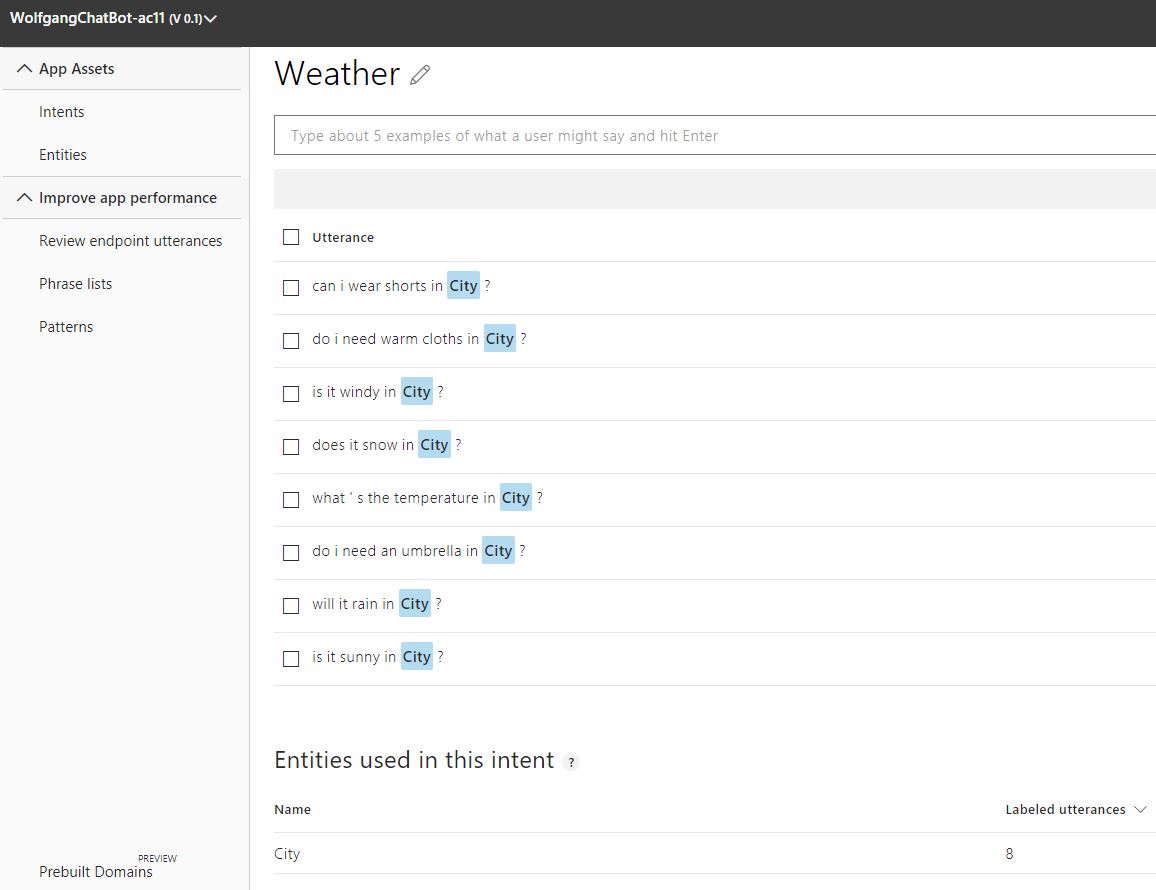
Applying the city entity
Click on Train and then on Publish
Handle the new entity in your bot code
The following code shows how to get the entity of the luisResult and then give an answer, according to the entity.
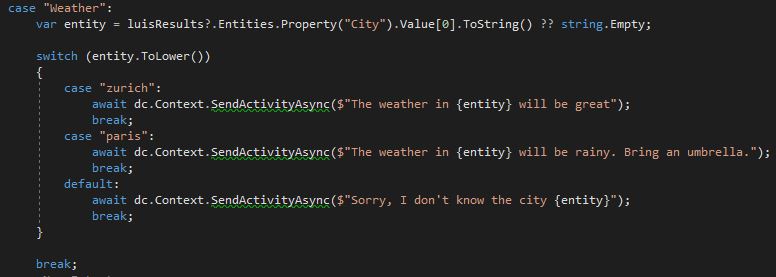
Handle the entity in the Azure bot
Obviously, this code is not really useful, it is only supposed to show what you can do with entities. A real world example could be to compare the entity with a list of cities where you have a store and if the entity is a city where you have a store, you call a weather service and show the weather for the day.
Conclusion
In this post, I showed how to implement language understanding in your Azure Bot using luis. Additionally, I showed how to use entities and make the answers of your Azure bot smarter. You can find the code of the demo on GitHub.
In part 3 of this series, I will talk about different reply types like videos, images or files.
Comments powered by Disqus.