

DevOps is all about automation and making the process faster and more reliable. Sometimes a human must check a change or feature before it is deployed. This could be someone from QA or even marketing checking if the new design is as they wanted it. Adding approvals in the classic (old) editor in Azure DevOps is pretty simple but it’s not as straightforward with the new YAML pipelines.
In this post, I will show how you can add approvals to your deployments when you use the modern YAML pipelines.
This post is part of “Microservice Series - From Zero to Hero”.
Add Approvals in the Classic Editor Pipeline
If you still use an old classic editor pipeline, it is very easy to add an approval before the deployment. All you have to do is to click on the icon on the left side of your task. Note that this icon only appears when you hover over the task. After you clicked on the icon, select Pre-deployment approvals and add the users who are allowed to approve the deployment.
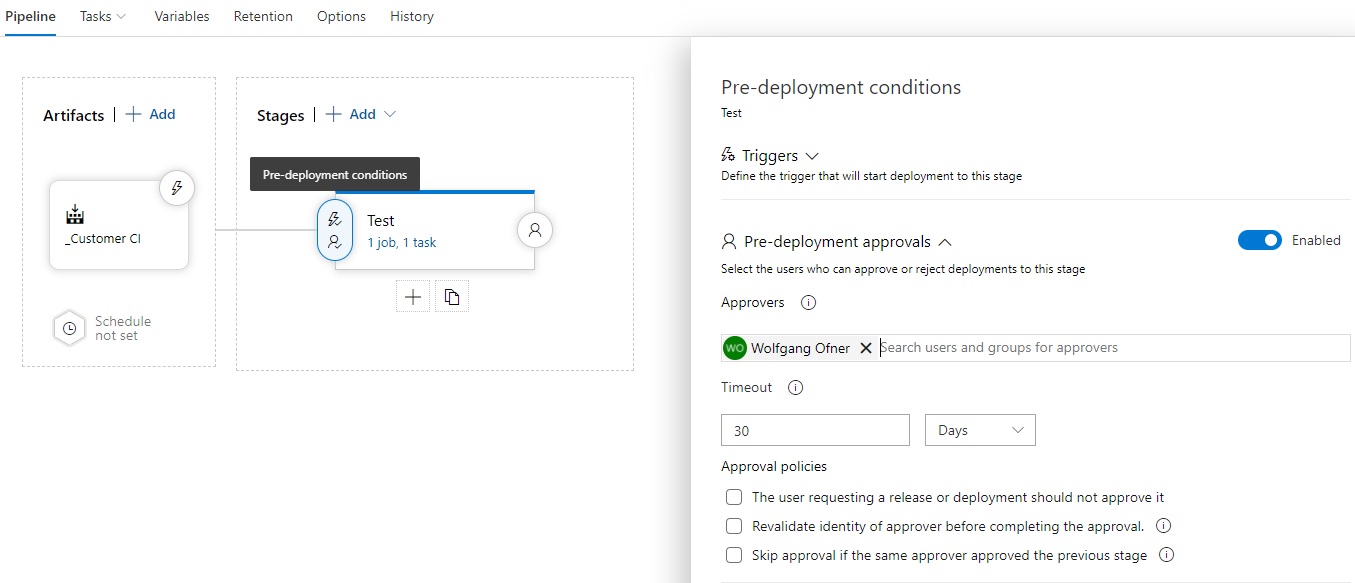
Add approvals in the classic editor
When you start the deployment, all approvers get an email to approve the deployment. Once the required approver approved the deployment, the task continues.
Add Approvals when using YAML Pipelines
You can find my YAML pipeline on GitHub.
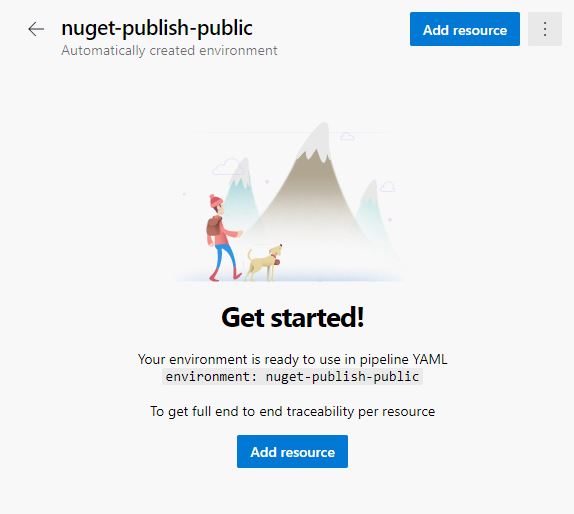
Adding approvals when using YAML pipelines is a bit more work but not complicated. In your Azure DevOps project open Pipelines –> Environments. If you ran my NuGet pipeline, you will already have two environments, nuget-publish-internal and nuget-publish-public. The environments are created (or referenced if they already exist) with the environment property in the pipeline as shown in the following code:
If you don’t have an environment yet, create one by clicking on New environment.
Configure an Environment
I want to add an approval to the publish task to nuget.org because I want only certain versions published. To do that, click on nuget-publish-public. If you ran the deployment already, you will see a list of all runs. If you haven’t run the deployment yet, you will see a get started page:
Configure an environment
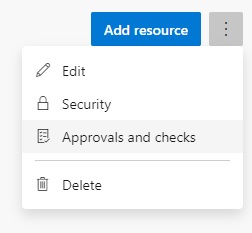
Click on the three dots on the right side and select Approvals and checks.
Open the approvals page
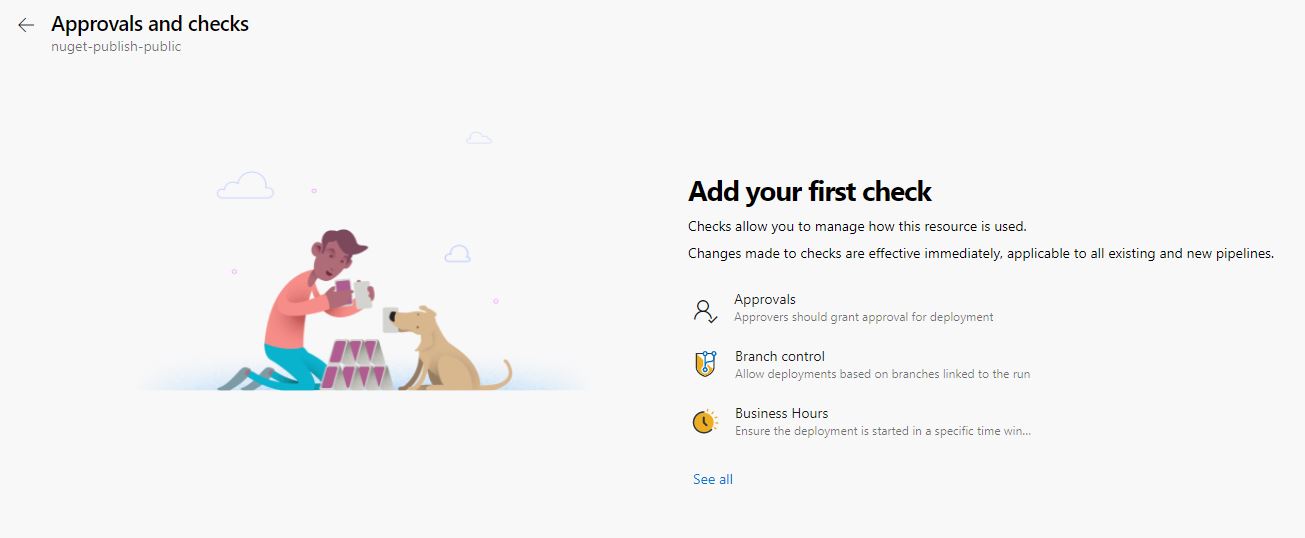
On this page, you can add approvals, branch control, and business hours. Branch control lets you configure which branches are allowed to start a deployment. For example, you could configure that deployments are only allowed from the master branch. Business hours allows you to configure the hours a deployment can start. For example, if you set your business hours from 9 am to 5 pm, a deployment started at 6 pm won’t run until 9 am. This allows you to ensure that there is always someone available in case something goes wrong.
Click on the three dots on the right side and select Approvals and checks.
Add an approval
Click on Approvals and the config flyout appears. I add myself as an approver, to keep it simple and allow me to approve my own runs. I leave the timeout at 30 days. If you add instructions to the approvers, they will get them in the notification email. Click on Create and the approval gets created.
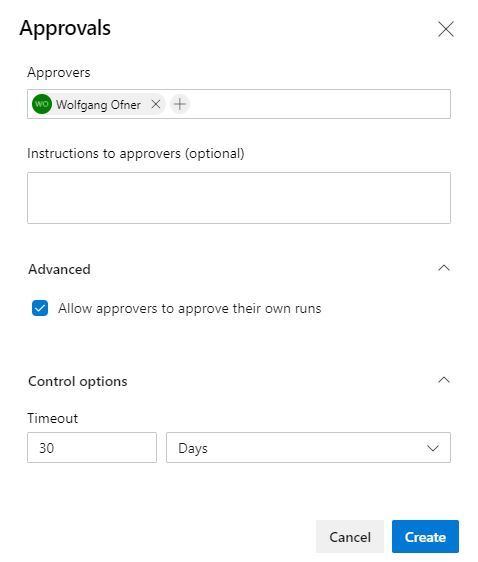
Configure the approval
Test the Approval in the YAML Pipeline
Run the YAML pipeline and the build stage will run as always. The deployment stops before the publish to nuget.org task. When you open the deployment, you can see that an approver has to review it.
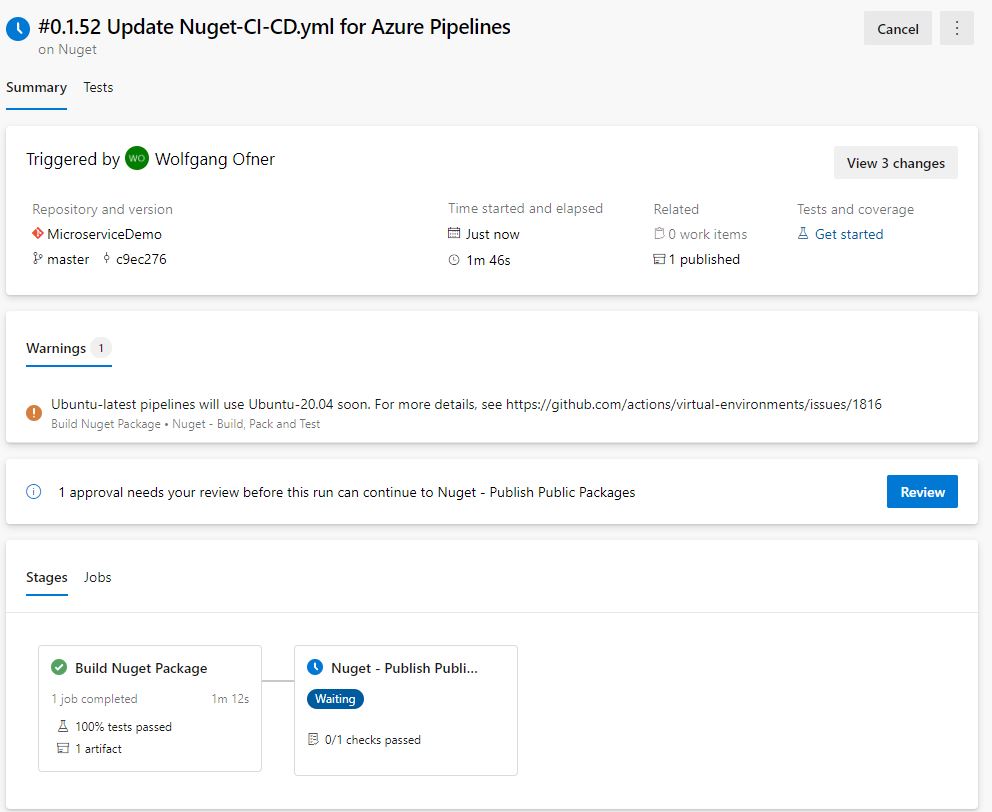
Review the deployment
Click on Review and then on Approve. Once you approved, the deployment starts.
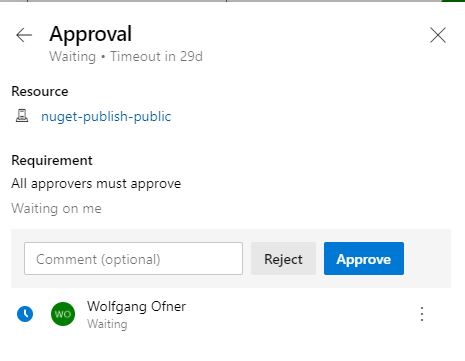
Approve the deployment
Conclusion
Adding approvals was very easy with the classic editor. With the new YAML pipelines, it is still pretty easy but you need a bit more clicks to create the process. Approvals are a great tool to ensure that the deployment gets reviewed before its deployed to a critical environment.
You can find the code of the demo on GitHub.
This post is part of “Microservice Series - From Zero to Hero”.
Comments powered by Disqus.