
In my last post, I added RabbitMQ to my two microservices which finished all the functional requirements. Microservices became so popular because they can be easily deployed using Docker. Today I will dockerize my microservices and create a Docker container that can be run anywhere as long as Docker is installed. I will explain most of the Docker commands but basic knowledge about starting and stopping containers is recommended.
This post is part of “Microservice Series - From Zero to Hero”.
What is Docker?
Docker is the most popular container technology. It is written in Go and open-source. A container can contain a Windows or Linux application and will always be identical bit by bit, no matter where you start it. This means it runs the same way during development, on the testing environment, and on the production environment. This eliminates the famous “It works on my machine”.
Another big advantage is that Docker containers share the host system kernel. This makes them way smaller than a virtual machine and enables them to start within seconds or even less. For more information about Docker, check out Docker.com. There you can also download Docker Desktop which you will need to run a Docker container on your machine.
What is Docker Hub?
Docker Hub is like GitHub for Docker containers. You can sign up for free and get unlimited public repos and one private repo. There are also enterprise plans which give you more private repos, build pipelines for your containers, and security scanning.
To dockerize an application means that you create a Docker container or at least a Dockerfile which describes how to create the container. You can upload the so-called container image to container registries like Docker Hub so other developers can easily download and run them.
Docker Hub is the go-to place if you want to download official container images. The RabbitMQ from the last post was downloaded from there or you can download Redis, SQL Server from Microsoft, or thousands of other popular applications.
Dockerize the Microservices
You can find the code of the finished demo on GitHub.
Visual Studio makes it super easy to dockerize your application. All you have to do is to right-click on the API project and then select Add –> Docker Support.

Dockerize your application
This opens a new window where you can select Linux or Windows as OS for the container. I am always going for Linux as my default choice because the image is way smaller than Windows ones and therefore starts faster. Also, all my other containers run on Linux and on Docker Desktop, you can only run containers with the same OS at a time. After clicking OK, the Dockerfile and .dockerignore files are added. That’s all you have to do to dockerize the application.
Dockerfile and .dockerignore Files
The .dockerignore file is like the .gitignore file and contains extensions and paths which should not be copied into the container. Default extensions in the .dockerignore file are .vs, /bin or /obj. The .dockerignore file is not required to dockerize your application but is highly recommended.
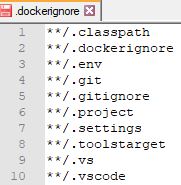
Content of the .dockerignore file
The Dockerfile is a set of instructions to build and run an image. Visual Studio creates a multi-stage Dockerfile which means that it builds the application but only adds necessary files and images to the container image. The Dockerfile uses the .NET Core SDK to build the image but uses the way smaller .NET Core runtime image inside of the container. Let’s take a look at the different stages of the Dockerfile.
Understanding the multi-stage Dockerfile
The first part downloads the .NET Core 3.1 runtime image from Docker Hub and gives it the name base which will be used later on. Then it sets the working directory to /app which will also be later used. Lastly, the ports 80 and 443 are exposed which tells Docker to listen to these two ports when the container is running.
The next section downloads the .NET Core 3.1 SDK from Docker Hub and names it build. Then the working directory is set to /src and all project files (except the test projects) of the solution are copied inside the container. Then dotnet restore is executed to restore all NuGet packages and the working directory is changed to the directory of the API project. Note that the path starts with /src, the working directory path I set before I copied the files inside the container. Lastly, dotnet build is executed which builds the project with the Release configuration into the path /app/build.
The build image in the first line of the next section is the SDK image that we downloaded before and named build. We use it to run dotnet publish which publishes the CustomerApi project.
The last section uses the runtime image and sets the working directory to /app. Then the published files from the last step are copied into the working directory. The dot means that it is copied to your current location, therefore /app. The Entrypoint command tells Docker that the container contains a .NET application and that it should run the CustomerApi.dll when the container starts.
For more details on the Dockerfile and .dockerignore file check out the official documentation.
Test the dockerized Application
After adding the Docker support to your application, you should be able to select Docker as a startup option in Visual Studio. When you select Docker for the first time, Visual Studio will run the Dockerfile, therefore build and create the container. This might take a bit because the images for the .NET Core runtime and SDK need to be downloaded. After the first download, they are cached and can be quickly reused.

Select Docker as startup option
Click F5 or on the Docker button and your application should start as you are used to. If you don’t believe me that it is running inside a Docker container, you can check the running containers in PowerShell with the command docker ps.

Check the running containers
The screenshot above shows that the customerapi image was started two minutes ago, that it is running for two minutes, and that it maps the port 32789 to port 80 and 32788 to 433. To stop a running container, you can use docker stop [id]. In my case. this would be docker stop f25727f43d6b. You don’t have to use the full id, like in git. Docker only needs to clearly identify the image you want to stop. So you could use docker stop f25.
Build the Dockerfile without Visual Studio
You don’t need Visual Studio to create a Docker image. This is useful when you want to create the image and then push it to a container registry like Docker Hub. You should always do this in a build pipeline but it’s useful to know how to do it by hand and sometimes you need it to quickly test something.
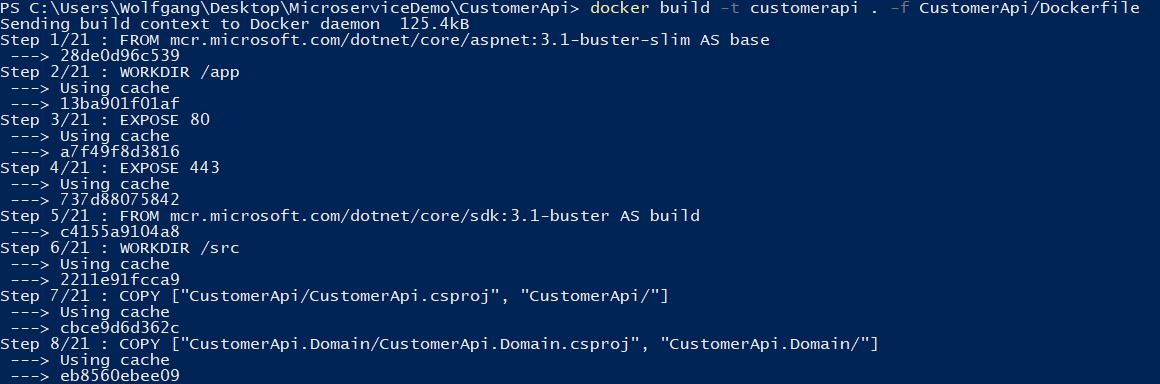
Open Powershell or bash and navigate to the folder containing the CustomerApi.sln file. To build an image, you can use docker build [build context] [location of Dockerfile]. Optionally, you can add a tag by using -t tagname. Use
to build the Dockerfile which is in your current folder with the tag name customerapi. This will download the needed images (or use them from the cache) and start to build your image.
Build the docker image
To confirm that your image was really created, use docker images.

Confirm that the image was created
Start the newly built Image
To start an image use docker run [-p “port outside of the container”:”port inside the container”] name of the image to start. In my example:

Run the previously created image
After the container is started, open localhost:32789 and you should see the Swagger UI of the API. If you use the HTTP port, you will get a connection closed error. HTTPS is currently not working because we have to provide a certificate so kestrel can process HTTPS requests. I will explain in my next post how to add a certificate to the container. For now, I will only use the HTTP port.
Push the Image to Docker Hub
We confirmed that the image is running, and now it is time to share it and therefore upload it to Docker Hub. Docker Hub is the default registry in Docker Desktop. Use “docker login” to login into your Docker Hub account.

Log in into Docker Hub
Next, I have to tag the image I want to upload with the name of my Docker Hub account and the name of the repository I want to use. I do this with docker tag Image DockerhubAccount/repository.
The last step is to push the image to Docker Hub using “docker push tagname”.

Push the image to Docker Hub
To confirm that the image was pushed to Docker Hub, I open my repositories and see the newly create customerapi there.

Confirm that the image was pushed to Docker Hub
Testing the uploaded Image
To confirm that everything worked fine, I will download the image and run it on any machine. The only requirement is that Docker is installed. When you click on the repository, you can see the command to download the image. In my example, this is docker pull wolfgangofner/customerapi. I will use docker run because this runs the image and if it is not available, automatically pull it too.
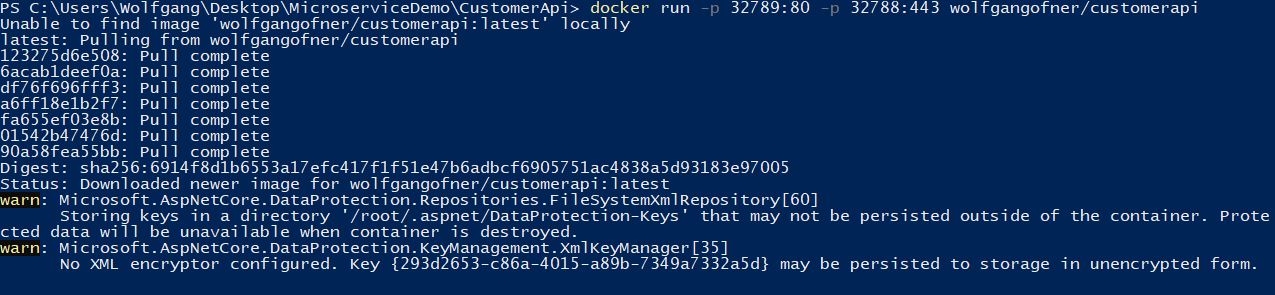
Run the previously uploaded image
Open localhost:32789 and the Swagger UI will appear.
For practice purposes, dockerize the OrderApi. The steps are identical to the steps for the CustomerApi.
Conclusion
Today, I showed how to dockerize the microservices to create immutable Docker images which I can easily share using Docker Hub and run everywhere the same way. Currently, only the HTTP port of the application works because we haven’t provided an SSL certificate to process HTTPS requests. In my next post, I will create a development certificate and start the image with it.
You can find the code of the finished demo on GitHub.
This post is part of “Microservice Series - From Zero to Hero”.
Comments powered by Disqus.