

Swagger is an open-source toolset that can be easily integrated into your solution and helps you to document and test your APIs. It is so simple that even non-technical people can use it.
In my last post, I created two microservices and today I will explain how to integrate Swagger.
This post is part of “Microservice Series - From Zero to Hero”.
What is Swagger?
Swagger is an open-source toolset from Smartbear and is based on the OpenAPI specificiation. For .NET Core, you can install Swagger easily as a NuGet package and configure it in the Startup class of your solution. In simple words, Swagger wraps the XML comments of your API in a nice-looking functional GUI which shows you the available actions and models and also lets you send requests to the actions. You can even attach authentication objects like JWT.
Install Swagger
You can find the code of the finished demo on GitHub.
To implement Swagger, I installed the Swashbuckle.AspNetCore NuGet package in the API project. Next, I added the path to the XML file which contains all the XML comments of the actions and models in the ConfigureServices method in the Startup class.
The next step is to tell ASP .NET Core to use Swagger and its UI. You can add both in the Configure method of the Startup class. Additionally, I configured Swagger to load the UI when starting your solution.
That’s all you have to configure in Swagger. Now I only have to make two adjustments to the starting project. First, I tell the project to create the XML file by opening the properties of the project. Go to the Build tab and check “XML documentation file”. It is important that you use All Configurations as Configuration in the dropdown on top.
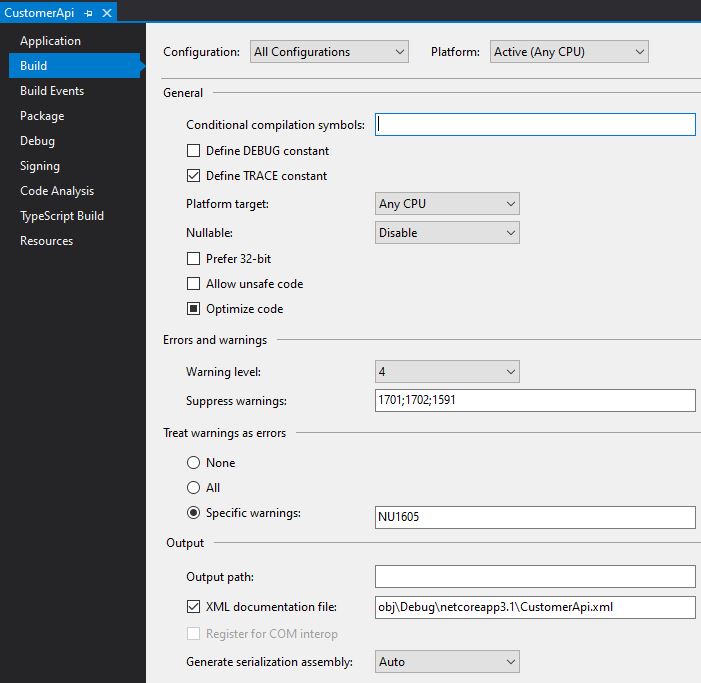
Create the XML documentation file
After you configured your project to create the XML documentation file, you will get warnings that an XML comment is missing on top of your actions. I find these warnings pretty annoying, so I suppress them by adding 1591 in the text box for “Suppress warnings” in the Build tab (see screenshot above).
The last step is to remove the launch URL from the launchSettings.json file. You can just remove the line, otherwise, the Swagger UI won’t be loaded when the application is started and you have to call its URL manually.
That’s all you have to do to set up Swagger. Before I test it, I will add some XML comments to the actions, attributes to my model, and some more configurations.
Adding XML comments to API Actions
The XML comment on an action describes what the action does, what the parameters are, what it returns and what return codes it can produce. Usually, I have the opinion that the name of the method and parameter should describe themselves but in this case, we need a comment for the Swagger UI. To create an XML comment write three / on top of an action. This will give you the template of the comment.
Additionally, I add the response codes and the ProducesResponseType attribute which will help users of the UI to understand what return codes can be expected from the API.
Adding Attributes to the Model
The Swagger UI for .NET Core also includes the models of your application. The UI shows which models are available, what properties they have including their data type and their attributes, e.g. if the property is required. To use this feature, you only have to add the attribute to the property of your models. Swagger creates everything out of the box by itself.
Personalize the Swagger UI
Swagger is also easily extensible. You can load your own CSS, or change the headline or information displayed on top of the page. For now, I will add my contact information so developers or customers can contact me if they have a problem. To add your contact information use the SwaggerDoc extension and pass an OpenApiInfo object inside the AddSwaggerGen extension in the Startup class.
Testing Swagger
Everything is set up and when you start the application, you should see the Swagger UI.
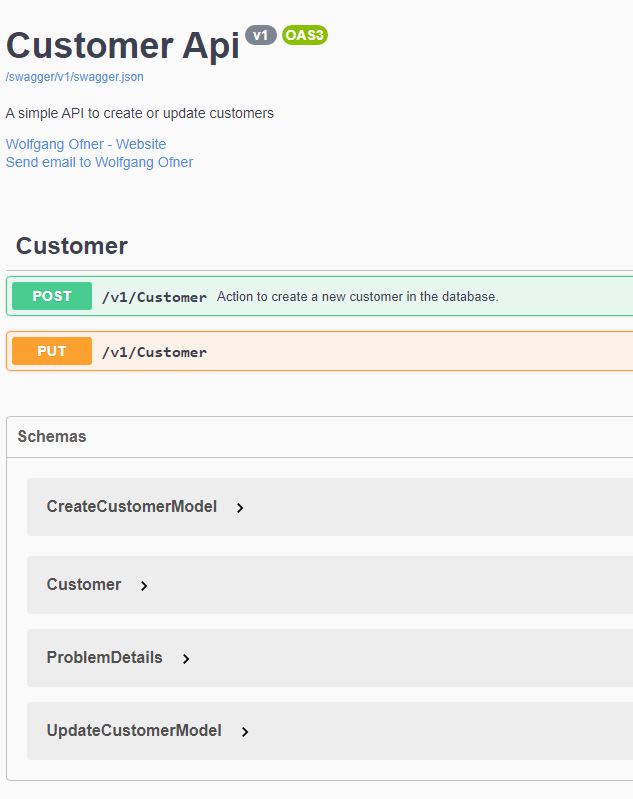
Swagger UI
At top of the page, you can see my headline and my contact information. Then you can see my two actions, even in different colors for the different HTTP verbs they use, and then you can see my models. Next to the post-action, you can see the XML comment I added to describe the method. The put action doesn’t have an XML comment yet, therefore no text is displayed.
When you click on an action, it opens and shows you information about the parameters, and also shows the responses which I added previously in the XML comment.
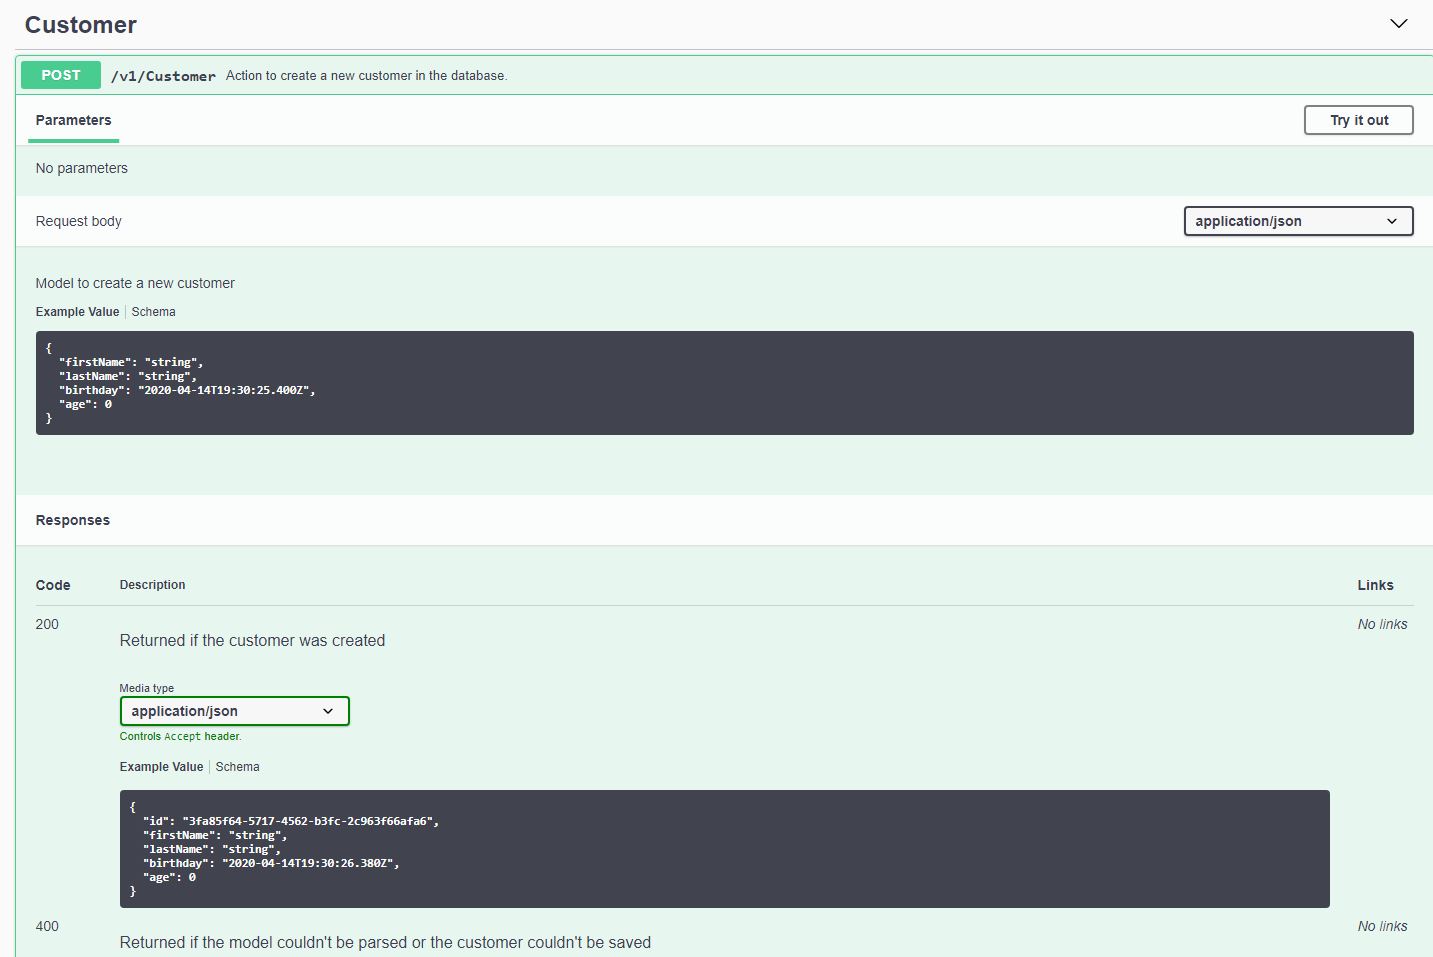
Swagger UI information about an action
When you click on the “Try it out” button in the top right corner, Swagger will already create a request for you with all parameters. You can edit them and then send the request to the server and the UI will show you the reply.
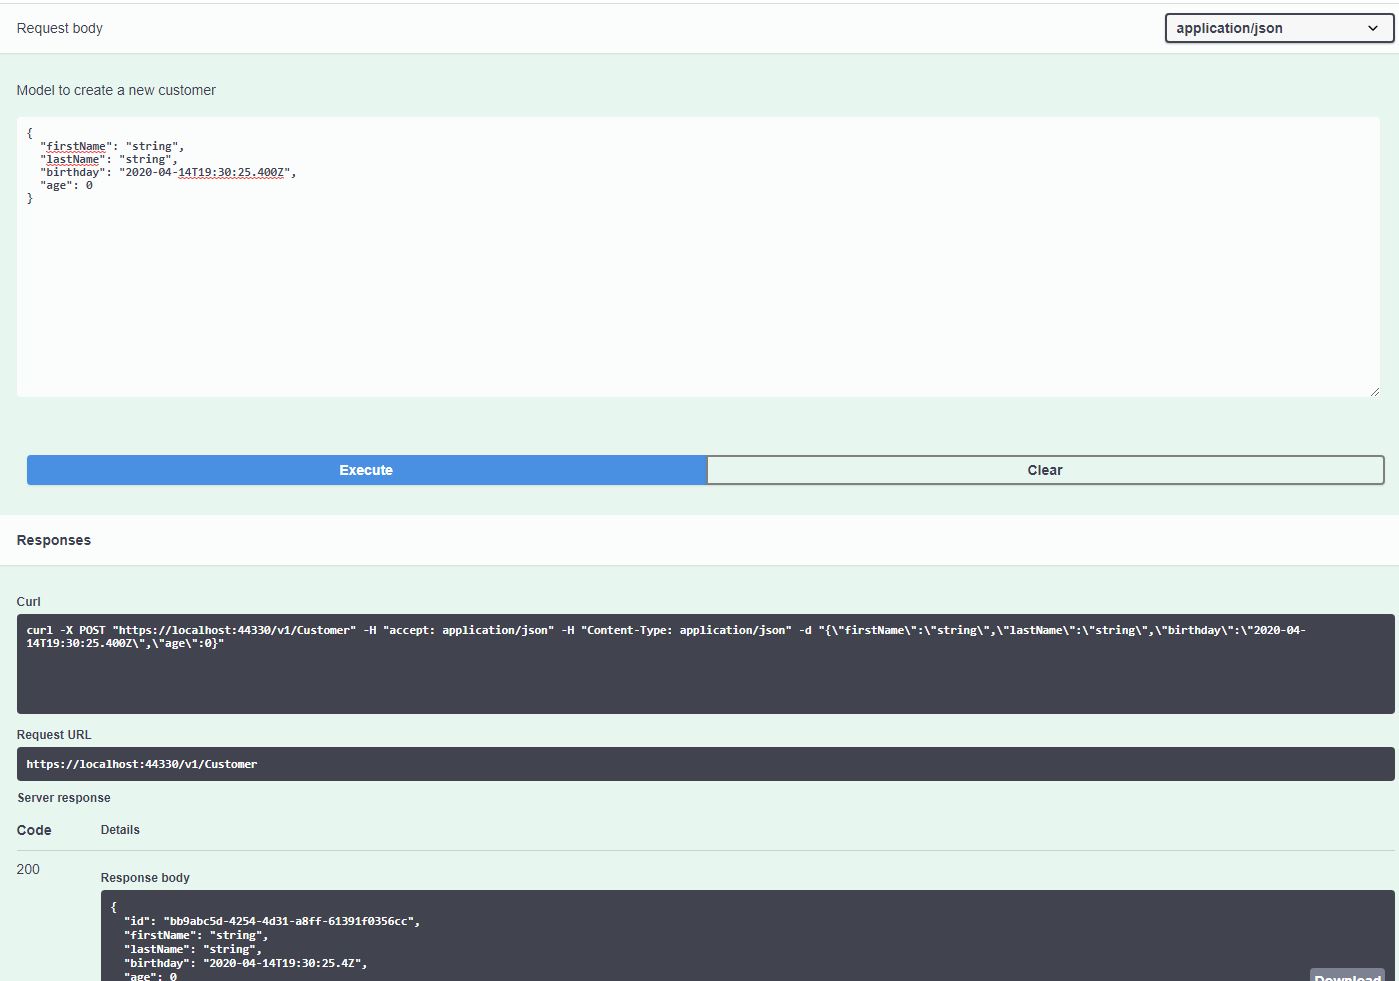
Testing an action of the API
After clicking on “Try it out”, you can define the format of your request on the top right. I leave the default application/json and also leave the created model as it is. When you click on “Execute”, the response and also the sent request, and the request URL will be shown below. In my case, the response is a code 200 and a Customer JSON object. On the bottom right is a button where you can even download the result. This might be useful if you have a test document and want to attach the result to it.
Conclusion
Today, I talked about Swagger, one of my favorite NuGet packages. Swagger can be used to document and test your application and make this information easily accessible even for non-technical people. Swagger is also very easy to set up and can be extended and modified to fit your needs.
In my next post, I will explain the implementation of CQRS and how it can be used to split up your read and write operations.
You can find the code of the finished demo on GitHub.
This post is part of “Microservice Series - From Zero to Hero”.
Comments powered by Disqus.