

Azure API Management is a turnkey solution for publishing, managing, securing, and analyzing APIs to both external and internal customers in minutes. You can create an API gateway for backend services hosted anywhere. Many modern APIs protect themselves by rate-limiting consumers, meaning, limiting how many requests can be made in a certain amount of time. Traditionally, there is a lot of work that goes into that process. When you use API Management to manage your API, you can easily secure it and protect it from abuse and overuse with an API key, JWT validation, IP filtering, and through quotas and rate limits.
If you have several APIs as part of your solution, and they are hosted across several services or platforms, you can group them all behind a single static IP and domain, simplifying communication, protection, and reducing maintenance of consumer software due to API locations changing. You also can scale API Management on demand in one or more geographical locations. Its built-in response caching also help with improving latency and scaling.
Hosting your APIs on the API Management platform also makes it easier for developers to use your APIs, by offering self-service API key management, and an auto-generate API catalog through the developer portal. APIs are also documented and come with code examples, reducing developer on-boarding time using your APIs.
The components of API Management
API Management is made up of the following components:
- The API gateway is the endpoint that:
- Accepts API calls and routes them to your backends.
- Verifies API keys, JWT tokens, certificates, and other credentials.
- Enforces usage quotas and rate limits.
- Caches backend responses where set up.
- Logs call metadata for analytics.
- The publisher portal is the administrative interface where you set up your API program. Use it to:
- Define or import API schemas.
- Package APIs into products.
- Get insights from analytics.
- Manage users.
- The developer portal serves as the main web presence for developers, where they can:
- Read the API documentation.
- Try out an API via the interactive console.
- Create an account and subscribe to get API keys.
- Access analytics on their own usage.
Create managed APIs
Before you can create APIs, you must first create a service instance.
Create an API Management service
To create an API Management service, follow these steps:
- In the Azure portal click on +Create a resource, search for API Management and click Create.
- Provide a name, subscription, resource group, location, organization name, and administrator email.
- Click Create.
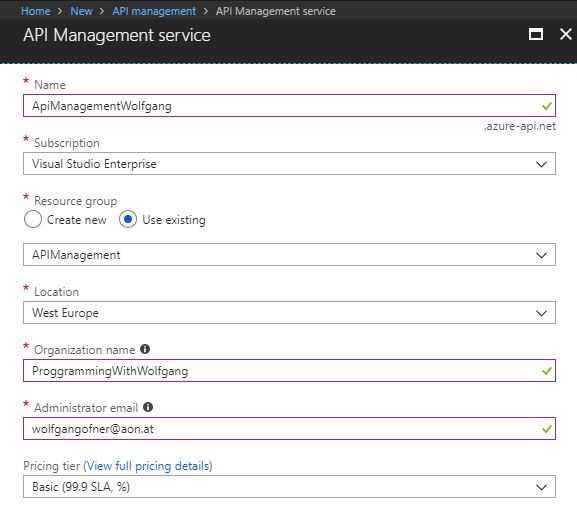
Create an API Management service in the Azure Portal
Add a product
A product contains one or more APIs, as well as constraints such as a usage quota and terms of use. You can create several products to group APIs with their own usage rules. Developers can subscribe to a product once it is published, and then begin using its APIs.
To add and publish a new product, follow these steps:
- On the API Management service, select the Products blade under the API Management menu.
- On the Products blade, click +Add.
- Provide a name and description. The remaining fields are settings for the level of protection and can stay as they are.
- Change the state to published.
- Click on Select API and select Echo API.
- Click Create.
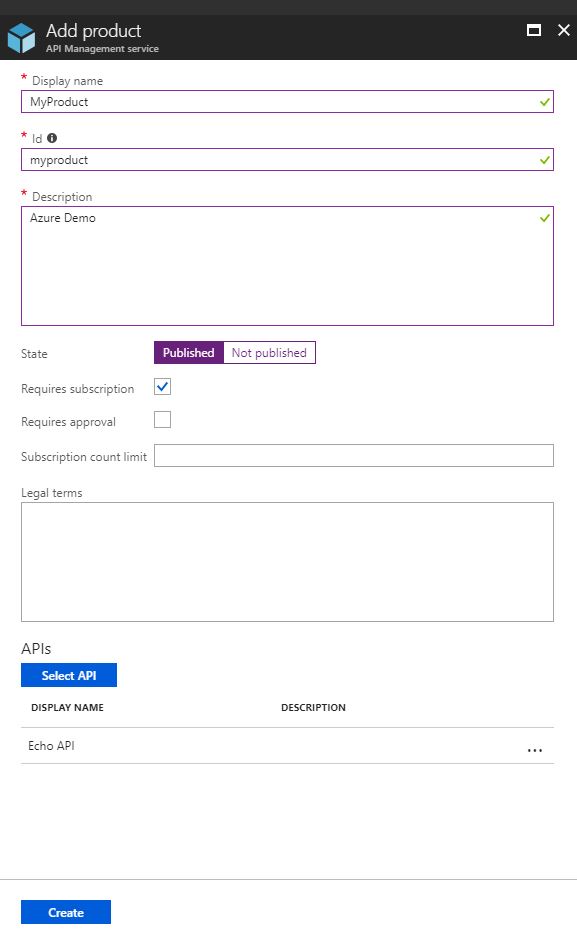
Add a product to you API Management instance
Create a new API
To create a new API, follow these steps:
- On the API Management service, select the APIs blade under the API Management menu.
- On the APIs blade, select Blank API (or choose one of the existing templates).
- Provide a display name, name, the Web Service URL, which is the HTTP endpoint of your API and an API URL affix.
- Select HTTP, HTTPS or both as an URL schema.
- Add the previously added product in the Products drop-down.
- Click Create.
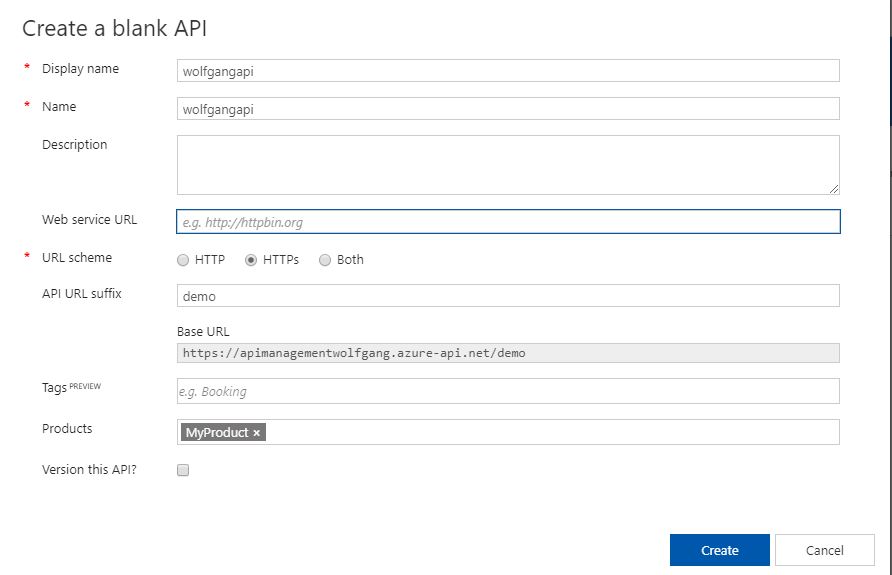
Create a new API
Add an operation to your API
Before you can use your new API, you must add one or more operations. Their operations do things like enable service documentation, the interactive API console, or set operation limits.
To add an operation, follow these steps:
- On your previously created API, click on +Add operation.
- Provide a name, URL and HTTP verb.
- Optionally, you can create parameters.
- Click Create.
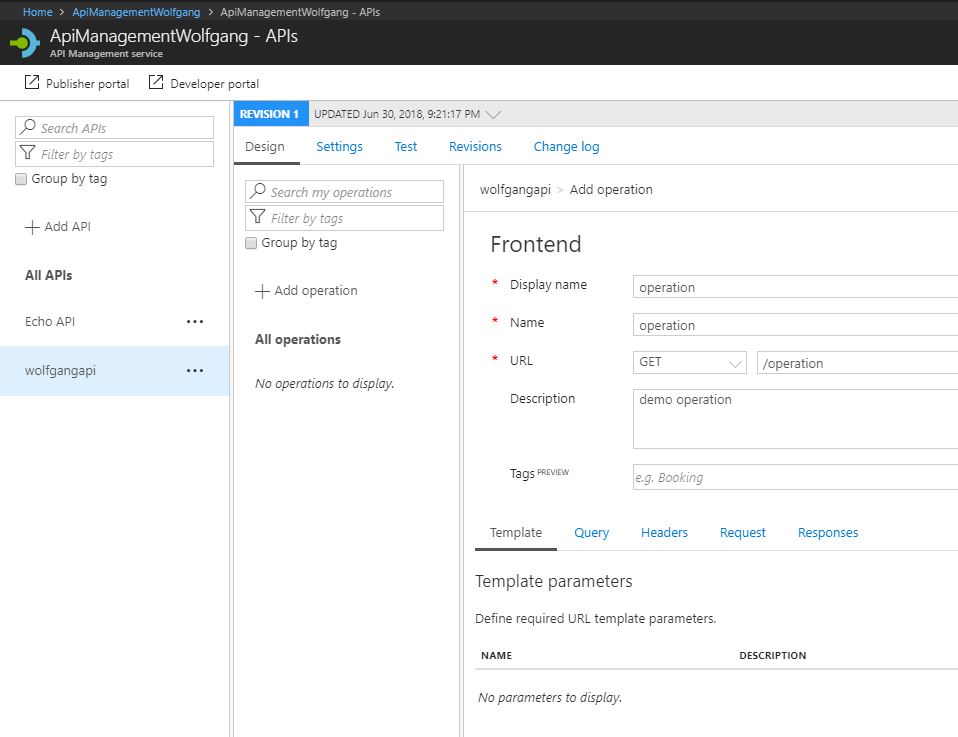
Add an operation to your API
Configure API Management policies
API Management policies allow you as the publisher, to determine the behavior of your APIs through configuration, requiring no code changes. There are many built-in policies, like allowing cross-domain calls, authenticate requests or setting rate limits. The policies statements you choose affect both inbound requests and outbound responses. Policies can be applied globally, or scoped to the Product, API, or Operation level.
To configure a policy, follow these steps:
- In the API Management service, select the APIs blade and click on All APIs.
- Click on +Add on the Inbound processing tab.
- Click Code View on the top right corner.
- Add your desired policy, for example, to enable CORS from all domains.
- After you are done, click Save

Add a policy for CORS
To see all available policies, go to the Azure documentation.
Protect APIs with rate limits
Protecting your published APIs by throttling incoming requests is one of the most attractive offerings of API Management. Limiting incoming requests helps you controlling your resource costs, preventing you from unnecessarily scaling up your services to meet unexpected demand. Rate limiting, or throttling, is common practice when providing APIs. Oftentimes, API publishers offer varying levels of access to their APIs. For instance, you may choose to offer a free tier with very restrictive rate limits, and various paid tiers offering higher request rates. This is where API Management’s product comes into play.
Create a product to scope rate limits to a group of APIs
To create a rate limited API, follow these steps:
- On the API Management service, select the Products blade under the API Management menu.
- On the Products blade, click +Add.
- Provide a name and description.
- Add your previously created API.
- Click Create.
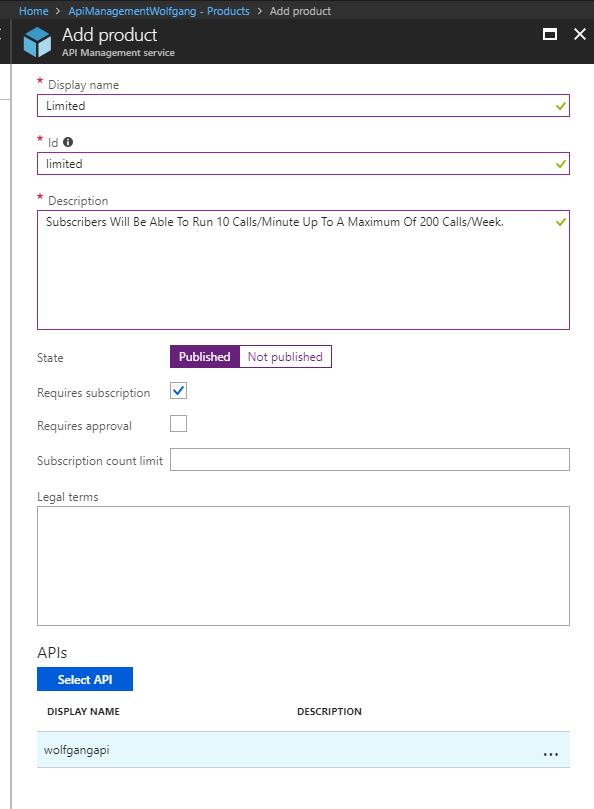
Create a new Product to limit the requests
- After the new product is published, open it and select Policies.
- Add the following code to the inbound rule:<rate-limitcalls=”10″renewal-period=”60″></rate-limit><quotacalls=”200″renewal-period=”604800″></quota>
- Click Save
Advanced rate limiting
If you want to avoid high-usage consumers limit access to occasional users, by using up the pool of available resources, consider using the rate-limit-by-key and quota-by-key policies. These are more flexible rate limiting policies that allow defining an expression to track traffic usage by user-level information such as IP address or user identity.
The following code limits the rate by the users IP address:
<rate-limit-by-key calls=”10″
renewal-period=”60″
counter-key=”@(context.Request.IpAddress)” />
Add caching to improve performance
Caching is a great way to limit your resource consumption, like bandwidth, as well as reduce latency for infrequently changing data.
To add caching to your API, follow these steps:
- In the API Management service, click the APIs blade and select the Echo API.
- Click on the Operations blade and select Retrieve resource (cached).
- Switch to the Caching tab.
- Here you can configure caching and also copy the code from the code view to use it in your own API.
Monitor APIs
API Management provides a few methods by which you can monitor resource usage, service health, activities, and analytics. If you want real-time monitoring, as well as richer debugging, you can enable diagnostics on your logic app and send events to OMS with Log Analytics, or to other services, such as Azure Storage, and Event Hubs. Select the Diagnostics logs under the Monitoring menu from your API Management service, and then select Turn on diagnostics to archive your gateway logs and metrics to a storage account, stream to an Event Hub, or send to Log Analytics on OMS.
Like all Azure resources, you can view several metrics under the Metrics blade or create alerts under the Alerts blade.
Conclusion
In this post, I introduced Azure API Management. I showed how to create an API Management service, and add APIs, products and operations to it and how to enable and configure policies on different scopes. Additionally to the configuration, I mentioned how to monitor APIs and how to enable alerts.
For more information about the 70-532 exam get the Exam Ref book from Microsoft and continue reading my blog posts. I am covering all topics needed to pass the exam. You can find an overview of all posts related to the 70-532 exam here.
Comments powered by Disqus.