

Azure Search is a Platform as a Service offering that gives developers APIs needed to add search functionality to their applications. Primarily this means full-text search. The typical example is how Google and Bing search works. They don’t care what tense you use, it spell checks for you, and finds similar topics based on the search term. It also offers term highlighting and can ignore noise words, as well as many other search-related features. Applying these features inside your application can give your users a rich and comforting search experience.
Create a service index
There are four different types of Azure Search accounts: Free, Basic, Standard, and High-density. The free tier only allows 50 MB of data storage and 10,000 documents. The higher you go with the pricing tier, the more documents you can index and the faster a search returns results. Computer resources for Azure Search are sold through Search Units (SUs). The basic level allows 3 search units whereas the high-density tier offers up to 36 SUs. Additionally, all of the paid pricing tiers offer load-balancing over three or more replicas.
Create an Azure Search service
To create an Azure Search service, follow these steps:
- In the Azure portal click on +Create a resource, search for Azure Search and then click on Create.
- On the New Search Service blade, provide an URL, subscription, resource group, location, and pricing tier.
- Click Create.
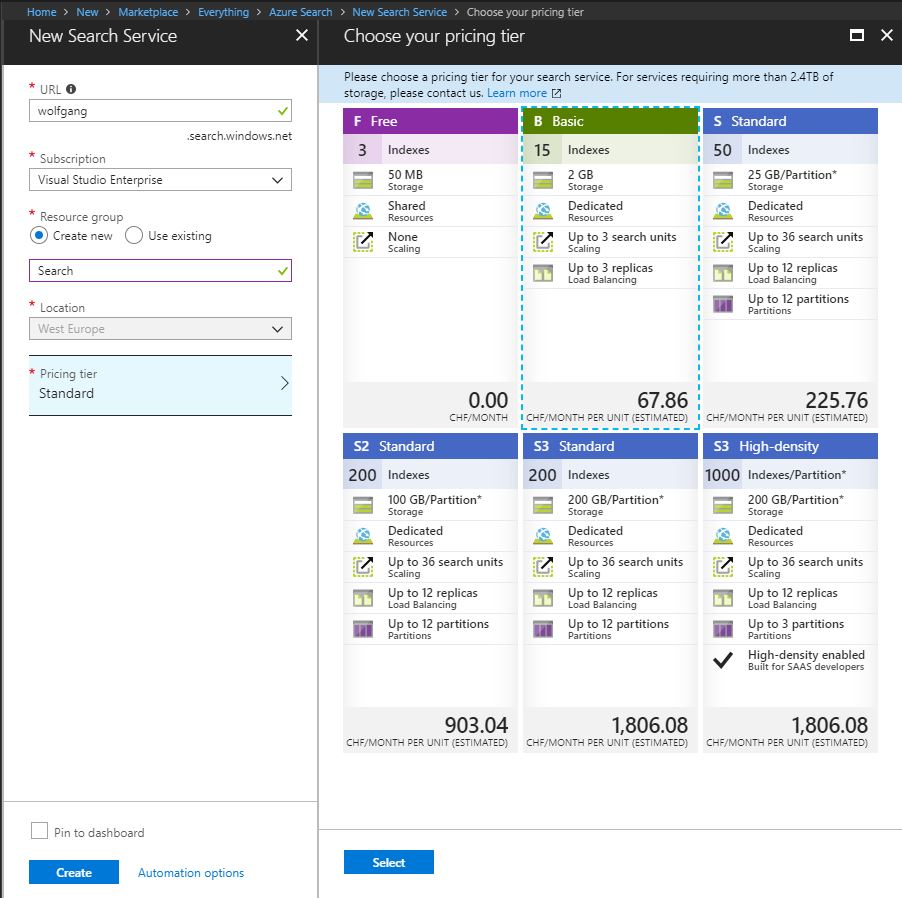
Create a new Azure Search Service
Scale an existing Azure Search Service
You can only scale an Azure Search Service with a paid pricing tier.
- In your Azure Search Service, click on Scale under the Settings menu.
- On the Scale blade, select your desired partitions and replicas.
- Click Save.
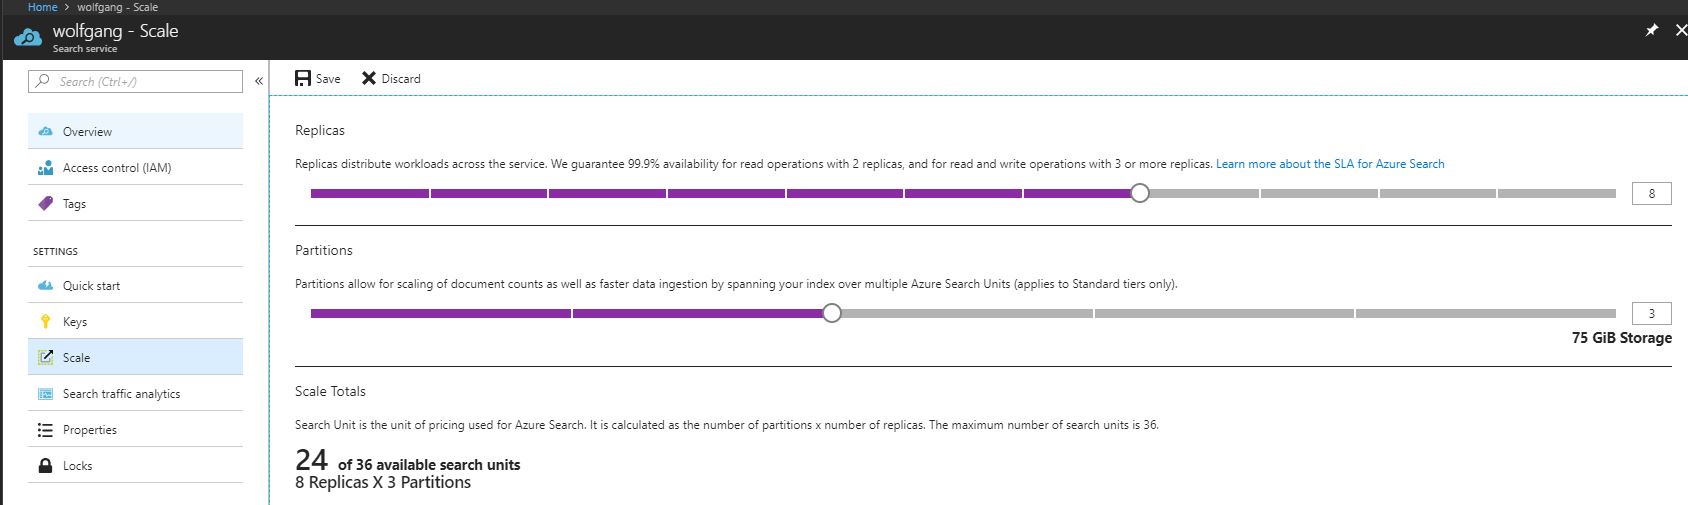
Scale your Azure Search Service
Replicas distribute workloads across multiple nodes. Partitions allow for scaling the document count as well as faster data ingestion by spanning your index over multiple Azure Search Units.
Implement Azure Search using C#
To add data to Azure Search, create an index. An index contains documents used by Azure Search. For instance, a car dealer might have a document describing each car they sell. An index is similar to a SQL Server table and documents are similar to rows in those tables.
You can find the code for the following demo on GitHub. To add data to an index and search it using C#, follow these steps:
- Create a new C# console application with Visual Studio 2017.
- Install the Microsoft.Azure.Search NuGet package.
- Set up the connection to your Azure Search Service. Note that the serviceName is only the name you entered. Not a URI.

Set up the connection to the Azure Search Service account
- Add the System.ComponentModel.DataAnnotations reference to your project.
- Create a POCO for the cars you want to be searchable:
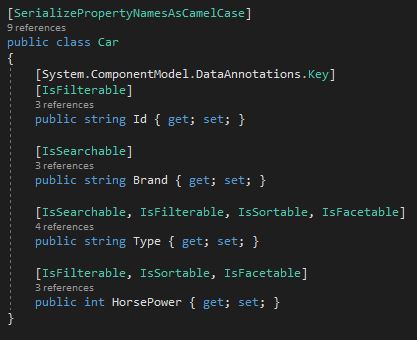
The car class for the search
- The next step is to create an index. The following code will create an index object with field objects that define the correct schema based on the car POCO. The FieldBuilder class iterates over the properties of the Car POCO using reflections.
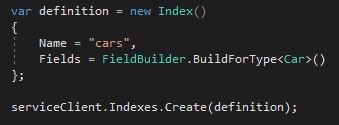
Create an index object for the search
- Next, I create a batch of cars to upload:
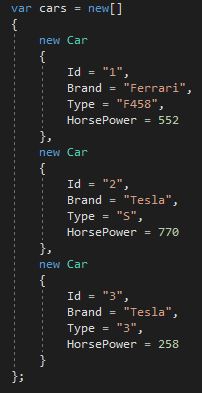
Create a car array
- This array of cars are the documents which will be searched. Create a batch object and upload it.

Upload the car array
- When I started with the Azure Search, I had problems finding results, although I uploaded my documents. Then I figured out that it is not working when you add the index and documents and search through it right away. You have to wait for a second to make it work. Therefore I added Thread.Sleep(1000).
Search for a brand
- That’s all you have to do to set up the search. The next step is to search something. To do that, create a SearchParameters object containing all properties, which the search should return. Then execute the search with the string you are looking for and your SearchParameters object.
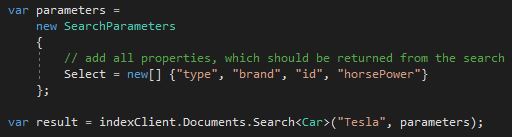
Execute the search
- The search should return two objects. You can iterate through the results and, for example, print the type of the car.

Iterate through the search result
Conclusion
This post provided an overview of the Azure Search Service and how it can be implemented using C#.
You can find the code of the demo on GitHub.
For more information about the 70-532 exam get the Exam Ref book from Microsoft and continue reading my blog posts. I am covering all topics needed to pass the exam. You can find an overview of all posts related to the 70-532 exam here.
Comments powered by Disqus.