

RabbitMQ is a great tool to connect microservices asynchronously but it also comes with a couple of downsides. The biggest downside is that you have to take care of running, monitoring, and updating it. Running a RabbitMQ Docker image in Kubernetes is quite easy but still requires some management. One of the best features of cloud provides are the platform as a service (PaaS) offerings. This means that the cloud provider, for example, Azure runs the platform for you and you don’t have to take care of updating or patching the software.
In this post, I will add a new class to my microservice so I can switch between RabbitMQ and Azure Service Bus.
This post is part of “Microservice Series - From Zero to Hero”.
What is Azure Service Bus
Azure Service Bus is an enterprise messaging PaaS solution with many useful features. Some of these features are:
- Queues
- Topics (one sender, multiple subscribers)
- Transaction
- Duplication filter
- Dead message queues
- Geo-disaster recovery
Since it is a PaaS offering, Azure is managing the infrastructure which means that you as a developer can focus on implementing it and don’t have to think about maintaining, upgrading, or monitoring it. For this demo, I am using the Basic tier which has very limited features but only costs 0.043€ per million operations. In your production environment, you most likely will use the Standard tier.
Difference between Azure Service Bus Queue and Azure Queue
Both queue solutions are very similar but Azure Service Bus comes with a First-In-First-Out guarantee. Additionally, it has more enterprise features in the Standard and Premium tier. For a more detailed comparison between Azure Service Bus and Azure Queue, see the documentation.
Create a new Azure Service Bus Queue
First, you have to create an Azure Service Bus Namespace. In the Azure Portal, search for Service Bus and click on Create.
Create a new Service Bus Namespace
Select your subscription, resource group, location, and pricing tier, and then provide a unique name. Click on Create and the Service Bus Namespace gets created.
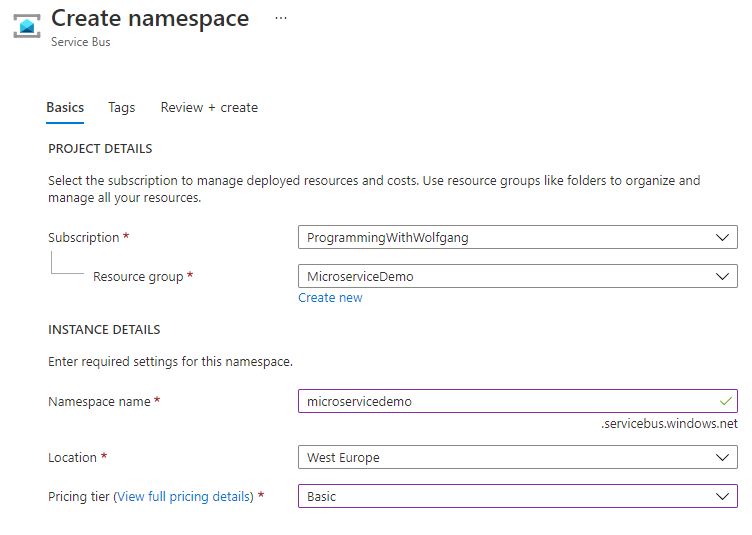
Configure the new Azure Service Bus Namespace
After the deployment, click on Queues and then add a new queue.
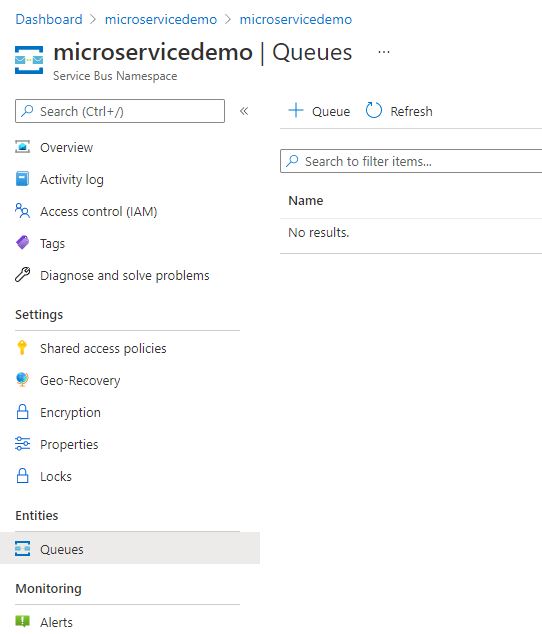
Create a new Queue
Give the queue a name and leave all settings as they are.

Configure the new Queue
Configure the Access to the Queue using Shared Access Policies (SAS)
After the queue is created, click on it and then select the Shared access policies tab. There click on Add, select the Send checkbox and click on Save.

Create a SAS for the Queue
We will use this SAS to allow the microservice to send messages to the queue. You can also give the manage permission if you want to allow your microservice to create queues but I prefer as few permissions as possible. Additionally, I will show in a future post how to create the infrastructure using an Azure DevOps CI/CD pipeline.
Send Messages to the Azure Service Bus Queue from a Microservice
You can find the code of the demo on GitHub.
The Azure Service Bus Queue is created and configured and now we can configure the microservice to send messages to the new queue. First, we add the following settings to the appsettings.json file:
These settings contain the Azure Service Bus queue name, the connection string, and also a switch to use RabbitMQ or Azure Service Bus Queue. I used the in-memory switch already in a previous post, Use a Database with a Microservice running in Kubernetes. The queue switch will work the same way and either register the RabbitMQ service or the Azure Service Bus Queue service. In the appsettings.Development.json file, add the UserabbitMq attribute and set it to true.
Next, create a new class that will contain the Azure Service Bus options:
In the ConfigureServices method of the Startup.cs class, read the AzureServiceBus section into the previously created AzureServiceBusConfiguration class:
Additionally, read the UserabbitMq variable and either register the already existing RabbitMQ service or the Azure Service Bus service:
That is all the configuration needed. Lastly, go to the CustomerApi.Messaging.Send project and install the Azure.Messaging.ServiceBus NuGet package and then create a new class called CustomerUpdateSenderServiceBus. This class inherits from the ICustomerUpdateSender interface and takes a customer and sends it to the Azure Service Bus Queue. The full class looks as follows:
This code is very simple but will throw an exception if the queue does not exist.
Test the Azure Service Bus integration in the Microservice
Start the microservice and update a Customer using the Swagger UI.
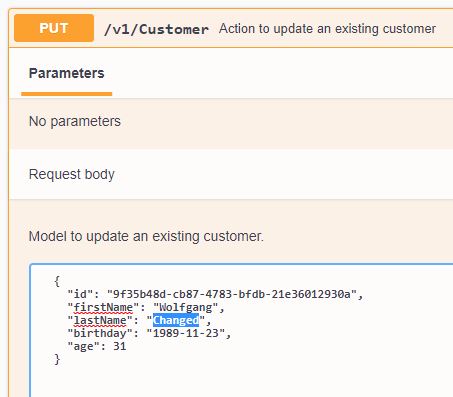
Update an existing customer
After updating the customer, open the Service Bus Queue in the Azure Portal and select the Service Bus Explorer tab. There, you should see one message in the queue.
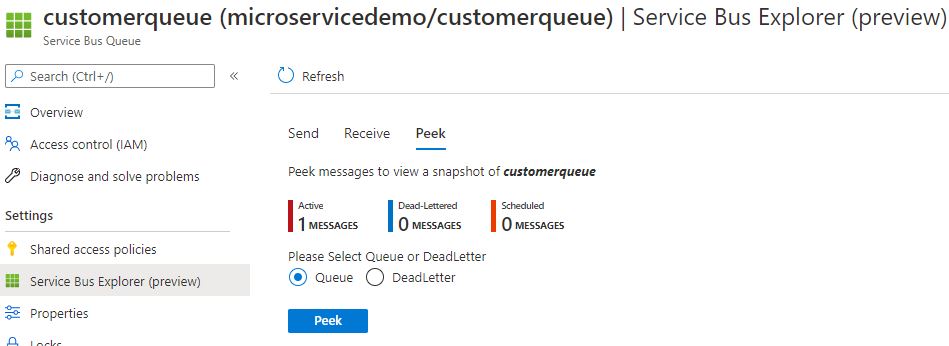
One message got sent to the Queue
Select the Peek option (look at the first message without deleting it) and you should see your previously edited customer.
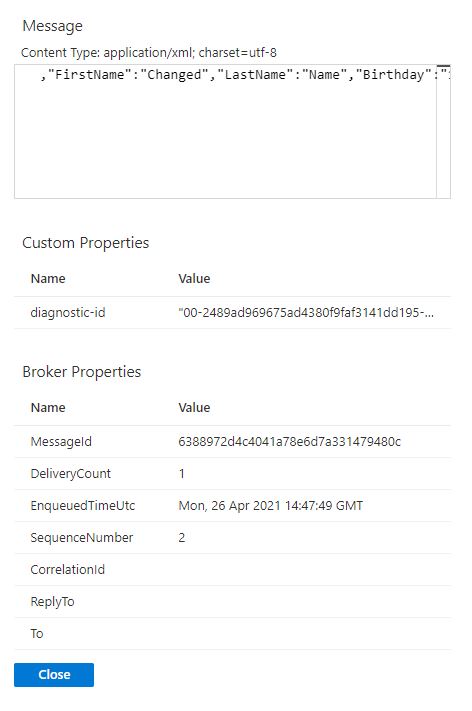
The updated customer got sent to the Queue
Deploy the Microservice to Kubernetes and use the Azure Service Bus
To use the Azure Service Bus Queue in Kubernetes, you have to tell your microservice the connection string. This works the same way as providing a database connection string which I described in Use a Database with a Microservice running in Kubernetes.
First, click on Variables and add a new variable inside your Azure DevOps pipeline. Name the variable AzureServiceBusConnectionString and past the connection string from the previously created SAS as the value.
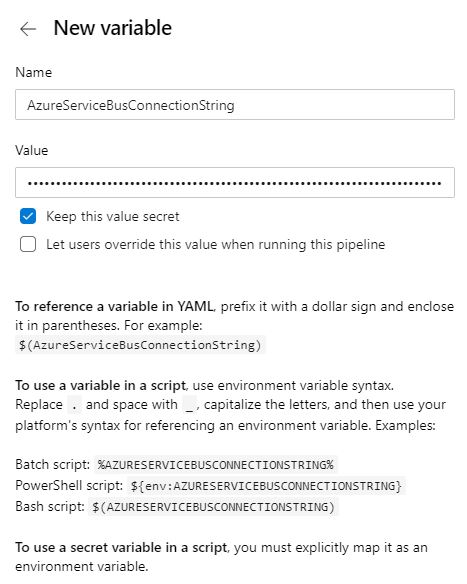
Add the Service Bus Queue Connection String
After adding the variable, add the following code to the values.yaml file.
This code creates a secret in Kubernetes with the value of the previously created variable. This secret will overwrite the appsettings of the microservice and therefore allow it to access the Azure Service Bus Queue and no sensitive information was exposed in the pipeline.
This code is using Helm to create the secret and Tokenizer to replace __AzureServiceBusConnectionString__ with the value of the variable AzureServiceBusConnectionString. For more information on these topics see Deploy to Kubernetes using Helm Charts, Override Appsettings in Kubernetes and Replace Helm Chart Variables in your CI/CD Pipeline with Tokenizer
Conclusion
Cloud providers, especially Azure, offer a wide range of services. This allows developers to use different PaaS solutions which help them to focus on their implementation, rather than running and maintaining the infrastructure. Azure Service Bus is an enterprise queueing solution and can replace RabbitMQ if you want to take advantage of the PaaS offering instead of running RabbitMQ yourself. I added a switch to the microservice, so you can easily switch between RabbitMQ and Azure Service Bus Queue.
In Automatically set Azure Service Bus Queue Connection Strings during the Deployment, I have replaced the variable with some automation to automatically read the connection string. This allows for a more flexible and robust deployment process.
In my next post, I will show you how to replace the background service in the OrderApi with Azure Functions to use a serverless solution to process the messages on the queue.
You can find the code of the demo on GitHub.
This post is part of “Microservice Series - From Zero to Hero”.
Comments powered by Disqus.