

In my last post, I talked about Istio and how it can be installed. I also mentioned some of the features of the service mesh but only in theory.
This post will show you some features of Istio, how to implement them and how they can help you build better applications
This post is part of “Microservice Series - From Zero to Hero”.
Installing Istio
If you haven’t installed Istio or want more information about it, see my post Istio in Kubernetes - Getting Started.
Request Routing
By default, all requests are routed evenly between pods. If you have two different versions of a service running, for example, version 1 and version 2, the request will be routed once to v1 and once to v2. You can observe the request routing using Kiali. For more information about Kiali, see my last post Istio in Kubernetes - Getting Started.
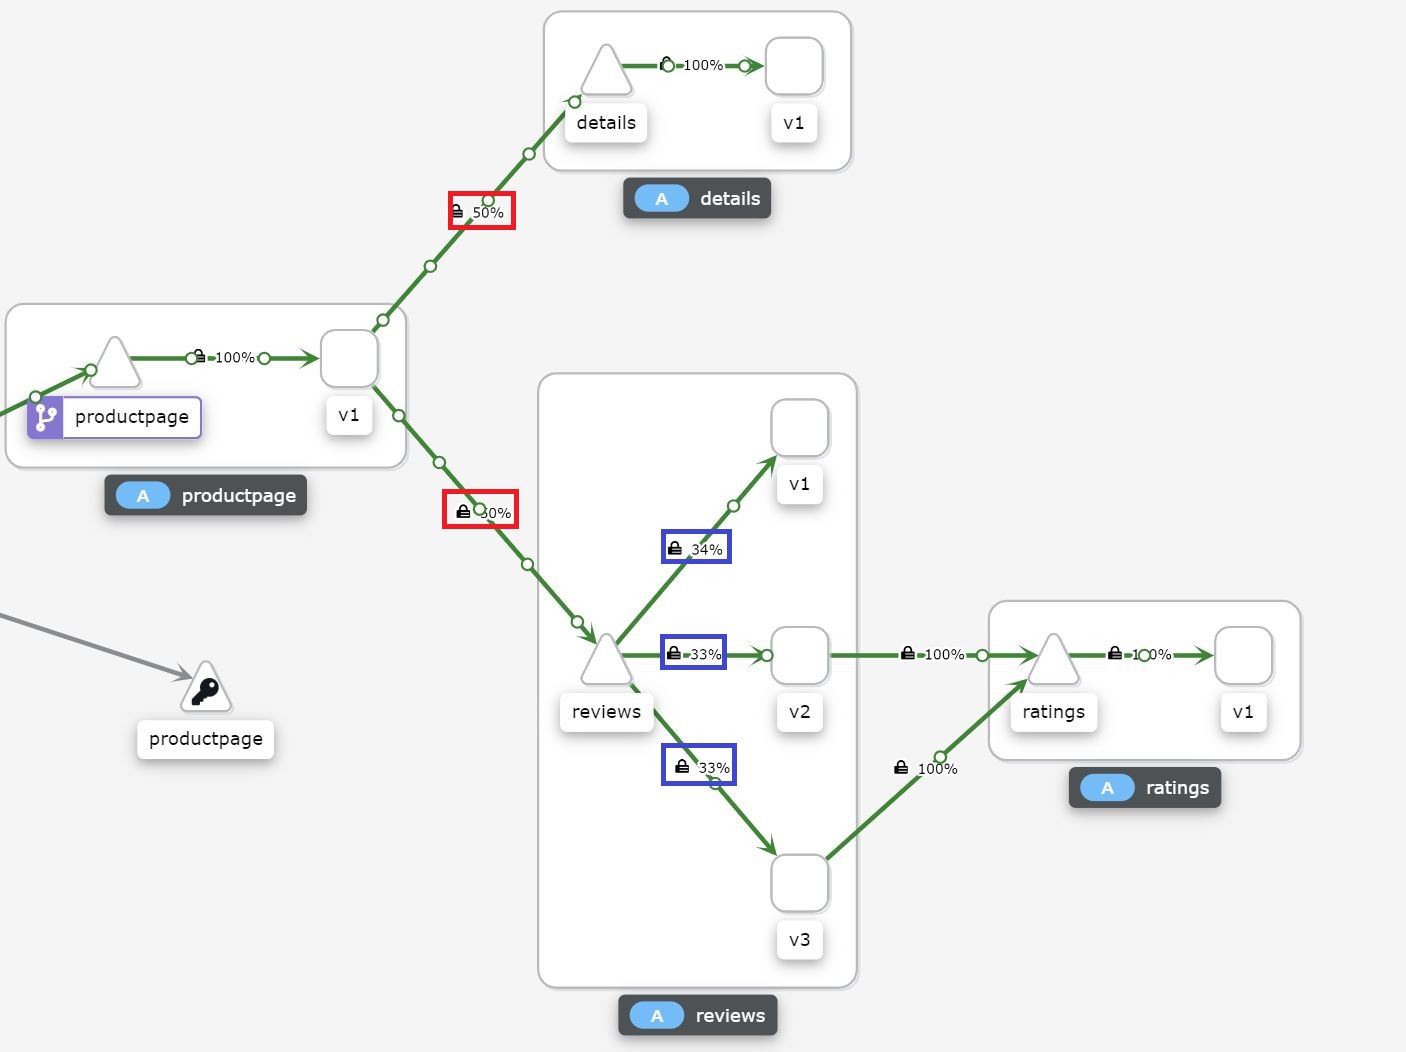
The Traffic is routed evenly
As you can see, the requests are routed evenly between the details and the reviews service (red box) and also routed evenly within the reviews service to v1, v2, and v3 (blue box).
Following DevOps principles, we want to deploy often. To deploy as often as possible, developers have to deploy features that are not fully ready yet or need more testing before all users can access the new feature. This is where request routing comes into play. You can configure Istio to route no requests to a specific service, a small percentage, for example, 1% of all requests, or only route the requests of a specific user to the new service.
Especially routing a small percentage of the requests can be very useful. This is called canary deployment. Often companies only allow employees to use a new feature. After they confirmed that everything is working as expected, a small percentage of actual users get to use the feature. If everything is still ok, the percentage gets increased until it reaches 100%. If an error occurs that was not found during testing, only a small percentage of the users is affected, and not all.
Configure Request Routing
The demo application of Istio is great and you should use it as starting point in your Istio journey. Create virtual services with the following command
Also, make sure that you created the default traffic rules while installing Istio.
Let’s have a look at the defined routes which you just created.
These services route traffic always to v1 of the service. For example, if the user calls the reviews service, the request is always routed to v1 of the reviews service.
Once the routes are created, you can check that everything was applied correctly with the following command
Create a couple of requests using your browser or the following loop “for i in $(seq 1 100); do curl -s -o /dev/null “http://$GATEWAY_URL/productpage”; done” and then go back to the Kiali graph dashboard. There you can see that the requests are only routed to v1 of the reviews service.
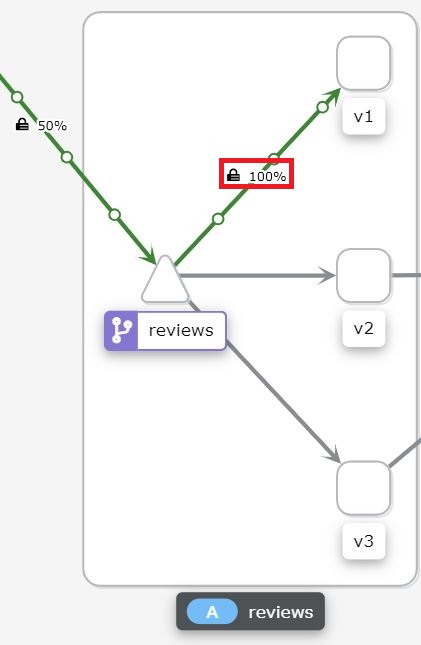
The Traffic is only routed to V1
Routing is also possible based on the user identity. This can be useful if a tester wants to access the new service.
You can delete the created routing rules with the following command:
Fault Injection
Fault injection is another cool feature of Istio which helps you to build more robust applications. Probably every developer has seen applications that work fine in testing but once under production load, problems start to surface. These problems can be hard to analyze or reproduce, especially in a microservice architecture.
Istio’s fault injection allows you to intercept requests and return an HTTP error or delay requests to provoke a timeout.
Inject HTTP 500 Errors
In the following example, I want to test how the application works when the review service is not available. The user should see a good error message and nothing cryptic. Additionally, I want to test this in my production environment and no user should be affected by it. Therefore, I configure the injection of the HTTP 500 error to only affect a user called Jason.
Let’s have a look at the created virtual service.
This virtual service applies the rule when the ratings service is called and the user matches jason. Then it injects a fault with a probability of 100% (always) and returns the HTTP code 500. You could change the 100 to 10 and test how the application behaves with “random” interrupts.
Open the demo application and log in as jason without a password. You will see that the rating service is not available and the user gets a clear error message which does not interrupt the user experience.
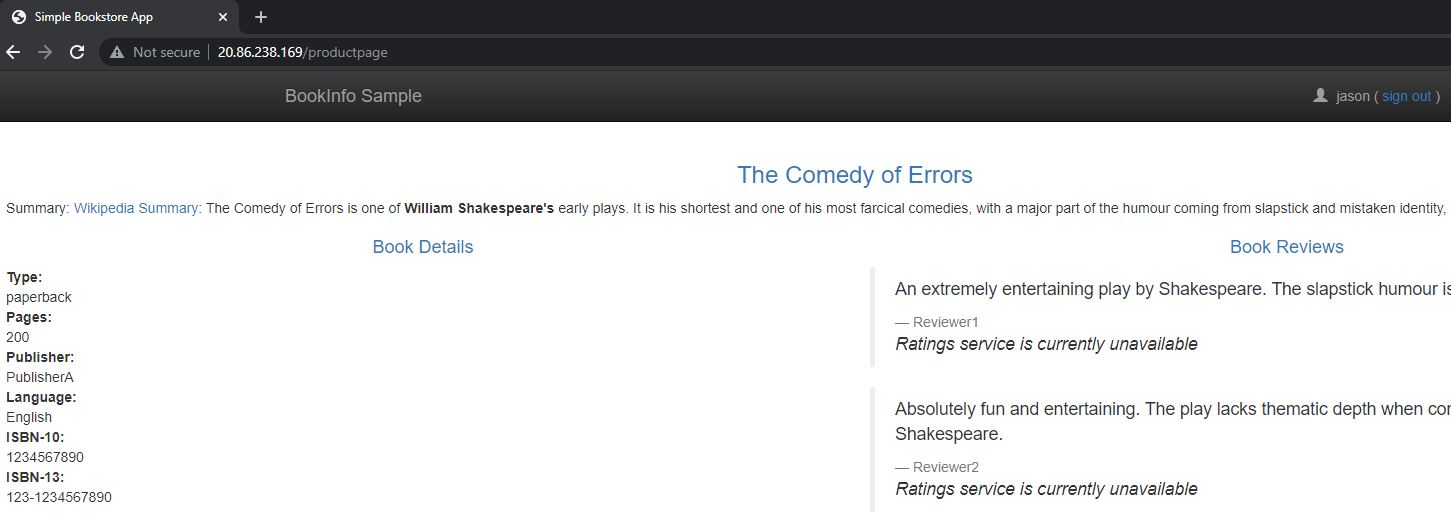
The Rating Service is not available as Jason
Log out and you will see that the rating service works as expected.
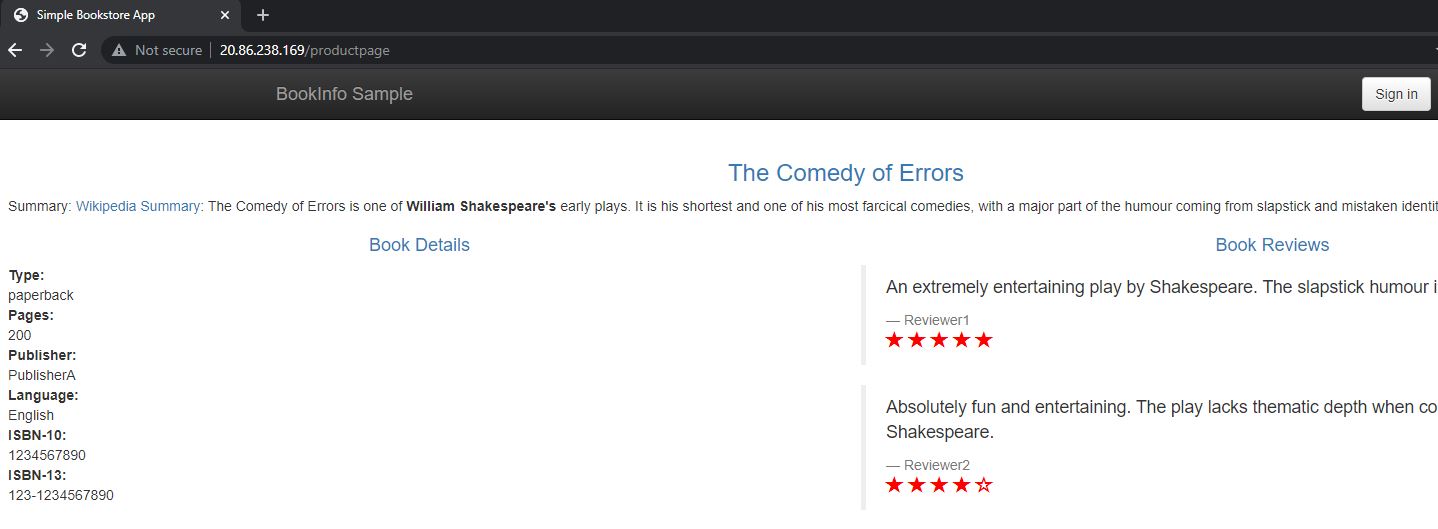
The Rating Service works if the user is not Jason
When you are done with your testing, delete the virtual service with the following command:
Conclusion
Istio brings some cool features like fault injection and request routing which help developers to build more robust and resilient applications which will lead to a better user experience. The sample code provides a great starting point with many examples and will help you to get started.
In my next post, I will show you how easy it is to add Istio to an existing application.
This post is part of “Microservice Series - From Zero to Hero”.
Comments powered by Disqus.