
Azure DevTest Labs is a service designed to help developers and testers quickly spin up virtual machines (VMs) or complete environments in Azure, enabling rapid deployment and testing of applications. This allows you to easily spin up and tear down development and test resources, minimizing waste and providing better cost control. It is also useful to create pre-provisioned environments for demos and training.
Create DevTest Labs
To add a new DevTest Lab, follow these steps:
- In the Azure Portal select All services and search for DevTest Labs.
- Click on DevTest Labs and select + Add.
- Enter a Lab name, Subscription, Location and optionally add a Name and Value for tagging.
- By default, the Auto-shutdown option is enabled. This feature can help you save costs. Click on it, if you want to disable it or if you want to change the time for the shutdown.

Create a DevTest Lab
- Click on Create.
The deployment process creates a new resource group with the following resources in it:
- The DevTest Lab instance
- A Key vault instance
- A Storage account
- A virtual network
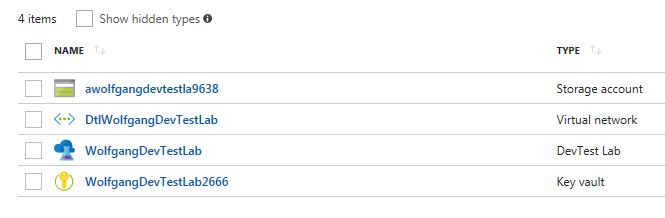
Deployed resources
Add a VM to your lab
After the DevTest Lab is deployed, you can add a VM to it following these steps:
- In your DevTest Lab, click +Add on the overview blade.
- On the Choose a base blade, select your desired image for your VM.
- Selecting an image opens the Virtual machine blade. Provide a machine name, user name, password, the size of your VM and optionally artifacts. Artifacts are third-party tools like Chrome or Git.
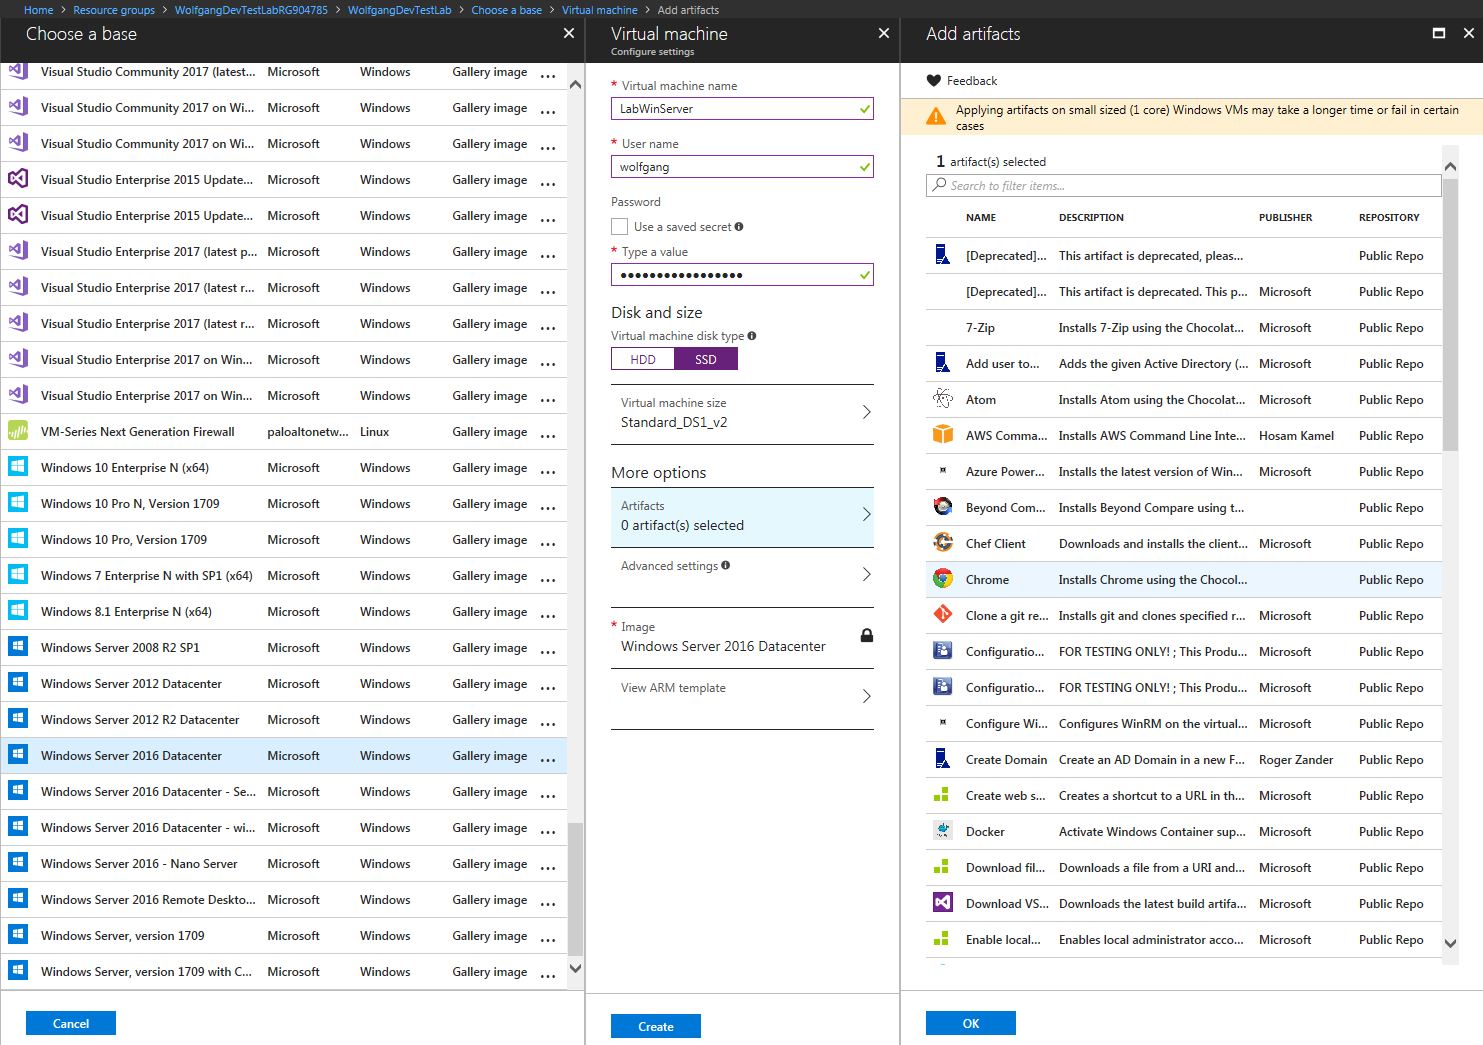
Create a Windows 2016 Server for your DevTest Lab
- Click Create to start the deployment process.
Claim a VM
After the VM is created, the ownership is assigned to the creator but it can be made claimable for others. To unclaim the VM, follow these steps:
- Click on the VM, you want to unclaim in your DevTest Lab.
- On the top of the Overview blade click on unclaim.
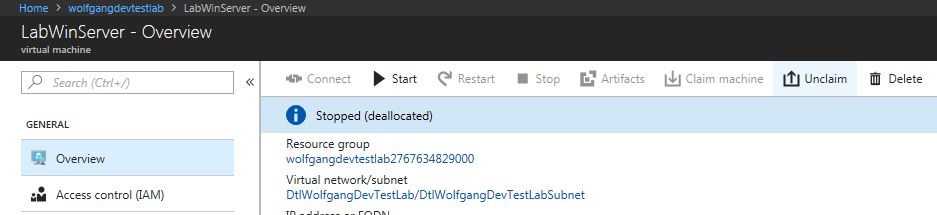
Unclaim a VM
Unclaiming a VM removes it from the My virtual machines area in the DevTest Lab and moves it to the Claimable virtual machines section.
To claim a VM, open it and select Claim machine on the top of the Overview blade.
Create and manage custom images and formulas
The difference between a custom image and a formula is that the custom image is an image based on a VHD, whereas formulas are base on a VHD with additional pre-configurations such VM size, virtual network, and artifacts. These pre-configured settings can be overridden during the deployment process.
Creating custom images
Custom images provide a static, immutable way to create VMs from a configuration.
Pros of using custom images:
- VMs created from the same image are identical
- The provisioning of the VM is fast
Cons of using custom images:
- To update the image, it has to be recreated
You can use the Azure Portal or PowerShell to create an image from an existing VM or create one from a VHD.
Create a custom image from a provisioned VM
To create a custom image from a provisioned VM using the Azure Portal, follow these steps:
- In your DevTest lab, select All virtual machines under the My Lab menu and then click on the VM, you want to use as a base for your image.
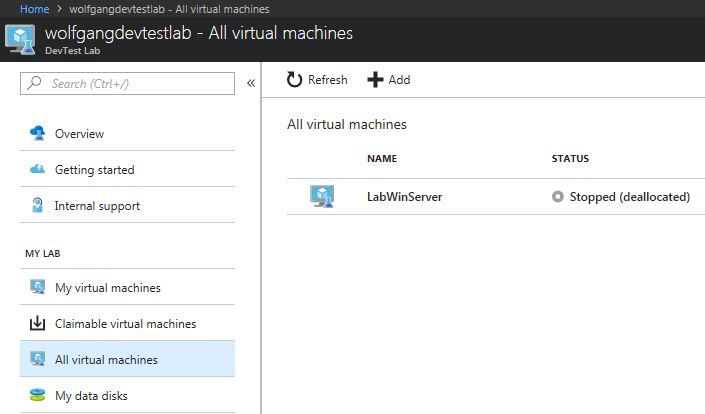
All virtual machines in your DevTest Lab
- After you selected a VM, click on Create custom image under the Operations menu.
- On the Custom image blade, provide a name and select whether sysprep should be run.
- Click OK to create the image.
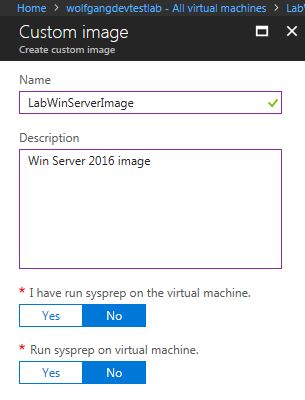
Create a custom image
Create a custom image from a VHD using the Azure Portal
To create a custom image from a VHD using the Azure Portal follow these steps:
- In your DevTest Lab instance, select Configuration and policies under the Settings tab.
- On the Configuration and policies blade, select Custom images under the Virtual Machine Bases menu and click +Add.
- Provide a name, the operating system type and select the VHD. If you don’t have any, you have to upload one first.
- Click OK.
Delete a custom image
To delete a custom image, follow these steps:
- In your DevTest Lab instance, select Configuration and policies under the Settings tab.
- On the Configuration and policies blade, select Custom images under the Virtual Machine Bases menu and click the three dots next to the image which you want to delete.
- Click delete and select Yes in the confirmation dialog.

Delete a custom image
Formulas
Formulas provide default property values and therefore offer a fast way to create VMs from a pre-configured state.
Pros of using formulas:
- Formulas can define default setting that custom images can’t provide.
- The default settings from the formulas can be modified when creating a new VM.
Cons of using custom images:
- Creating a new formula can be more time consuming than creating a VM from a custom image.
There are two ways to create a formula:
- From a base like a custom image or Marketplace image, use a base when you want to define all characteristics of the formula.
- From an existing lab VM. Use this approach when you want to create a formula which is based on an existing VM.
Create a formula from a base
To create a formula from a base, follow these steps:
- In your DevTest Labs instance, select Configuration and policies under the Settings menu.
- On the Configuration and policies blade, select Formulas (reusable bases) under the Virtual Machine Bases menu and click + Add.
- On the Choose a base blade, select an image to use for the formula, for example, Windows Server 2016 Datacenter.
- Provide a Formula name and user name.
- Select the disk type and the size of your VM.
- Optionally add artifacts. Artifacts are third-party tools like Google Chrome or Docker which will be installed on your VM.
- On the Advanced blade, you can configure the IP address and the automatic delete options.
- After you are done with the configuration, click Create to create the formula.
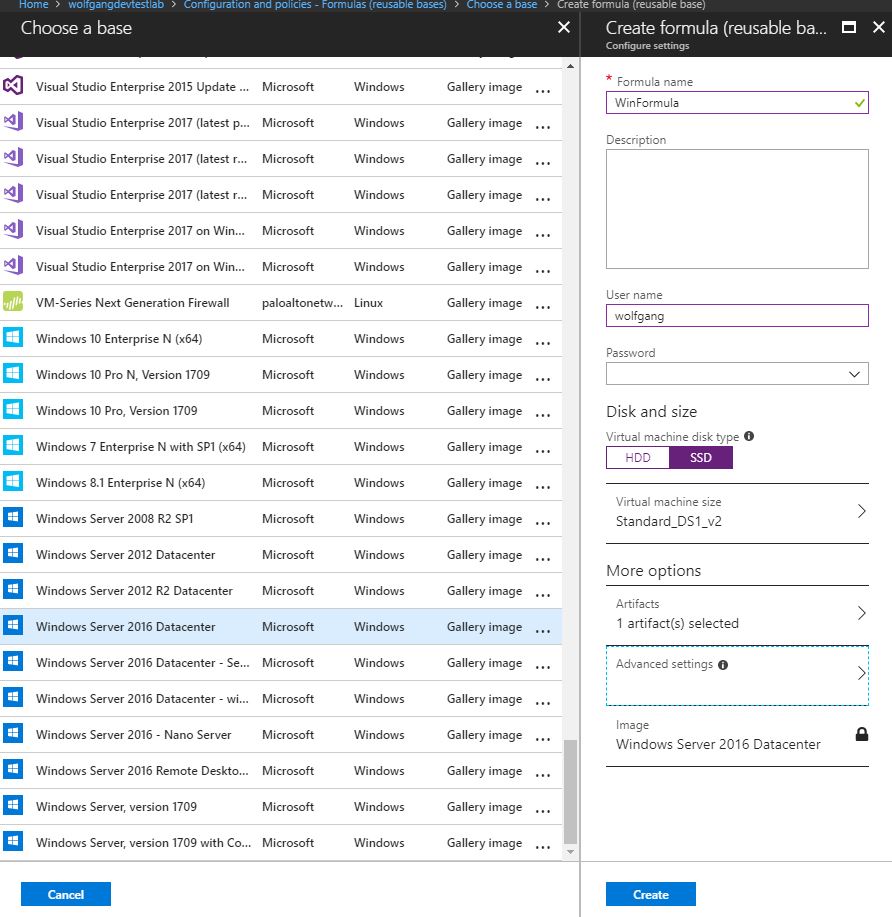
Create a new formula
Create a formula from a VM
To create a formula from a VM, follow these steps:
- In your DevTest Labs instance, on the Overview blade, select the VM from which you want to create the new formula.
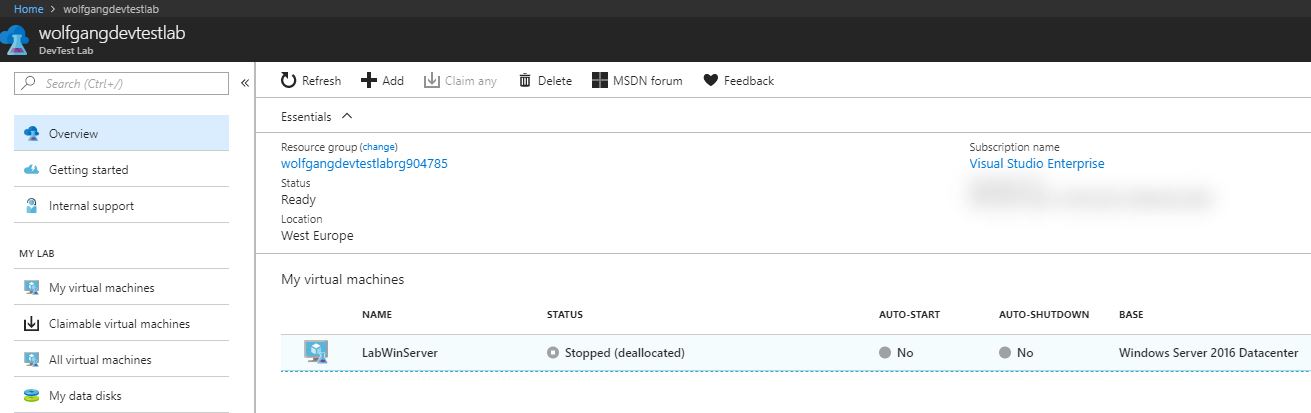
Select a VM for your formula
- On the VM’s blade, select Create formula (reusable base) under the Operations menu.
- On the Create a formula blade, provide a name and optionally a description and click OK.
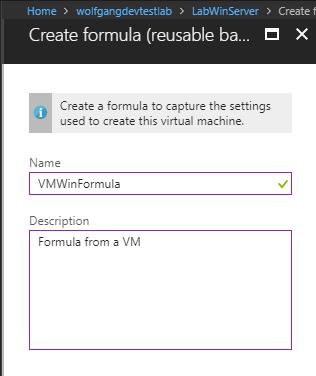
Create a new formula from a VM
Modify a formula
To modify the properties of an existing formula, follow these steps:
- In your DevTest Labs instance, select Configuration and policies under the Settings menu.
- On the Configuration and policies blade, select Formulas (reusable bases) under the Virtual Machine Bases menu.
- Select the formula you wish to modify.
- Make your changes on the Update formula blade and select Update when you are finished.
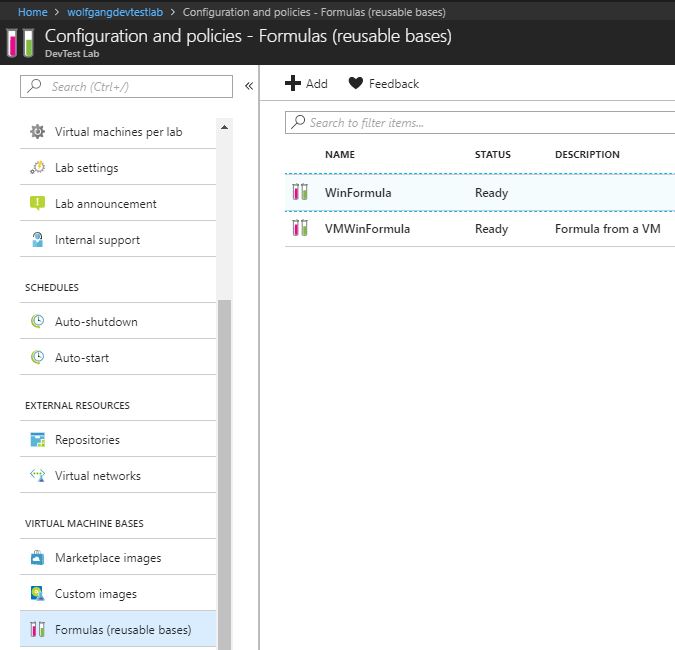
Modify an existing formula
Delete a formula
To delete an existing formula, follow these steps:
- In your DevTest Labs instance, select Configuration and policies under the Settings menu.
- On the Configuration and policies blade, select Formulas (reusable bases) under the Virtual Machine Bases menu.
- Click on the ellipsis to the right of the formula you want to delete and click Delete in the context menu.

Delete an existing formula
- On the confirmation dialog click Yes.
Configure a lab to include policies and procedures
For each lab you create, you can control cost and minimize your time waste by managing policies.
Configure allowed virtual machine sizes policy
You can configure that the creation of only specific VM sizes is allowed. To do that follow these steps:
- In your DevTest Labs instance, select Configuration and policies under the Settings menu.
- On the Configuration and policies blade, select Allowed virtual machines under the Settings menu.
- On the Allowed virtual machine move the slider to On and then check each VM size which you want to be allowed to be created.
- Click Save on the top of the blade when you are finished.
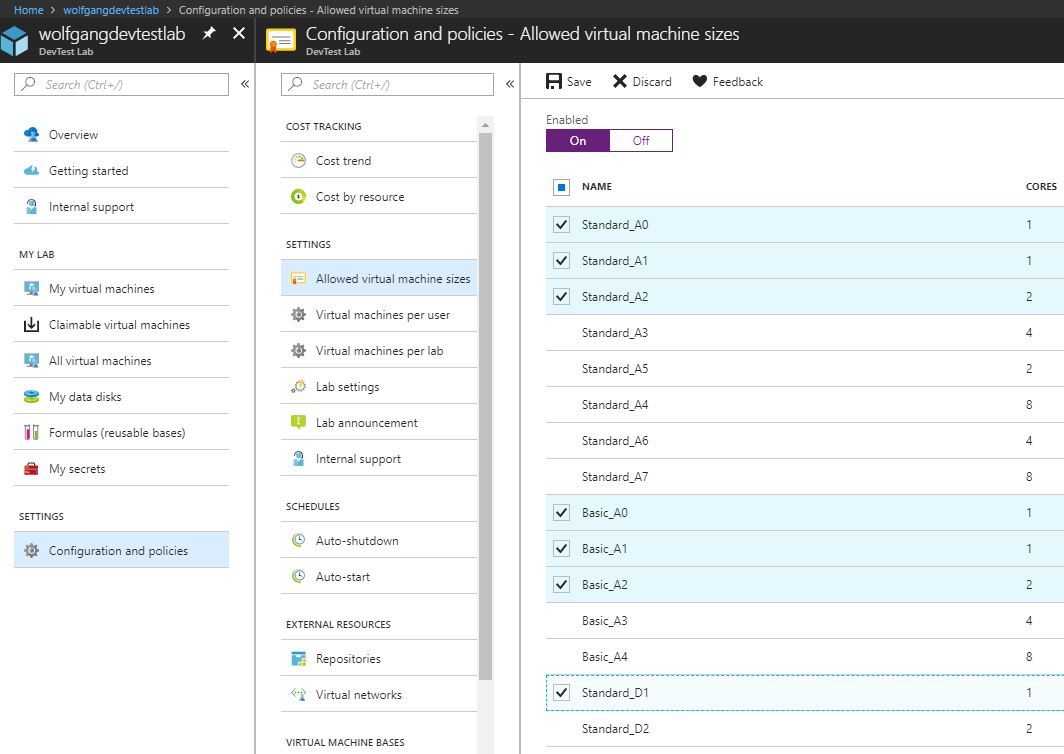
Enable allowed virtual machine sizes policy
Configure virtual machines per user policy
It is also possible to limit the number of virtual machines an user can create. Additionally, you can limit the number of VMs using premium OS disks. To do that, follow these steps:
- In your DevTest Labs instance, select Configuration and policies under the Settings menu.
- On the Configuration and policies blade, select Virtual machines per user under the Settings menu.
- Move the slider to Yes to limit the number of virtual machines and/or the number of virtual machines using premium OS disks per user.
- After you enabled a limitation, provide a number for the limit. The default value is 1.
- Click Save.
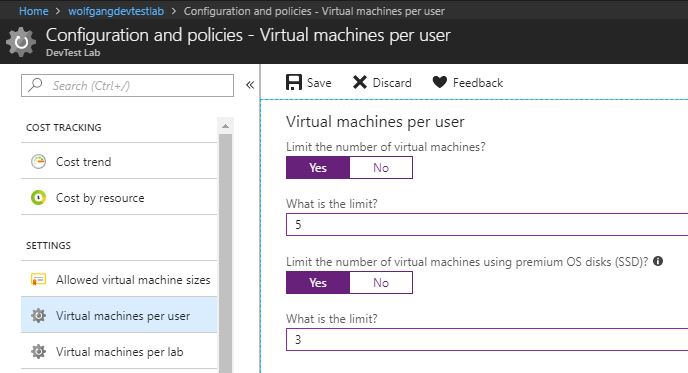
Limit the number of virtual machines and premium OS disks per user
If a user has reached his maximum amount of VMs but tries to create another one, he will get an error message.
Configure virtual machines per lab policy
To specify the maximum number of VMs that can be created in your current lab, follow these steps:
- In your DevTest Labs instance, select Configuration and policies under the Settings menu.
- On the Configuration and policies blade, select Virtual machines per lab under the Settings menu.
- Move the slider to Yes to limit the number of virtual machines and/or the number of virtual machines using premium OS disks per lab.
- After you enabled a limitation, provide a number for the limit. The default value is 1.
- Click Save.
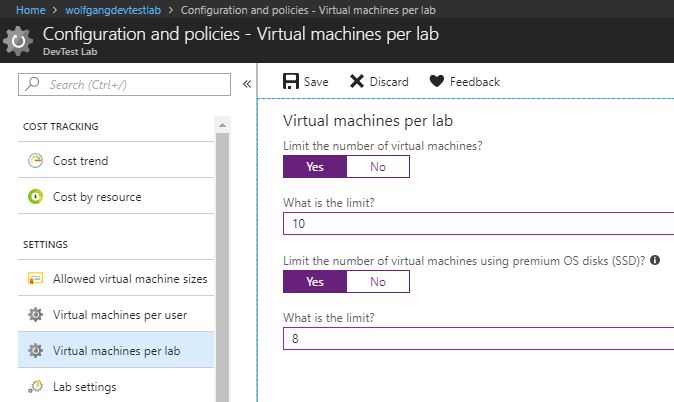
Limit the number of virtual machines and premium OS disks per lab
Configure auto-shutdown policy
The auto-shutdown is the most important policy for helping you to minimize cost control and also helps to prevent costs when the VMs are not in use. I always enable this policy when I do training because there is always at least one student who doesn’t turn off his VMs at the end of the day.
To enable auto-shutdown, follow these steps:
- In your DevTest Labs instance, select Configuration and policies under the Settings menu.
- On the Configuration and policies blade, select Auto-shutdown under the Schedules menu.
- Move the slider to On to enable auto-shutdown.
- Configure the shutdown time and optionally enable sending a notification and provide a webhook URL or an email address. The notification will be sent 15 minutes prior the shutdown.
- Click Save.

Configure auto-shutdown policy
Once configured, the auto-shutdown policy will be applied to all VMs in the lab. You also can adjust the auto-shutdown policy for specific VMs. To do that follow these steps:
- In your DevTest Labs instance, select the VM you want to configure.
- On the VM blade select Auto-shutdown under the Operations menu. There you can see the same attributes as before but if you change them here, you only change the settings for this VM.
- After all changes are made, click Save.
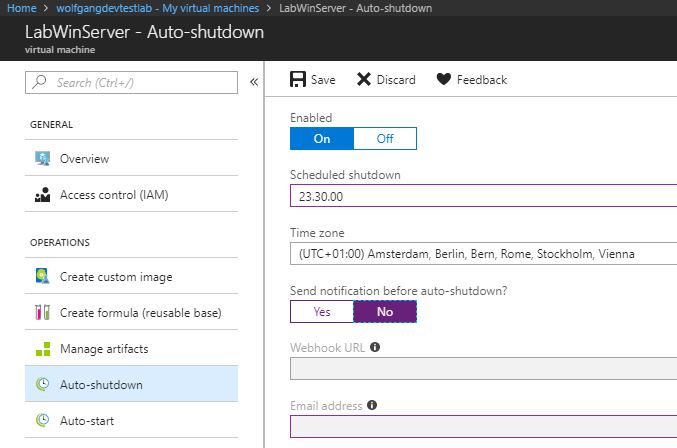
Configure auto-shutdown policy for an individual VM
I like to disable the auto-shutdown policy on my VM, so I can prepare things for the next days training on the evening without getting interrupted by the shutdown.
Configure auto-start policy
Besides auto-shutdown, you can also configure an auto-start policy. To do that follow these steps:
- In your DevTest Labs instance, select Configuration and policies under the Settings menu.
- On the Configuration and policies blade, select Auto-start under the Schedules menu.
- Move the slider to On and then configure the start time and on which days the VMs should start.
- Click Save
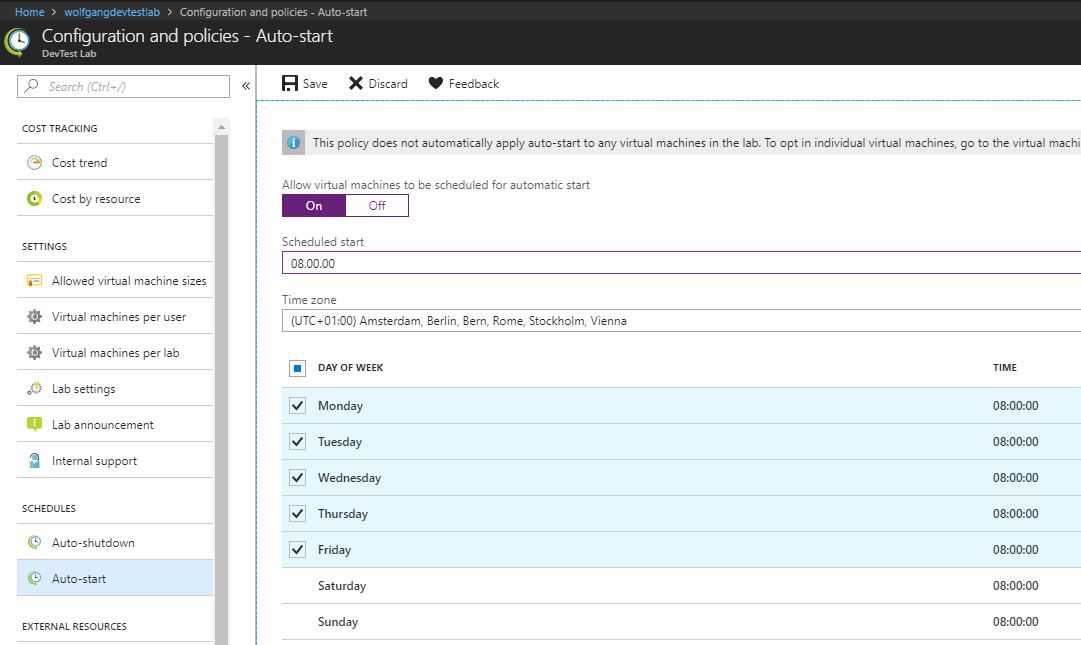
Configure auto-start policy
##
Once configured, the auto-start policy will be applied to all VMs in the lab. You can Opt-out the auto-start policy for a specific VM. To do that follow these steps:
- In your DevTest Labs instance, select the VM you want to configure.
- On the VM blade select Auto-start under the Operations menu. There you can see move the slider to On or Off to enable or disable auto-start.
- Click Save.
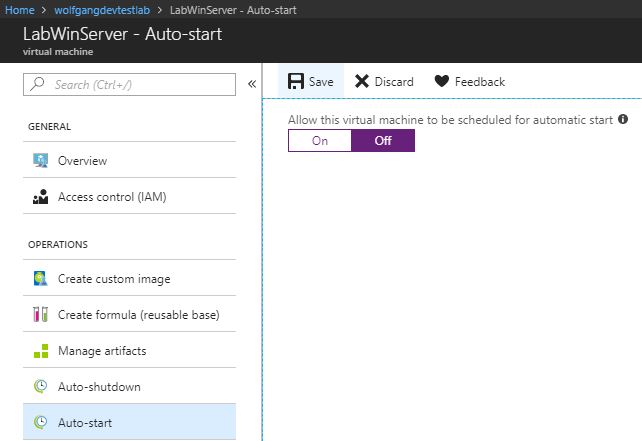
Disable auto-start for a specific VM
Set expiration date policy
The expiration date policy ensures that VMs are automatically deleted at a specified date and time. To do that follow these steps:
- When creating a new VM click on the Advanced settings.
- On the Advanced blade click the calendar icon under Expiration date and select the date when the VM should be deleted. Next, select the time.
- Click OK and then Create.

Set the expiration date policy
Configure cost management
Azure DevTest Labs was designed to manage your resources and costs effectively. Cost Management is a key feature and allows you to track to costs associated to your lab. It also enables you to view trends, set cost targets and configure alerts.
To view your Cost trend chart, select Configuration and policies in your DevTest lab and then select Cost trend under the Cost Tracking menu.
Cost trend
To view the monthly estimated cost trend chart follow these steps:
- In your DevTest Labs instance, select Configuration and policies under the Settings menu.
- On the Configuration and policies blade, select Cost trend under the Cost Tracking menu.

The Cost trend chart
To modify the Cost trend chart follow these steps:
- On the Cost trend blade, click on Manage target.
- On the Manage target blade, you can modify the date interval of the chart and also set a cost target threshold and notifications via webhook when a certain amount is reached.
- Click OK to save your changes.
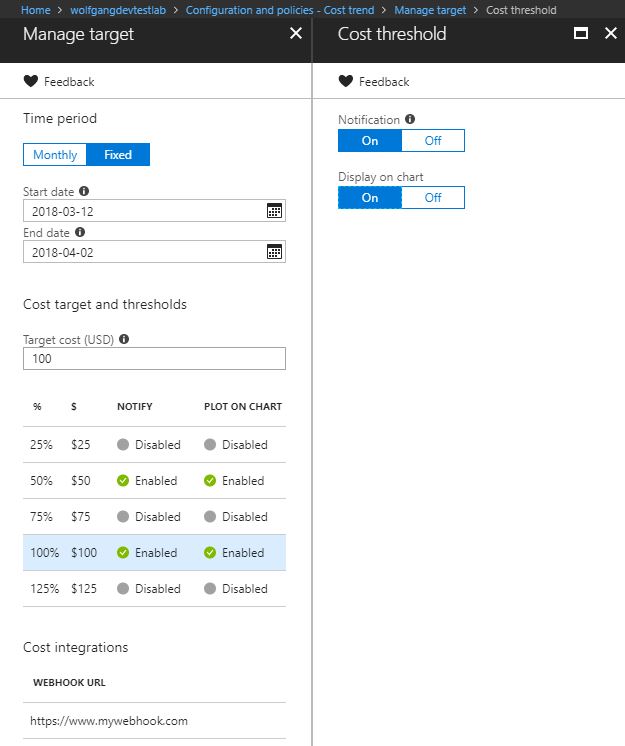
Modify the cost trend chart
Cost by resource
With cost by resource, you get a breakdown of your costs of each resource. To do that follow these steps:
- In your DevTest Labs instance, select Configuration and policies under the Settings menu.
- On the Configuration and policies blade, select Cost by resource under the Cost Tracking menu.
- All your resources of the lab are listed on the Cost by resource blade.
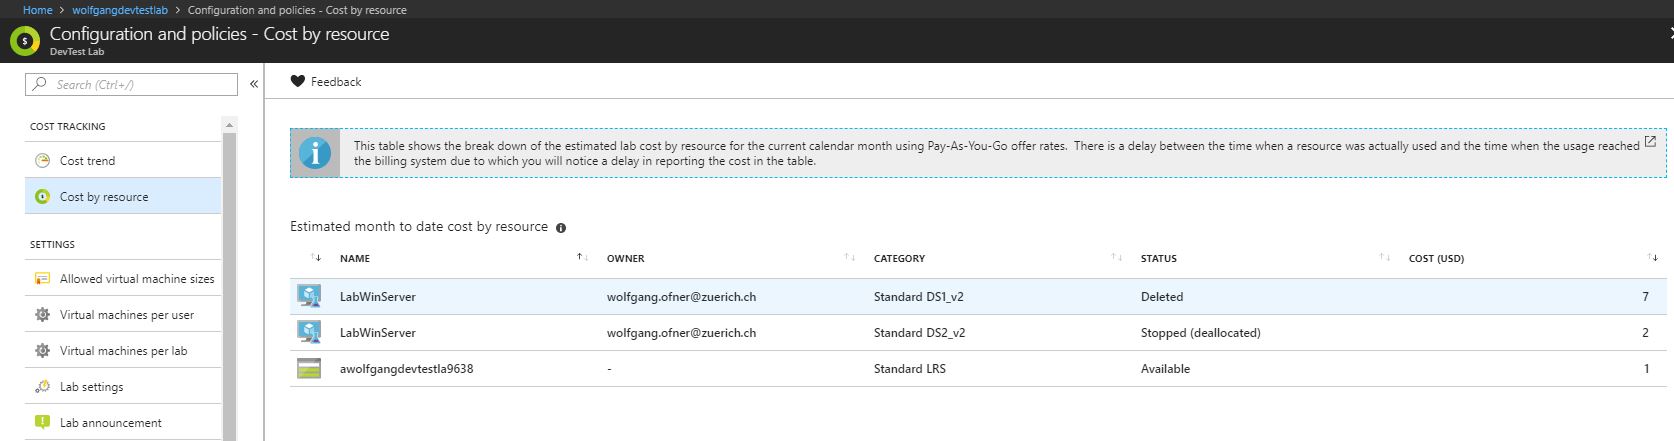
Your costs by resource
Secure access to labs
The access to your DevTest Labs is determined by Azure Role-Based Access Control (RBAC). To understand how this works, you have to understand the difference between a permission, a role, and a scope defined by RBAC.
- Permission: Defines access to a specific action (for example, read-access to the storage account)
- Role: A set of permissions that can be grouped and assigned to a user. For example, the reader role can read all resources.
- Scope: A level within the hierarchy of an Azure resource, such as a resource group or a virtual machine.
With RBAC, you can segregate duties within your team into roles where you grant only the amount of access necessary to users to perform their job. The three most relevant roles to Azure DevTest Labs are Owner, DevTest Labs User, and Contributor.
Add an owner or user at the lab level
Owners and users can be added at the lab level via the Azure Portal. This also includes external users with a valid Microsoft account. To add an owner or user, follow these steps:
- In your DevTest Labs instance, select Configuration and policies under the Settings menu.
- On the Configuration and policies blade, select Access control (IAM) under the Manage menu and click +Add.
- On the Add permissions blade, select Owner or DevTest Labs user as the role.
- Enter the name or email address and select the user.
- Click Save.
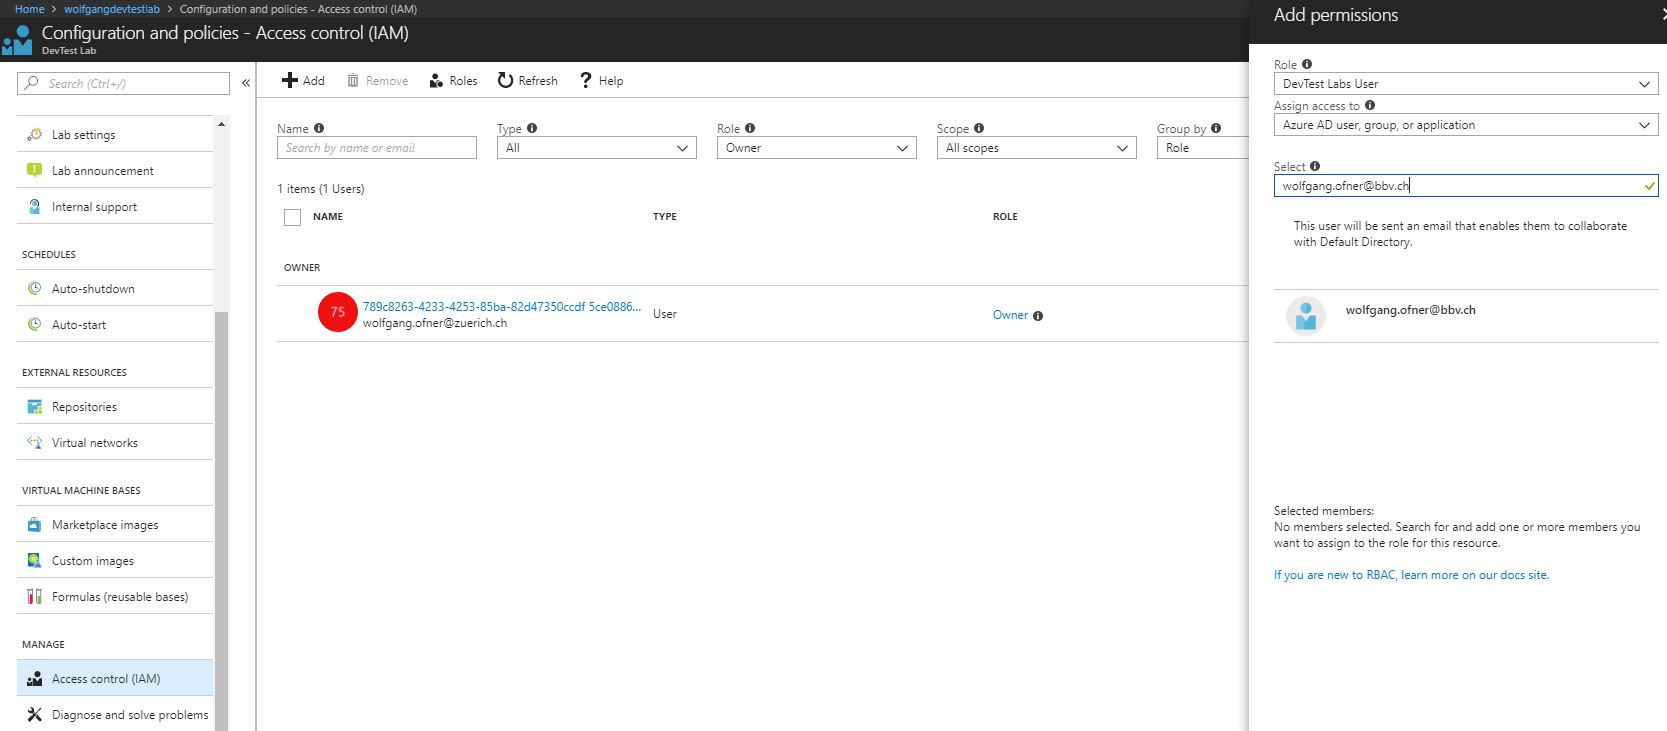
Add a user to the lab
Add an external user to a lab using PowerShell
Additionally to the Azure portal, you can add an external user to your Azure DevTest Labs using PowerShell. Before you can do that, you have to add the user as a gust to the Active Directory though. To do that follow these steps:
- Open the Azure Active Directory and select Users under the Manage menu.
- On the All users blade, click +New guest user on the top of the blade.
- Enter the email of the user you want to add as a guest and optionally include a message for the invitation.
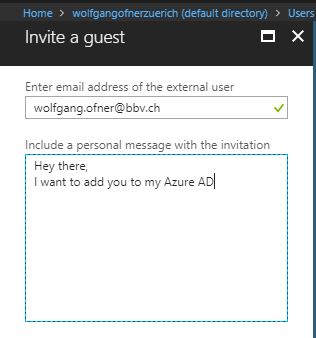
Add a user as a guest to your Active Directory
- After the invitation is sent, the user will show up in your Azure Active Directory.

The Azure Active Directory with the new guest user
Now, you can add the user to your lab using PowerShell, following these steps:
- Create the following variables in PowerShell:
- $subscriptionId = “
” - $labResourceGroup = “<Enter lab’s resource name here>”
- $labName = “
” - $userDisplayName = “<Enter user’s display name here>”
- $subscriptionId = “
- Select your subscription (you only have to do this step if you have more than one subscription)
- Select-AzureRmSubscription -SubscriptionId $subscriptionId
- Get the user object
- $adObject = Get-AzureRmADUser -SearchString $userDisplayName
- Create the role assignment
- $labId = (‘/subscriptions/’ + $subscriptionId + ‘/resourceGroups/’ + $labResourceGroup + ‘/providers/Microsoft.DevTestLab/labs/’ + $labName)
- Attention: You need a / in front of subscriptions. The Microsoft documentation doesn’t have the slash and therefore it won’t work.
- Assign the role to the user:
- New-AzureRmRoleAssignment -ObjectId $adObject.Id -RoleDefinitionName ‘DevTest Labs User’ -Scope $labId

Add a user to your lab with PowerShell
After you are done, the user will appear in your lab’s Active Directory. To verify it go to your Azure DevTest Labs –> Configuration and policies –> Access control (IAM). There, you can see the previously added user with his assigned role.
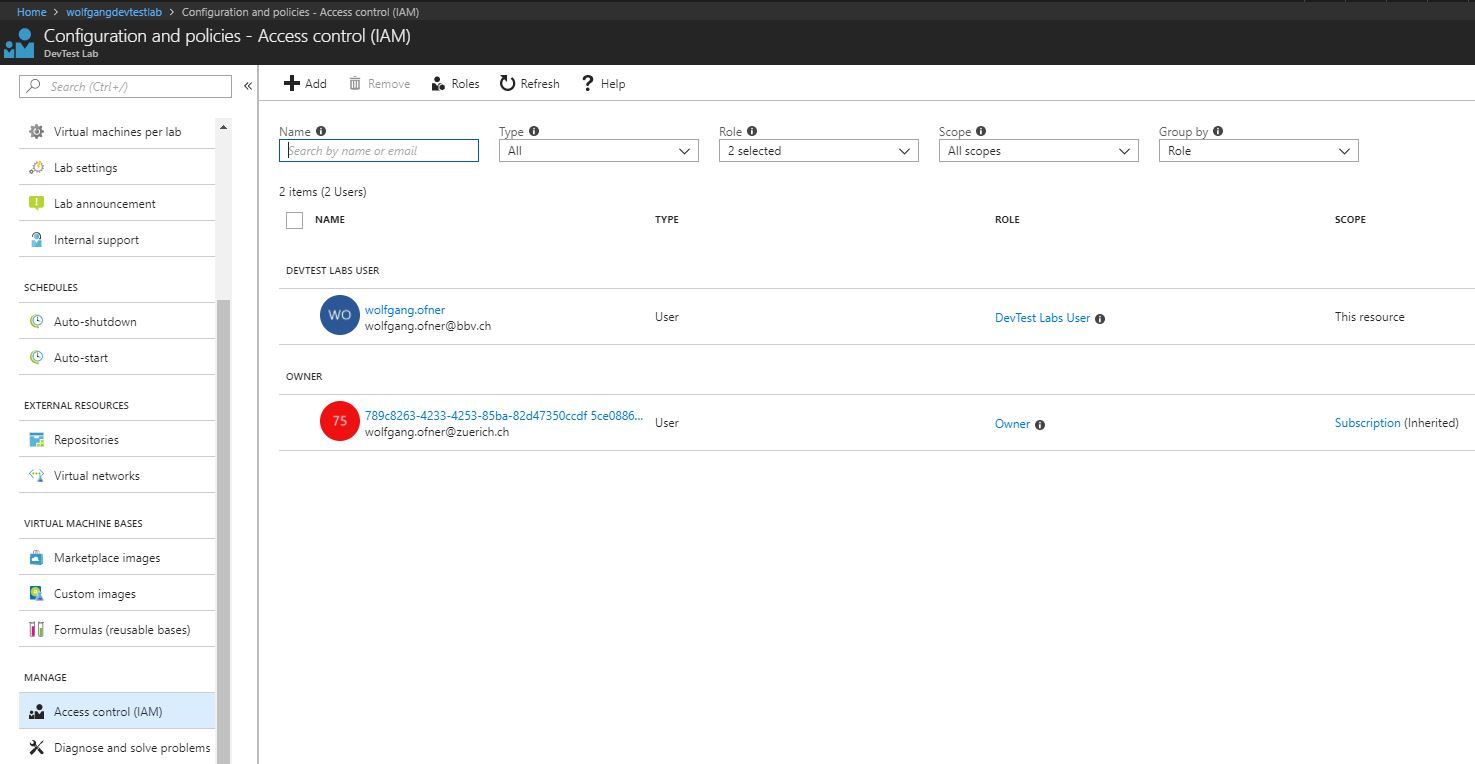
Confirm that the user has been added to your lab
Use lab settings to set access rights to the environment
You can give your lab users Contributor access rights. This enables them to edit resources such as SQL Server, in the resource group that contains your lab environment. By default, lab users only have the Reader access rights. To modify the user’s rights, follow these steps:
- In your DevTest Labs instance, select Configuration and policies under the Settings menu.
- On the Configuration and policies blade, select Lab settings under the Settings menu.
- Select Contributor to give users the Contributor access rights.
- Click Save
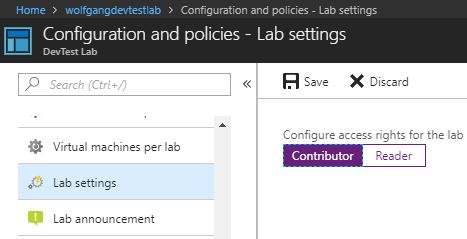
Give users the Contributor or Reader access rights
Use environments in a lab
You can use Azure Resource Manager (ARM) templates to spin up a complete environment in DevTest labs. These environments can contain multiple VMs, or a SharePoint farm. Following infrastructure-as-code and configuration-as-code best practices, environment templates are managed in source control. Azure DevTest Labs loads all ARM templates directly from your GitHub or VSTS Git repositories. As a result, Resource Manager templates can be used across the entire release cycle, from the test environment to the production environment.
Configure an ARM template repository
There are a couple of rules which you have to follow when organizing ARM templates in a repository:
- The master template file must be named azuredeploy.json.
- The parameter file must be named azuredeploy.parameters.json.
- You can use the parameters _artifactsLocation and _artifactsLocationSasToken to construct the parametersLink URI value, allowing DevTest Labs to automatically manage nested templates.
- Metadata can be defined to specify the template display name and description. This metadata must be in a file named metadata.json.
On the following example metadata file, you can see how to specify the display name and description:
{
“itemDisplayName”: “Your template name”,
“description”: “Your description”
}
To add a repository to your Azure DevTest Labs using the Azure portal, follow these steps:
- In your DevTest Labs instance, select Configuration and policies under the Settings menu.
- On the Configuration and policies blade, select Repositories under the External Resources menu and click +Add.
- Enter a name, the Git clone URI, your access token and optionally a branch.
- Enter either a folder path that starts with / and is relative to your Git clone URI or your ARM template definition.
- Click Save.
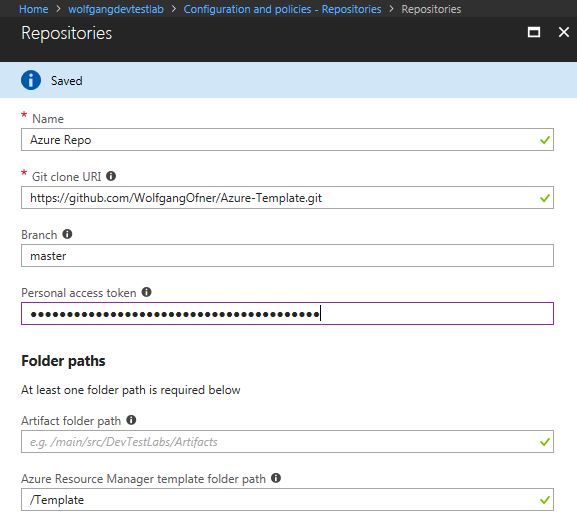
Add a repository with templates to your Azure DevTest Labs
After you added the Repository, you can use the templates when you add a new Resource on the Overview blade of your DevTest Labs.
Conclusion
This post described the Azure DevTest Labs and showed what you can do with it and how it helps you to minimize the management tasks and also helps to keep your costs low. I talked about creating VMs, custom images, and formulas and how to apply policies like auto-shutdown to the resources within the lab. Furthermore, I showed how to add users to your lab and how to change their access permissions. The last topic was about setting up your own Git repository which helps you to create complete environments with a single deployment process.
For more information about the 70-532 exam get the Exam Ref book from Microsoft and continue reading my blog posts. I am covering all topics needed to pass the exam. You can find an overview of all posts related to the 70-532 exam here.
Comments powered by Disqus.