
Azure provides several methods of storing files, including Azure Storage blobs and Azure Files. In this post, I want to talk about the differences between them and how to use them.
Azure Storage blobs
Azure Storage blobs should be used when you have files that you are storing using a custom application. Microsoft provides client libraries and REST interfaces for the Azure Storage blobs with which you can store and access data at a massive scale in block blobs
Create a blob storage account
To create a blob storage account, follow these steps:
- In the Azure Portal, click on +Create a resource then on Storage and then select Storage account – blob, file, table, queue.
- On the Create storage account blade provide a name, location, subscription, and resource group. Optionally you can choose between standard (HDD) and premium (SSD) performance and enforce HTTPS by moving the slider to Enabled under the Secure transfer required attribute.
- Click Create.
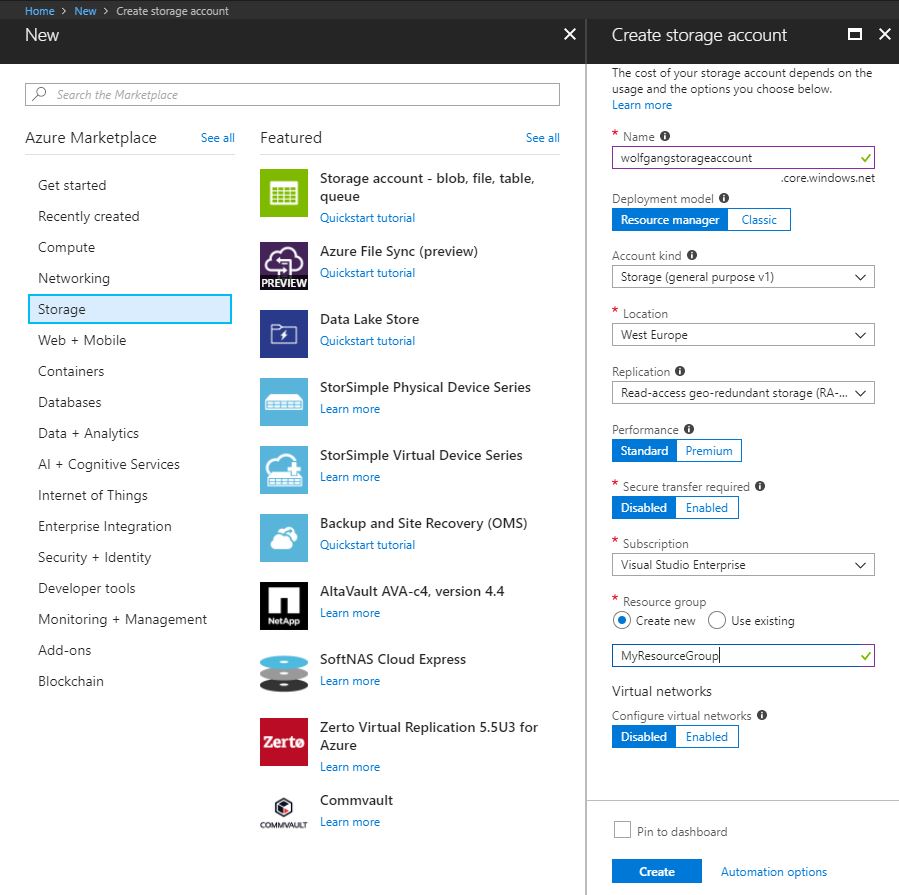
Create a new Azure Storage account
Your data is always replicated three times within the same data center to ensure data security.
Read and change data
The code of the following demo can be downloaded from GitHub You can read and change data by using the Azure SDK for .NET, following these steps:
- Make sure you have the Azure SDK installed.
- Create a new C# console application and install the WindowsAzure.Storage NuGet Package.
- Connect to your storage account in your application using the following code:

Connect to your storage account
Replace the placeholder for storage account name and storage key with your own. You can find them in the Azure Portal under Access keys in your storage account.
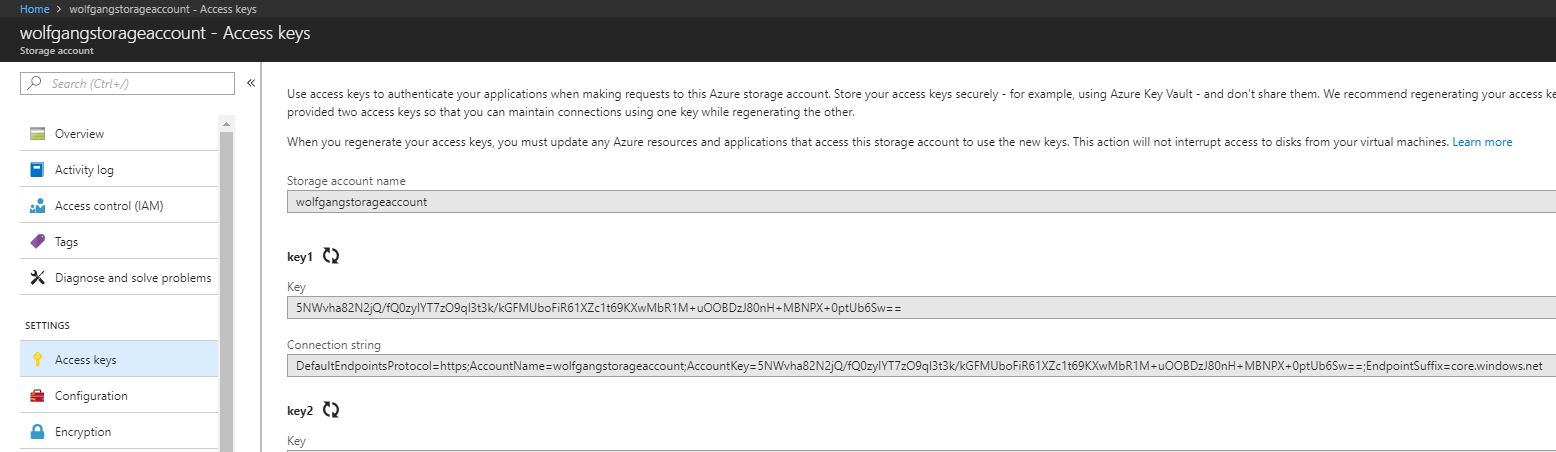
Finding the Storage account name, storage key, and connection string
- Create a container with the following code
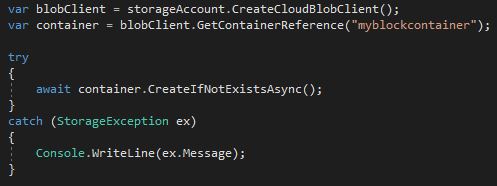
Create the container myblockcontainer if it does not exist
Azure Storage blobs are organized in containers. Each storage account can have an unlimited amount of containers. Note that a container can’t have uppercase letters.
- Next, set the path to the file you want to upload and upload the file
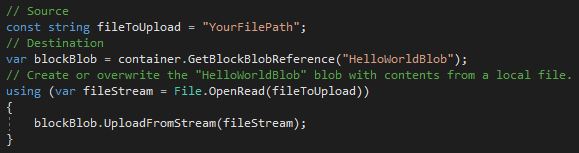
Upload a file to the container
- After the file is uploaded you can find it in the Azure Portal:
- Go to your storage account and click on Blobs on the Overview blade
- On the Blob service blade, click on your container. There you can see all blobs inside this container.

The previously uploaded blob
Set metadata on a container
Metadata can be used to determine when files have been updated or to set the content types for web artifacts. There are two forms of metadata:
- System properties metadata give you information about access, file types and more.
- User-defined metadata is a key-value pair that is specified for your application. It can be the time when a file was processed or a note of the source.
A container has only read-only system properties, while blobs have both read-only and read-write properties.
Setting user-defined metadata
To set user-defined metadata, expand the code from before with these two lines:

Set user-defined metadata
Read user-defined metadata
To read the previously added user-defined metadata, add this code:
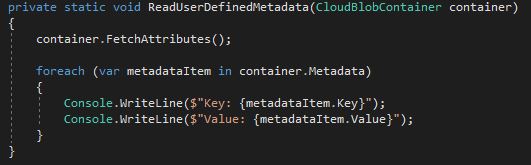
Read user-defined metadata
If the metadata key does not exist, an exception is thrown.
Read system properties
To read system properties, add this code:
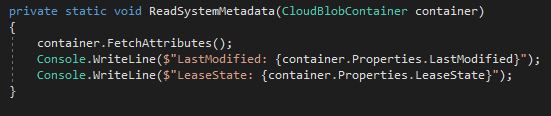
Read system metadata
There are various system metadata. Use the IntelliSense to see all available ones.
Store data using block and page blobs
Azure Storage Blobs have three different types of blobs:
- Block blobs are used to upload large files. A blob is divided up into blocks which allow for easy updating large files since you can insert, replace or delete an existing block. After a block is updated, the list of blocks needs to be committed for the file to actually record the update.
- Page blobs are comprised of 512- byte pages that are optimized for random read and write operations. Page blobs are useful for VHDs and other files which have frequent, random access.
- Append blobs are optimized for append operations like logging and streaming data.
Write data to a page blob
First, you have to create a page blob:
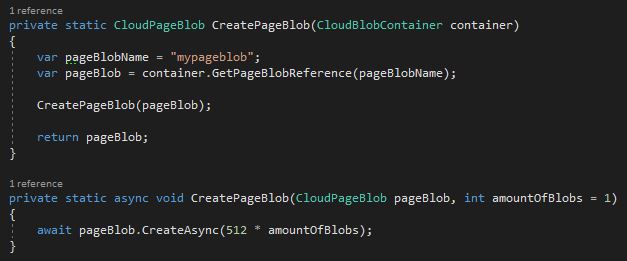
Create a page blob
After the page blob is created, you can write data to it:

Write to a page blob
After some data are added to the blob, you can read it:

Read a page blob
Stream data using Azure Storage blobs
Instead of downloading a whole blob, you can download it to a stream using the DownloadToStream() API. The advantage of this approach is that it avoids loading the whole blob into the memory.
Access Azure Storage blobs securely
Azure Storage supports both HTTP and HTTPS. You should always use HTTPS though. You can authenticate in three different ways to your storage account:
- Shared Key: The shared key is constructed from a set of fields from the request. It is computed with the SHA-256 algorithm and encoded in Base64
- Shared Key Lite: The shared key lite is similar to the shared key but it is compatible with previous versions of Azure Storage.
- Shared Access Signature: The shared access signature grants restricted access rights to containers and blobs. Users with a shared access signature have only specific permissions to a resource for a specified amount of time.
Each call to interact with blob storage will be secured, as shown in the following code:

Secure access to your Storage Account
Implement Async blob copy
Sometimes it is necessary to copy blobs between storage account, for example, before an update or when migrating files from one account to another.
The type of the blob can’t be changed during the async copy operation. Any files with the same name on the destination account will be overwritten.
When you call the API and get a success message, this means the copy operation has been successfully scheduled. The success message will be returned after checking the permissions on the source and destination account.
The copy process can be performed with the Shared Access Signature method,
Configure a Content Delivery Network with Azure Storage Blobs
A Content Delivery Network (CDN) is used to cache static files to different parts of the world. A CDN would be a perfect solution for serving files close to the users. There are way more CDN nodes than data centers, therefore the files in the CDN can be better distributed in an area and reduce the latency for your customers. As a result, files are loaded faster and the user experience is increased.
The CDN cache is perfect for CSS and JavaScript files, documents, images and HTML pages.
Once CDN is enabled and files are hosted in an Azure Storage Account, a configured CDN will store and replicate those files without any management.
To enable CDN for the storage account, follow these steps:
- Open your storage account and select Azure CDN under the Blob Service menu.
- On the Azure CDN blade, create a new CDN by filling out the form. The difference between the Premium and Standard Pricing tier is that the Premium offers advanced real-time analytics.
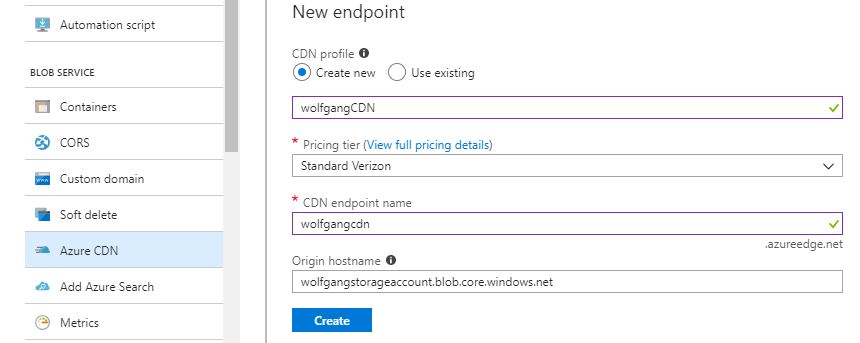
Create a new CDN
If a file needs to be replaced or removed, you can delete it from the Azure Storage blob container. Remember that the file is being cached in the CDN. It will be removed or updated when the Time-to-Live (TTL) expires. If no cache expiry period is specified, it will be cached in the CDN for seven days. You set the TTL is the web application by using the clientCache element in the web.confg file. Remember when you place that in the web.confg file it affects all folders and subfolders for that application.
Design blob hierarchies
Containers are flat which means that a container can’t have a child container inside it. A hierarchy can be created by naming the files similar to a folder structure. A solution would be to prefix all Azure Storage blobs with pictures with pictures/, for example, the file would be named pictures/house.jpg or pictures/tree.jpg. The path to these images would be:
- https://wolfgangstorageaccount.blob.core.windows.net/myblob/pictures/house.jpg
- https://wolfgangstorageaccount.blob.core.windows.net/myblob/pictures/tree.jpg
Using the prefix simulates having folders.
Configure custom domains
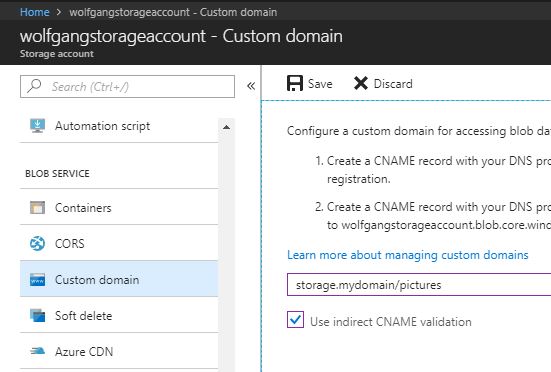
The default endpoint for Azure Storage blobs is: StorageAccountName.blob.core.windows.net. Using the default domain can negatively affect SEO. Additionally, it tells that you are hosting your files on Azure. To hide this, you can configure your storage account to use a custom domain. To do that, follow these steps:
- Go to your storage account and click on Custom Domain under the Blob Service menu.
- Check the Use indirect CNAME validation checkbox. By checking the checkbox, no downtime will incur for your application.
- Log on to your DNS provider and add a CName record with the subdomain alias that includes the Asverify domain.
- On the Custom domain blade, enter the name of your custom domain, but without the Asverify.
- Click Save.
- Create another CNAME record that maps your subdomain to your blob service endpoint on your DNS provider’s website
- Now you can delete the Asverify CNAME since it has been verified by Azure already.
Add a custom domain to your storage account
Scale blob storage
Blob storage can be scaled both in terms of storage capacity and performance. Each Azure subscription can have up to 200 storage account, with 500 TB if capacity each. This means that each Azure subscription can have up to 100 PB of data.
A block blob can have 50,000 100 MB blocks with a total size of 4.75 TB. An append blob has a maximum size of 195 GB and a page blob has a maximum size of 8 TB.
In order to scale the performance, there are several features available. For example, you could enable geo-caching for the Azure CDN or implement read access geo-redundant storage and copy your data to multiple data center in different locations.
Azure Storage only charges for disk space used and network bandwidth.
Many small files will perform better in Azure Storage than one large file. Blobs use containers for logical grouping, but each blob can be retrieved by different compute resources, even if they are in the same container.
Azure files
Azure files are useful for VMs and cloud services as mounted share. Check out my post “Design and Implement ARM VM Azure Storage” for an instruction on how to create an Azure file share.
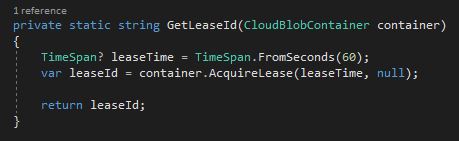
Implement blob leasing
You can create a lock on a blob for write and delete operations. This lick can be between 15 and 60 seconds or it can be infinite. To write to a blob with an active lease, the client must include the active lease ID with the request.
When a client requests a lease, a lease ID is returned. The client can then use this lease ID to renew, change, or release the lease. When the lease is active, the lease ID must be included to write to the blob, set any metadata, add to the blob (through append), copy the blob, or delete the blob.
Use the following code to get the lease ID:
Get the lease ID of your block blob
Create connections to files from on-premises or cloud-based Windows or, Linux machines
Azure Files can be used to replace on-premise file servers or NAS devices. You can find an instruction on how to connect to Azure Files in my post “Design and Implement ARM VM Azure Storage”. The instructions are for an Azure VM but you can do also do it with your on-premise machine.
Shard large datasets
You can use containers to group related blobs that have the same security requirements. The partition key of a blob is the account name + container name + blob name. A single blob can only be served by a single server. If sharding is needed, you need to create multiple blobs.
Implement Azure File Sync
Azure File Sync (AFS) helps you to automatically upload files from a Windows Server 2012 or 2016 server to the cloud.
Azure File Sync helps organizations to:
- Cache data in multiple locations for fast, local performance
- Centralize file services in Azure storage
- Eliminate local backup
To enable AFS, follow these steps:
- Create a Windows server 2012 or 2016 file server and a storage account.
- In the Azure portal, click on +Create a resource and search for Azure File Sync. Click on it and click on Create.
- Provide a name, subscription, resource group and location and click Create.
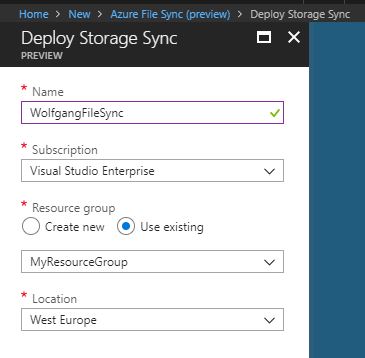
Deploy Storage Sync
- In your storage account, create a new file share.
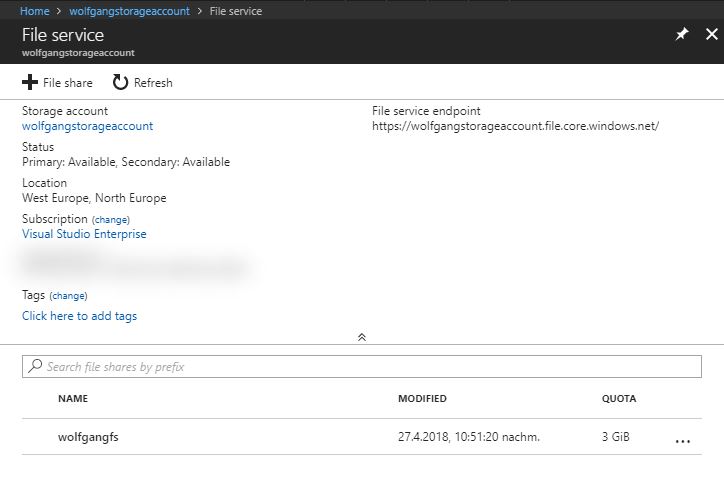
Create a file share in the storage account
- By now the Storage Sync Service should be deployed. Open it and click on +Sync group on the Overview blade.
- On the Sync group blade, enter a name and select a subscription, a storage account, and a file share and click Create.
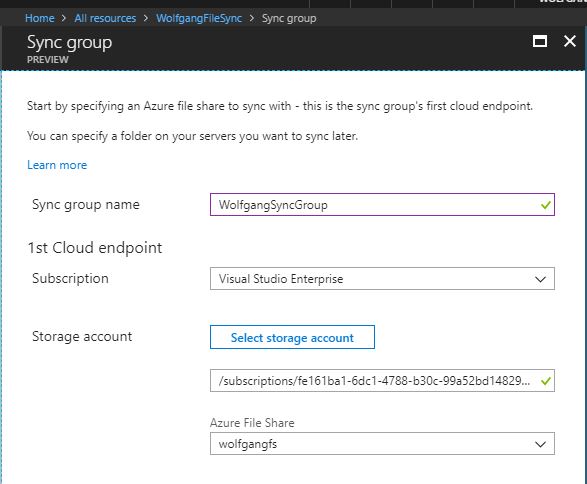
Create a Sync group
Set up the file server
- Next, you have to register your server. To do that, connect to your previously created Windows server and download the Azure Storage Sync agent from here.
- You might have to disable enhanced security.
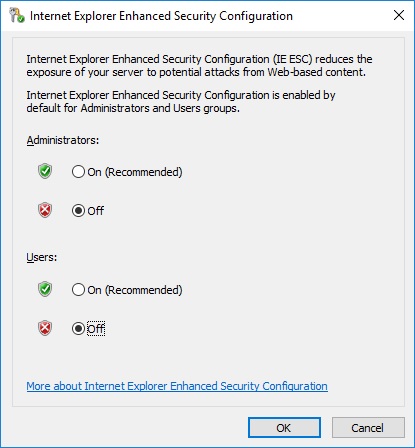
Disable enhanced security
- After the installation is finished, start the Server Registration if it doesn’t start automatically. The default path is C:\Program Files\Azure\StorageSyncAgent.
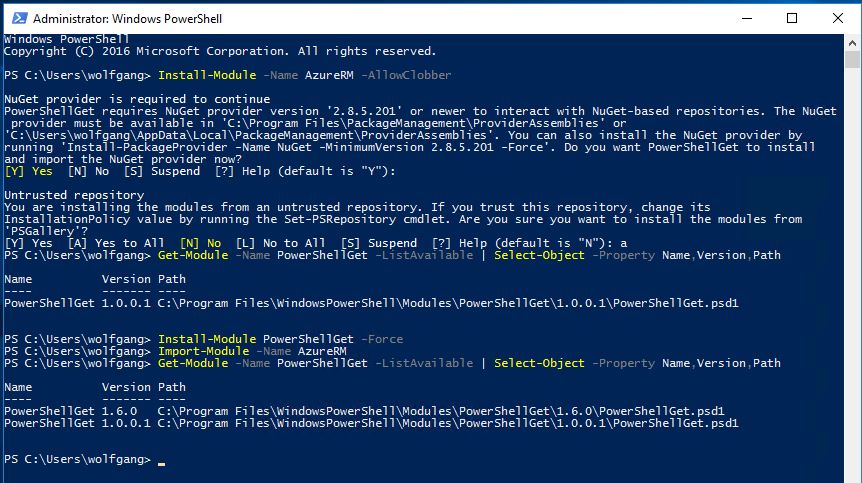
- If you see a warning that the pre-requisites are missing, you have to install the Azure PowerShell module.
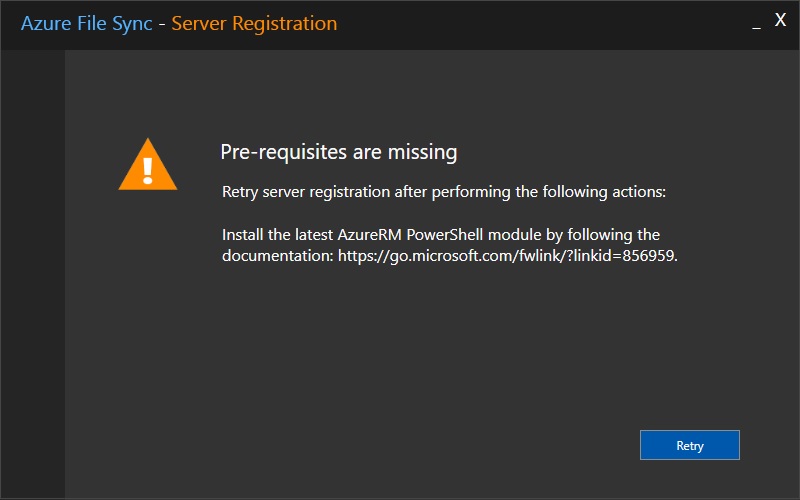
Azure File Sync Azure PowerShell Module missing
- To install the Azure PowerShell module, open PowerShell and enter Install-Module -Name AzureRM -AllowClobber. </li> </ol>
![Install the Azure PowerShell Module]()
Install the Azure PowerShell module
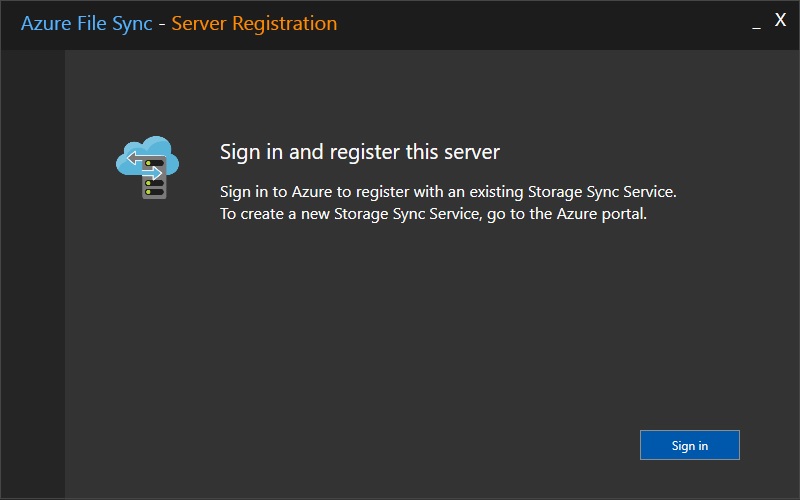
- After the Azure PowerShell module is installed, you can sign in and register your server.
### Configure the Sync group![Sign in and register this server]()
Sign in and register this server
- After the server is set up, go back to your Storage Sync Service and open the previously created Sync group on the Overview blade.
- On the Sync group blade, click on Add server endpoint and then select the previously registered server. Next, select a path which should be synchronized and then click Create.
### Test the Azure File Sync![Register a server endpoint]()
Register a server endpoint
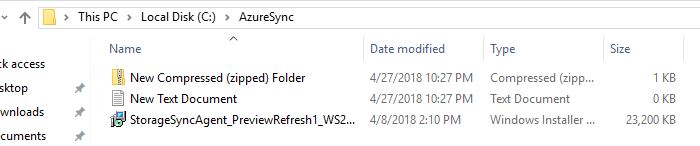
- To test the file sync, copy some files into the sync folder.
![Copy files into the sync folder]()
Copy files into the sync folder
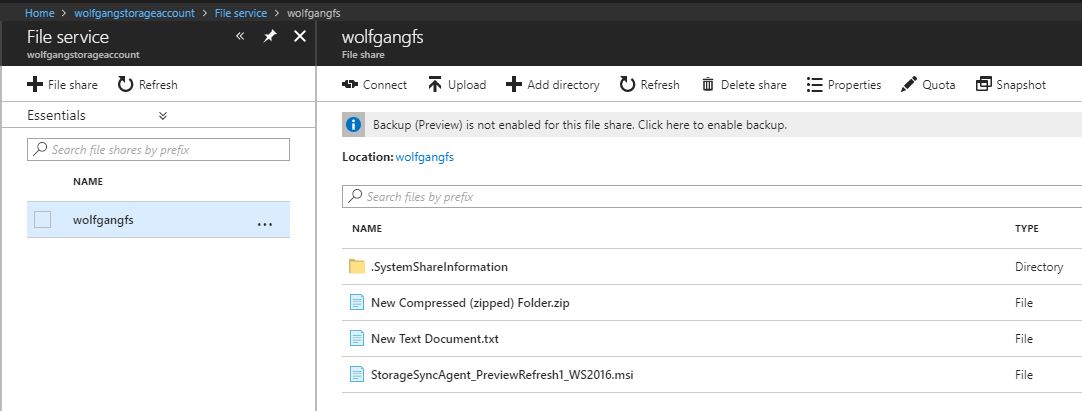
- To check if the files were synchronized, go to your file share in the storage account. There should be the files from your sync folder.
## Conclusion In this post, I talked about the different types of Azure Storage blobs and when they should be used. Furthermore, I showed how to implement Azure files as a file share for your cloud-based and on-premise machines. The last section was about implementing Azure File Sync to synchronize files from a server into the cloud. You can find the example code on GitHub. Don’t forget to replace the account name and access key placeholder with the name of your storage account and it’s access key. For more information about the 70-532 exam get the Exam Ref book from Microsoft and continue reading my blog posts. I am covering all topics needed to pass the exam. You can find an overview of all posts related to the 70-532 exam here.![The synchronize process was successful]()
The synchronize process was successful

Comments powered by Disqus.