

Azure API Apps provide a quick and easy way to create and consume scalable RESTful APIs, using the language of your choice. The Azure portal helps you to enable CORS to support access to your API from any client and Swagger support makes generating client code to use your API simple.
Create and deploy API Apps
There are different ways to create and deploy your API Apps. You could use Visual Studio to create a new API Apps project and publish it to a new API app. Additionally to Visual Studio, you can use the Azure portal, Azure CLI, or PowerShell to provision a new API App service.
Creating a new API App from the Azure portal
To create a new API app, follow these steps:
- In the Azure portal click on +Create a resource, search for API App and click Create.
- On the API App blade, provide a name, subscription, resource group and App Service plan.
- Click Create.
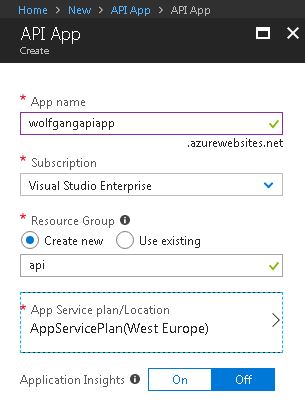
Create a new API App
After the API App is deployed, you can download a sample project in ASP.NET, NodeJs or Java by clicking on Quickstart under the Deployment menu.
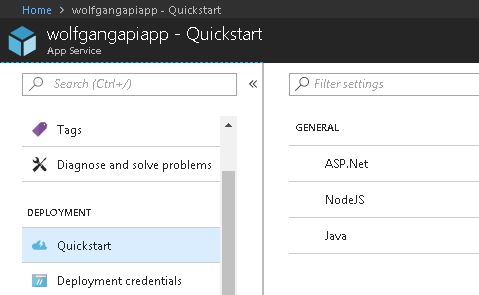
Download a sample project
Creating and deploying a new API App with Visual Studio
To create a new API App open Visual Studio 2017 and create a new ASP.NET project with the Azure API App template.

Create a new ASP.NET application with the Azure API App template
Visual Studio creates a new API App project and adds NuGet packages, such as:
- Newtsonsoft.Json for deserializing requests and serializing responses to and from API app.
- Swashbuckle to add Swagger for rich discovery and documentation for your API REST endpoints.
Follow these steps to deploy your API App from Visual Studio:
- Right-click on your project in the Solution Explorer and click Publish.
- In the Publish dialog, select the Create New option on the App Service tab and click Publish.
- On the Create App Service blade, provide an App name, subscription, resource group and hosting plan.
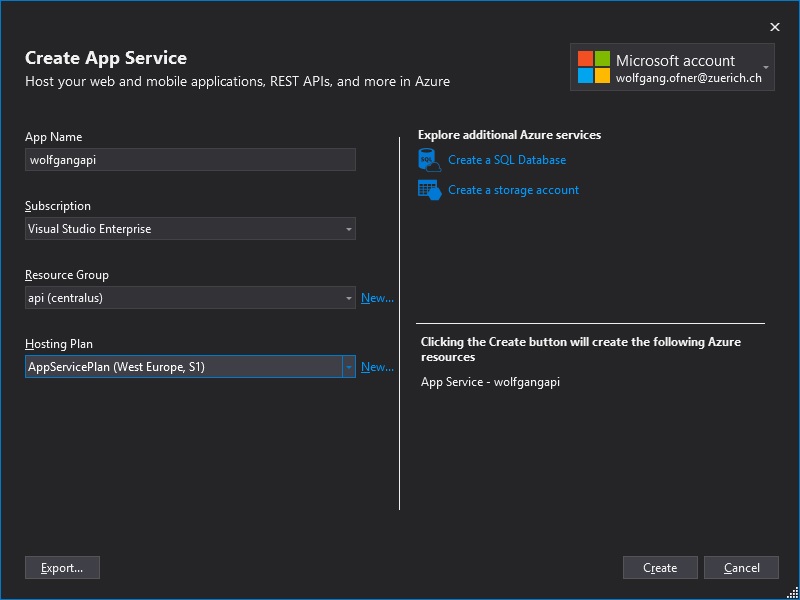
Create App Service
- Click Create.
- After the API is deployed, the browser will be automatically opened.
Automate API discovery by using Swashbuckle
Swagger is a popular, open source framework backed by a large ecosystem of tools that helps you design, build, document, and consume your RESTful APIs.
Generating Swagger metadata manually can be a very tedious process. If you build your API using ASP.NET or ASP.NET Core, you can use the Swashbuckle NuGet package to automatically do this for you, saving a lot of time creating the metadata and maintaining it. Additionally, Swashbuckle also contains an embedded version of swagger-ui, which it will automatically serve up once Swashbuckle is installed.
Use Swashbuckle in your API App project
To work with swagger, follow these steps:
- Go to https://swagger.io/swagger-ui/ and either download swagger or use the live demo. I used the live demo and entered the path to my API definition, https://wolfgangapi.azurewebsites.net/swagger/docs/v1. You can find the definition in the Azure portal by clicking on API definition under the API menu.
- Click Explore and the available API endpoints will be displayed.

The available endpoints of your API
- If you get an error message, you probably have to enable CORS. You can do that in the Azure portal, in your Web API by clicking on CORS under the API menu. For more information see Enable CORS to allow clients to consume API and Swagger interfaces.
- To test your API endpoints, click on one of them, for example, GET /api/Values.
- Click on Try it out.
- Click Execute and the result will be displayed after a couple of seconds.
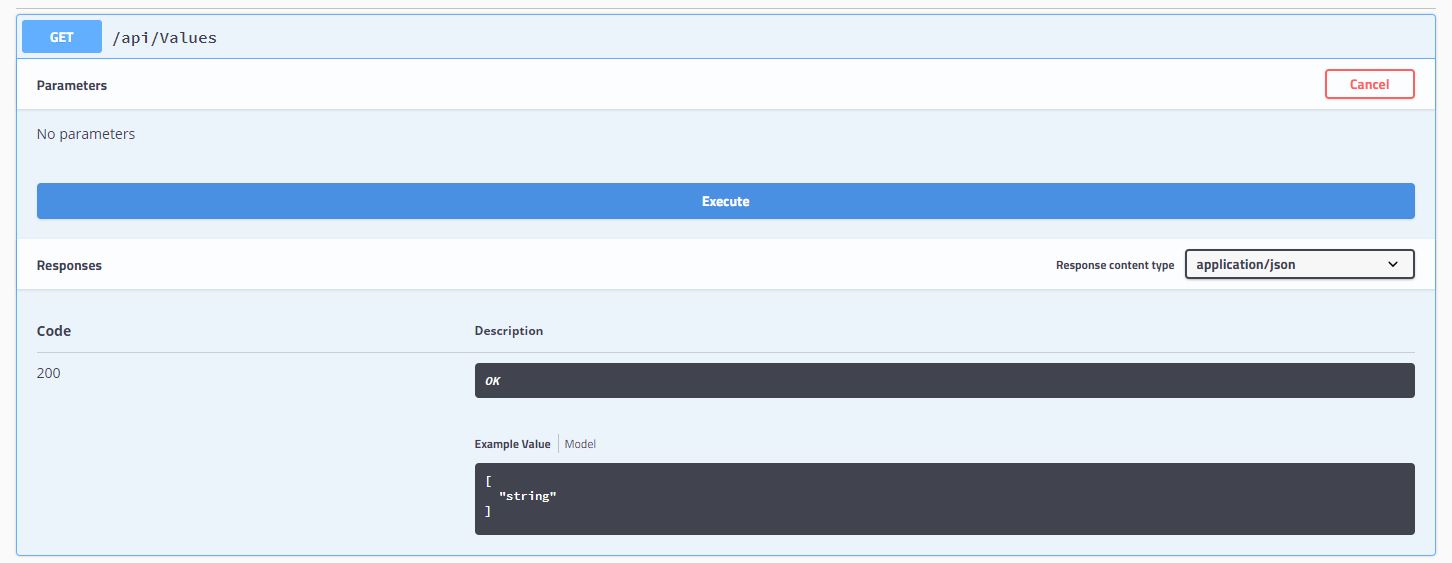
Test your API with swagger
Enable CORS to allow clients to consume API and Swagger interfaces
To enable CORS (Cross-Origin Resource Sharing), follow these steps:
- In the Azure portal on your API App service, click on CORS under the API menu.
- On the CORS blade, enter the allowed origins or enter an asterisk to allow all origins.
- Click Save.
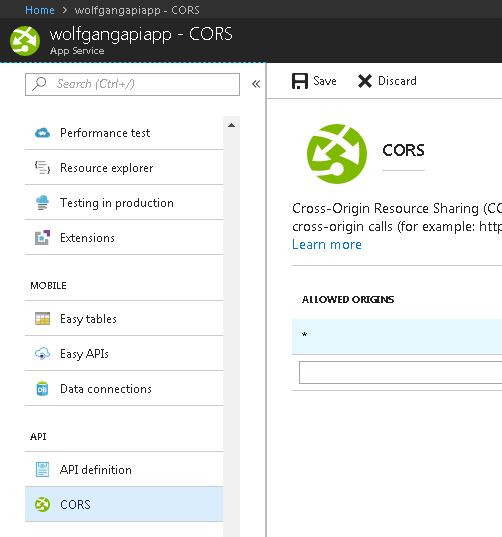
Enable CORS
Use Swagger API metadata to generate client code for an API App
There are tools available to generate client code for your API Apps that have Swagger API definitions, like the Swagger.io online editor.
To generate client code for your API App that has Swagger API metadata, follow these steps:
- In the Azure portal, go to your API App and select API definition under the API menu.
- On the API definition, copy the API definition.
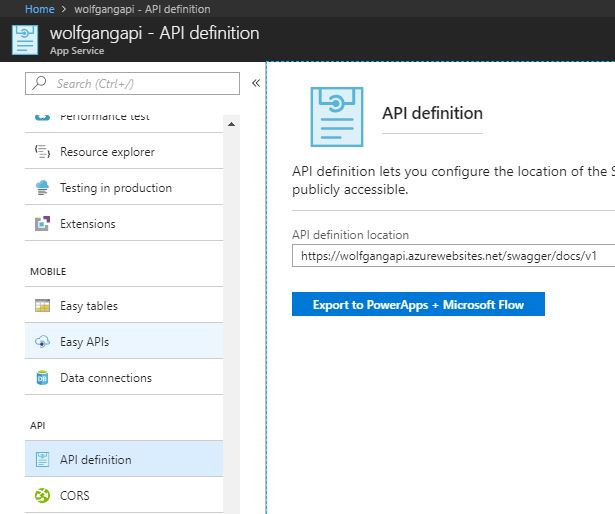
Copy the API definition
- With the API definition copied, go to http://editor.swagger.io/ to use the Swagger.io online editor.
- Click on File –> Import URL and paste your API definition.
- Click OK.
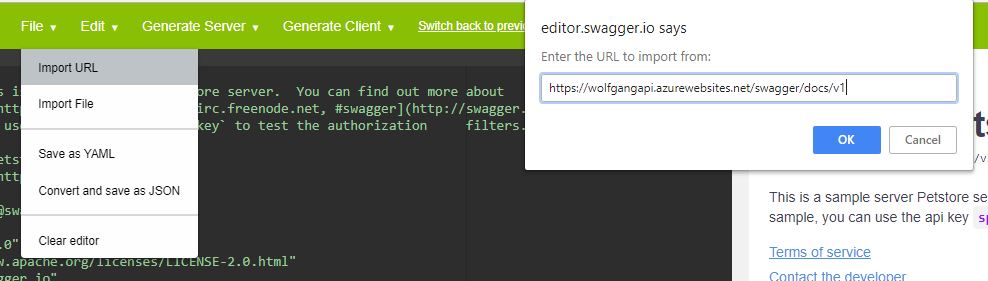
Paste the API definition into the swagger editor
- The discovered API endpoints will be displayed on the right side.
- Click on Generate Client and select your desired language.

Download the client application for your desired language
- The client application will be downloaded as a .zip file.
Monitor API Apps
App Service provides built-in monitoring capabilities, such as resource quotas and metrics. You can set up alerts and automatic scaling based on these metrics. Additionally, Azure provides built-in diagnostics to assist with debugging. A combination of the monitoring capabilities and logging should provide you with the information you need to monitor the health of your API App, and determine whether it is able to meet capacity demands.
Using quotas and metrics
The resource limits of API Apps are defined by the App Service plan associated with the app.
If you exceed the CPI and bandwidth quotas, your app will respond with a 403 HTTP error. Therefore, you should keep an eye on your resource usage. Exceeding memory quotas causes an application reset, and exceeding the file system quota will cause write operations to fail, even to logs. If you need more resources, you can upgrade your App Service plan.
Enable and review diagnostics logs
To enable and review diagnostics logs, see my last post Design Azure App Service Web App.
Conclusion
This post showed how to create an Azure API App in the Azure portal and how to create and deploy an API application using Visual Studio 2017. Next, I showed how to test your API endpoints with Swagger and how to create a client application using the online editor of Swagger. During the testing process, I showed how to configure CORS, otherwise, you won’t be able to test your endpoints.
The last section explained how to monitor your API Apps and how quotas work.
For more information about the 70-532 exam get the Exam Ref book from Microsoft and continue reading my blog posts. I am covering all topics needed to pass the exam. You can find an overview of all posts related to the 70-532 exam here.
Comments powered by Disqus.