

Helm is a package manager for Kubernetes which helps developers quickly deploy their applications. In my last post, Azure Kubernetes Service - Getting Started, I showed how to deploy an application to AKS using the dashboard.
In this post, I will talk about the basics of Helm and show how to add it to your application.
This post is part of “Microservice Series - From Zero to Hero”.
What is Helm?
Deploying microservices to Kubernetes, especially if they have dependencies, can be quite complex. This is where Helm comes in. Helm is a package manager for Kubernetes that allows you to create packages and helm takes care of installing and updating these packages. Helm packages are called charts. These charts describe everything your application needs and helm takes care to create or update your application, depending on the provided chart. Helm also serves as a template engine which makes it very easy to configure your charts either locally or during your CI/CD pipeline.
Let’s add a Helm chart to our microservice and I will explain every component of the chart. You can find the code of the demo on GitHub.
Add Helm Charts to a Microservice
Visual Studio 2019 comes with great Helm support. Right-click on your API project and select Add –> Container Orchestrator Support.

Add Container Orchestration Support
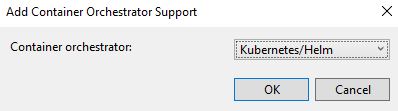
This opens a new window where you can select Helm or Docker-compose. Select Kubernetes/Helm and click OK.
Add Helm
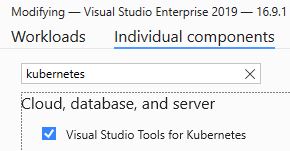
If you don’t have Kubernetes/Helm as an option, make sure that you have the Visual Studio Tools for Kubernetes installed.
Add the Visual Studio Tools for Kubernetes
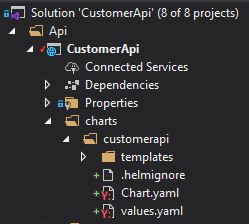
Visual Studio creates a new folder called charts and places a folder inside this charts folder with the name of your project. It’s important to only use lowercase because Kubernetes can process only lowercase names.
The Helm charts got added
Helm Chart Templates
Helm created another subfolder, called templates, and places a couple of files into it. If you ignore the _helpers and Notes files, the remaining file names should sound familiar if you think about Kubernetes objects. The charts folder contains templates for the Service, Deployment, Ingress, and Secrets. These four objects are needed to run your application in Kubernetes. At a first glance, these files look super complicated and confusing but they are quite simple. You have to know the yaml definition of the Kubernetes objects though. The templates are basically the same, except that the values are added dynamically.
Let’s have a look at the service.yaml file:
This file defines a service, adds labels, and then configures its ports and protocol. Helm replaces all values inside the two braces. What’s important to notice is that some start with .Values.*. These values come from the values.yaml file which is outside of the templates folder.
Override Values
In the previous section, I showed the service.yaml file. This file reads two values from the values.yaml file: .Values.service.type and .Values.service.port. You can find the respective files in the values.yaml file in the service section:
Take a look at the values.yaml file and you will see that the type of the service is ClusterIP and its port is 80. This approach enables you to configure your application with changes in only one file. The same principle applies to all files inside the templates folder.
The fullnameOverride parameter is used to replace the variable customerapi.fullname which serves, for example, as the name of the deployment and service.
Usage of the fullnameOverride variable
Conclusion
In this post, I gave a very short introduction to Helm. Helm is a package manager for Kubernetes and helps you to deploy your application including all its dependencies to Kubernetes. Helm also serves as a template engine which makes it very easy to change values.
In my next post, I will show who to deploy our microservice to Kubernetes using Helm. You can find the code of the demo on GitHub.
This post is part of “Microservice Series - From Zero to Hero”.
Comments powered by Disqus.