

My last post introduced the concept of a service mesh and how it can help to manage your Kubernetes cluster, especially with hundreds or thousands of pods running. The post was only theoretical and was probably a bit abstract if you have never worked with a service mesh.
Therefore, I want to show you how to install Istio and a sample application on your Kubernetes cluster in this post.
This post is part of “Microservice Series - From Zero to Hero”.
Installing Istio in Kubernetes
This demo assumes that you already have a Kubernetes cluster set up. If not see Azure Kubernetes Service - Getting Started to set up a new cluster and also configure the connection to Kubernetes. Usually, I work with Windows but for this demo, I will use the Windows Subsystem for Linux. You can use all commands on Linux or Mac as well.
To get started, download the newest version of Istio.
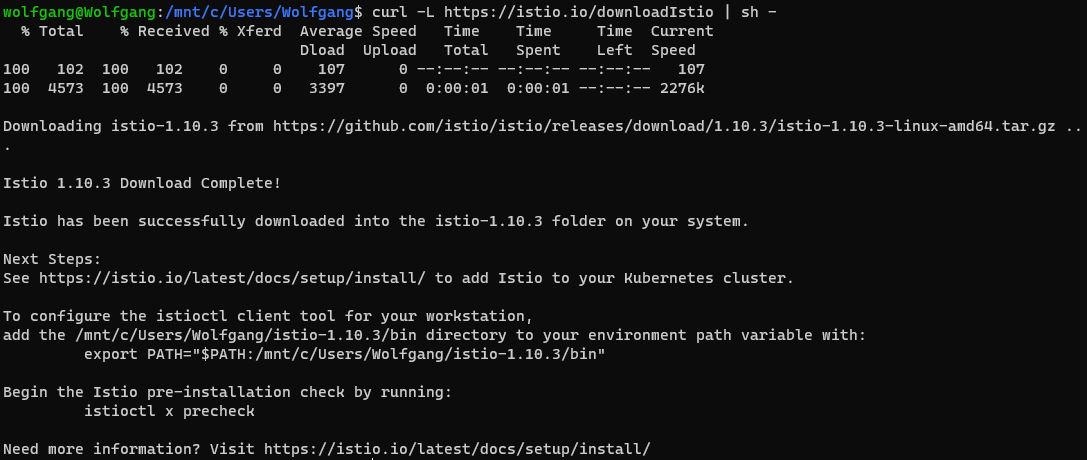
Download the newest Version of Istio
Alternatively, go to GitHub and download the desired version.
After the download is finished, navigate into the downloaded Istio folder and set the path to the /bin folder as the Path variable.

Set the Istio Path
Next, install Istio with the demo profile in your Kubernetes cluster. Istio comes with several profiles which have different configurations for the core components. The demo profile installs all components. You can find more information about the profiles in the Istio docs.

Install Istio in Kubernetes
The installation should only take a couple of seconds.
Install an Istio Demo Application
Istio offers a nice demo application which I will use in this demo. Before you install it, I would recommend creating a new namespace in your K8s cluster. Additionally, set the istio-injection=enabled label on the namespace. This label configures the automatic injection of the Envoy sidecar.

Create and tag the Namespace
Next, install the sample app in the previously created namespace.
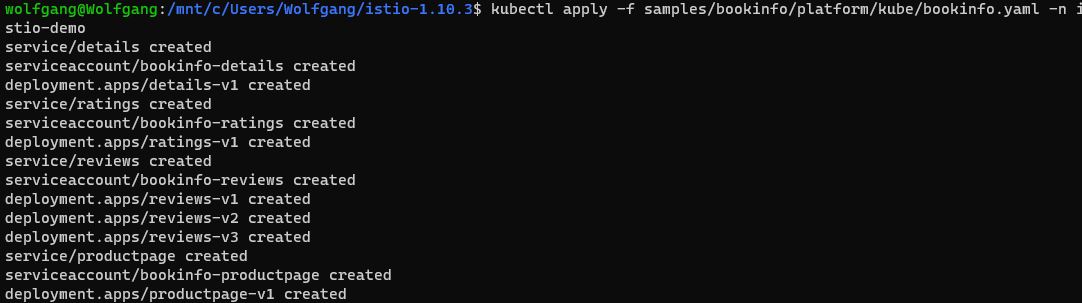
Install the Sample Application
After the sample application is installed, make sure that all services are up and running.

Check the installed Services
Also, check that all pods are started and running correctly.

Check the installed Pods
The demo application is only accessible through the internal network. To make it accessible from the outside, install the Istio ingress gateway in the same namespace.

Install the Gateway
The gateway acts as a load balancer and only provides an external URL. Use the following command to get the application’s URL and its ports.

Get the IP Adress of the Sample Application
Alternatively, use the following commands to read the URL and port and combine them in the GATEWAY_URL variable.
Test the Sample Application
Enter URL:Port/productpage in your browser and you should see the sample application.
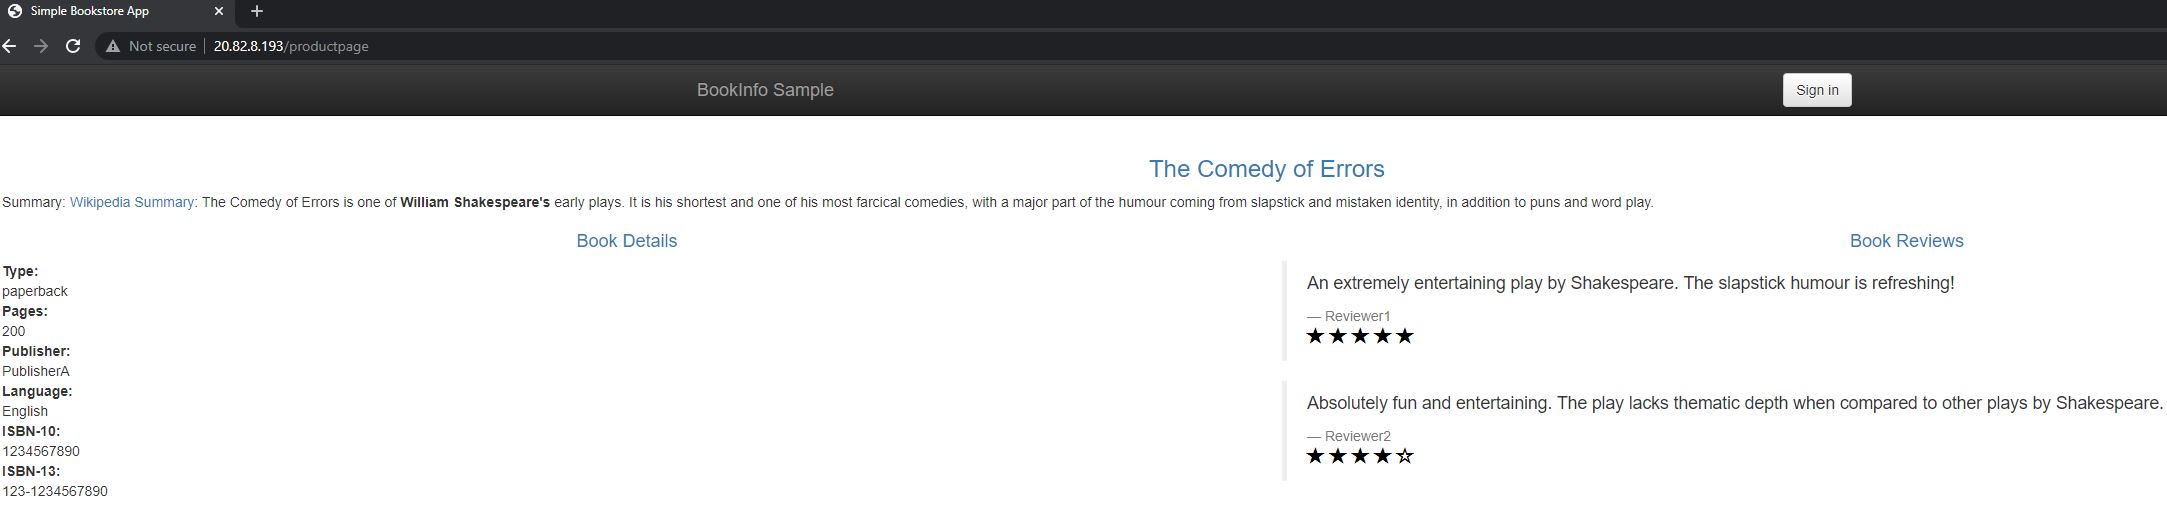
Test the Sample Application
Install Istio Addons
Istio comes with a wide range of additional software which can be easily installed with the following command.
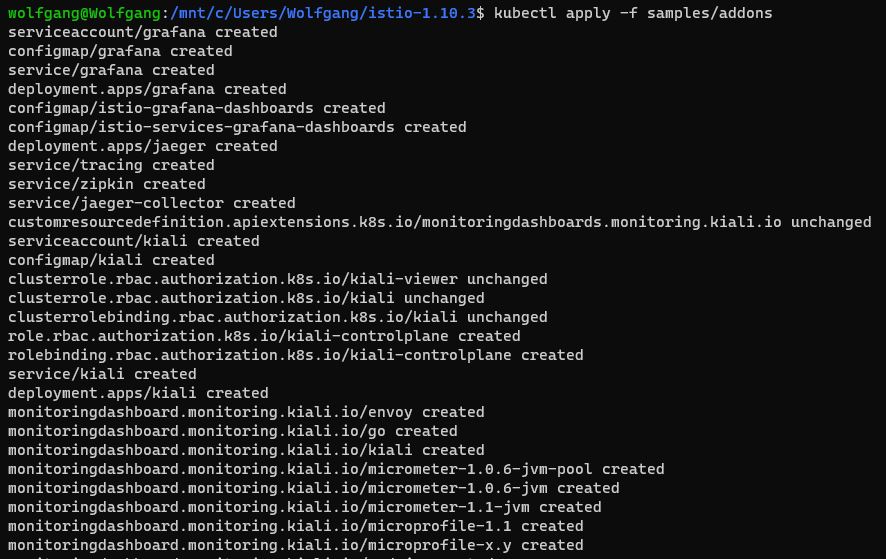
Install Istio Addons
This installs every available addon. If you only want to install certain products, use their specific YAML files. For example, install only Prometheus with the following command.
The above code installed many useful tools like Grafana, Jaeger, and Zipkin. I will talk more about these tools in my next post. For now, let’s take a look at Kiali which is a pretty cool tool to visualize the flow and useful information of requests in distributed applications. Kiali is already installed. All you have to do is to activate the port forwarding with the following command.
Open your browser, enter localhost:20001 and you should see the Kiali dashboard. On the left side select Graph, then select the istio-demo namespace from the drop-down and you should see the services of the demo application. Execute the following command to produce 100 requests which then will be visualized in the graph.
Play a bit around with the settings. You can, for example, enable the traffic animation and the response time of the requests. The graph also shows that most of the traffic is routed from the productpage to the details microservice.
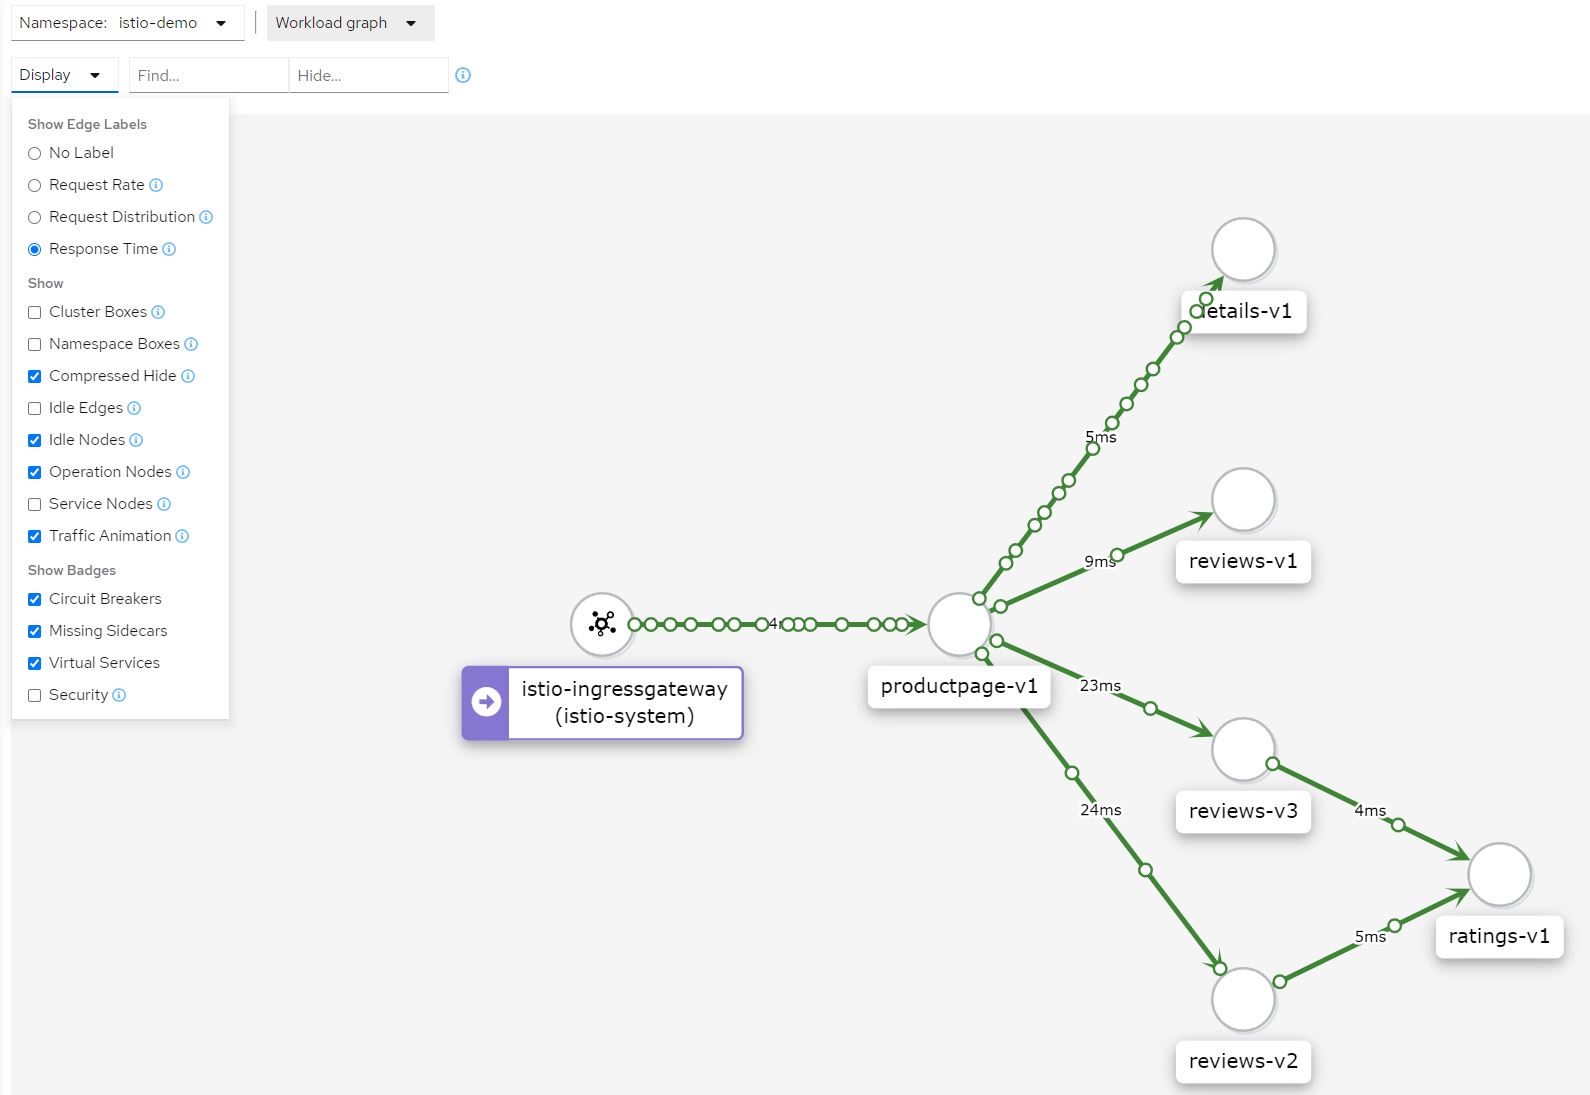
Traffic Flow with Kiali
Analyzing Istio Errors
Istio is very robust but sometimes things go wrong. You can analyze a namespace with the following command.
If you followed this demo and don’t add a namespace (-n istio-demo), the analysis process will run in your current namespace (usually the default namespace) and will return an error that Istio is not enabled.

Check for Errors
Conclusion
Istio is an easy to install service mesh that comes with many useful applications like Grafana, Prometheus, and Jaeger. This demo used the Istio demo application and showed how to visualize your microservice dependencies and the request flow using Kiali.
In my next post, I will show you more features of Istio like fault injection, request routing, and traffic shifting between microservices.
This post is part of “Microservice Series - From Zero to Hero”.
Comments powered by Disqus.