

In my last posts, I created two microservices using ASP .NET Core 3.1. Today, I will implement RabbitMQ, so the microservices can exchange data while staying independent. RabbitMQ can also be used to publish data even without knowing the subscribers. This means that you can publish an update and whoever is interested can get the new information.
This post is part of “Microservice Series - From Zero to Hero”.
What is RabbitMQ and why use it?
RabbitMQ describes itself as the most widely deployed open-source message broker. It is easy to implement and supports a wide variety of technologies like Docker, .NET, or Go. It also offers plugins for monitoring, managing, or authentication. I chose RabbitMQ because it is well known, quickly implemented, and especially can be easily run using Docker.
Why use a Queue to send Data?
Now that you know what RabbitMQ is, the next question is: why should you use a queue instead of directly sending data from one microservice to the other one. There are a couple of reasons why using a queue instead of directly sending data is better:
- Higher availability and better error handling
- Better scalability
- Share data with whoever wants/needs it
- Better user experience due to asynchronous processing
Higher Availability and better Error Handling
Errors happen all the time. In the past, we designed our systems to avoid errors. Nowadays we design our systems to catch errors and handle them in a user-friendly way.
Let’s say we have an online shop and the order service sends data to the process order service after the customer placed his order. If these services are connected directly and the process order service is offline, the customer will get an error message, for example, “An error occurred. Please try it again later”. This user probably won’t return and you lost the revenue of the order and a potential future customer.
If the order service places the order in a queue and the order processing service is offline, the customer will get a message that the order got placed and he or she might come back in the future. When the order processing service is back online, it will process all entries in the queue. You might know this behavior when booking a flight. After booking the flight it takes a couple of minutes until you get your confirmation per email.
Better Scalability
When you place messages in a queue, you can start new instances of your processor depending on the queue size. For example, you have one processor running, when there are ten items in the queue, you start another one, and so on. Nowadays with cloud technologies and serverless features, you can easily scale up to thousands of instances of your processor.
Share Data with whoever wants/needs it
Most of the time, you don’t know who wants to process the information you have.
Let’s say our order service publishes the order to the queue. Then the order processing service, reporting services, and logistics services can process the data. Your service as a publisher doesn’t care who takes the information. This is especially useful when you have a new service in the future which wants your order data too. This service only has to read the data from the queue. If your publisher service sends the data directly to the other services, you would have to implement each call and change your service every time a new service wants the data.
Better User Experience due to asynchronous processing
Better user experience is the result of the three other advantages. The user is way less likely to see an error message and even when there is a lot of traffic like on Black Friday, your system can perform well due to the scalability and the asynchronous processing.
Implement RabbitMQ with .NET Core
You can find the code of the finished demo on GitHub.
RabbitMQ has a lot of features. I will only implement a simple version of it to publish data to a queue in the Customer service and to process the data in the Order service.
Implementation of publishing data
I am a big fan of Separation of Concerns (SoC) and therefore I am creating a new project in the CustomerApi solution called CustomerApi.Message.Send. Next, I install the RabbitMQ.Client NuGet package and create the class CustomerUpdateSender in the project. I want to publish my Customer object to the queue every time the customer is updated. Therefore, I create the SendCustomer method which takes a Customer object as a parameter.
Publish Data to RabbitMQ
Publishing data to the queue is pretty simple. First, you have to create a connection to RabbitMQ using its hostname, a username, and a password using the ConnectionFactory. With this connection, you can use QueueDeclare to create a new queue if it doesn’t exist yet. The QueueDeclare method takes a couple of parameters like a name and whether the queue is durable.
After creating the connection to the queue, I convert my customer object to a JSON object using JsonConvert and then encode this JSON to UTF8.
The last step is to publish the previously generated byte array using BasicPublish. BasicPublish has like QueueDeclare a couple of useful parameters but to keep it simple, I only provide the queue name and my byte array.
That’s all the logic you need to publish data to your queue. Before I can use it, I have to do two more things though. First, I have to register my CustomerUpdateSender class in the Startup class. I am also providing the settings for the queue such as the name or user from the appsettings. Therefore, I have to read this section in the Startup class.
The last step is to call the SendCustomer method when a customer is updated. This call is in the Handle method of the UpdateCustomerCommandHandler.
Note: I updated the implementation on November 27, 2020. Instead of creating a connection every time the method is called, I reuse the connection and only create a new channel. This follows the RabbitMQ best practices and helps to improve the performance significantly. I am not reusing the channel since I don’t need the highest performance and I want to keep the implementation simple. The new code looks as follows:
Implementation of reading Data from RabbitMQ
Implementing the read functionality is a bit more complex because we have to constantly check the queue if there are new messages and if so, process them. I love .NET Core and it comes really handy here. .NET Core provides the abstract class BackgroundService which provides the method ExecuteAsync. This method can be overridden and is executed regularly in the background.
In the OrderApi solution, I create a new project called OrderApi.Messaging.Receive, install the RabbitMQ.Client NuGet and create a class called CustomerFullNameUpdateReceiver. This class inherits from the BackgroundService class and overrides the ExecuteAsync method.
In the constructor of the class, I initialize my queue the same way as in the CustomerApi using QueueDeclere. Additionally, I register events that I won’t implement now but might be useful in the future.
Reading Data from the Queue
In the ExecuteAsync method, I am subscribing to the receive event and whenever this event is fired, I am reading the message and encode its body which is my Customer object. Then I am using this Customer object to call another service that will do the update in the database.
That’s all you have to do to read data from the queue. The last thing I have to do is to register my CustomerFullNameUpdateReceiver class as a background service in the Startup class.
The code above checks whether the setting RabbitMq:Enables is true. If it is set to true, the background service gets registered. This check is useful because so you can either use the appsettings.json file or provide an environment variable to override it.
Run RabbitMQ in Docker
The publish and receive functionalities are implemented. The last step before testing them is to start an instance of RabbitMQ. The easiest way is to run it in a Docker container. If you don’t know what Docker is or haven’t installed it, download Docker Desktop for Windows from here or for Mac from here. After you installed Docker, copy the two following lines in Powershell or bash:
Don’t worry if you don’t understand them. Simplified these two lines download the RabbitMQ Docker image, start it as a container and configure the ports, the name, and the credentials.
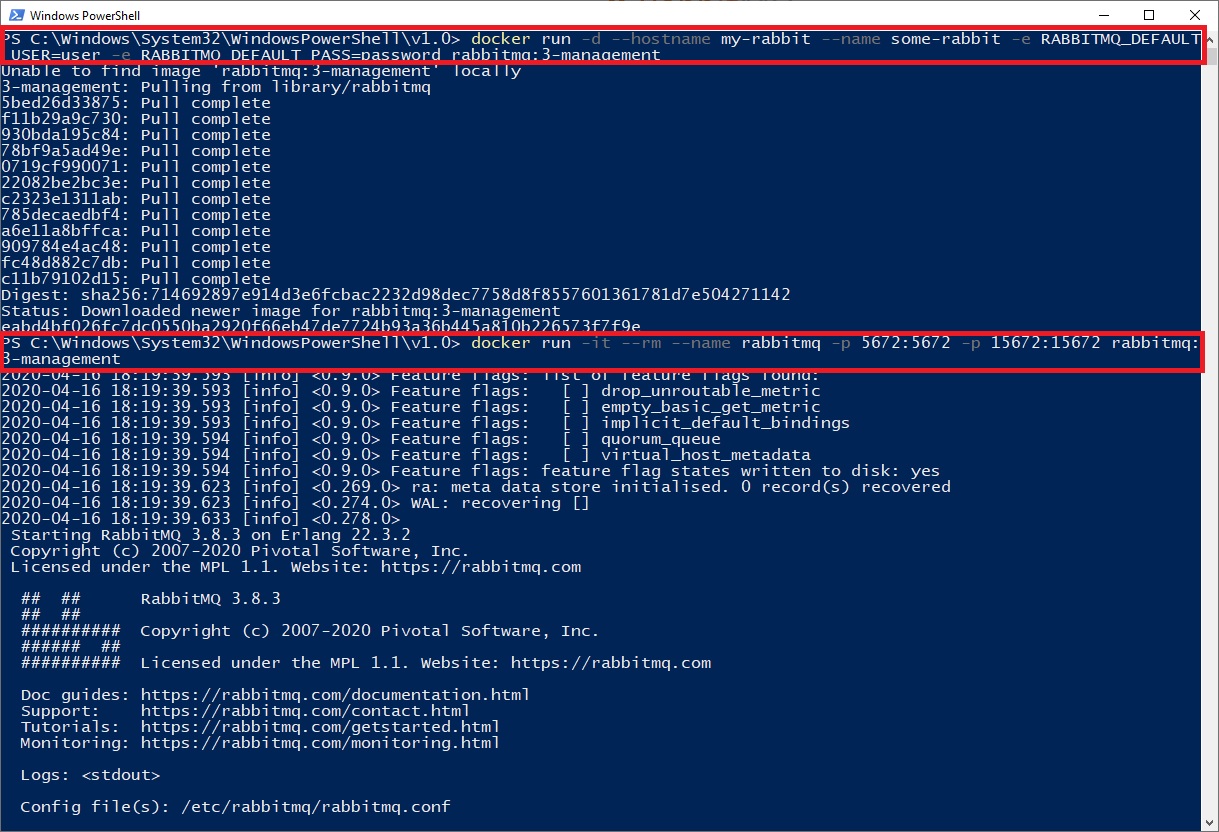
Run RabbitMQ in a Docker container
After RabbitMQ is started, you can navigate to localhost:15672 and login with guest as user and guest as password.
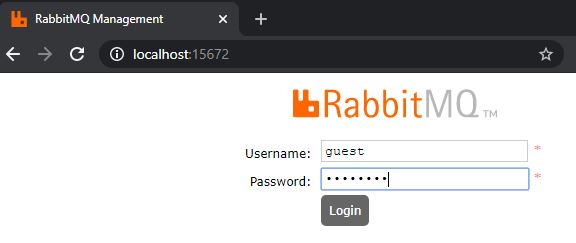
Login into the RabbitMQ management portal
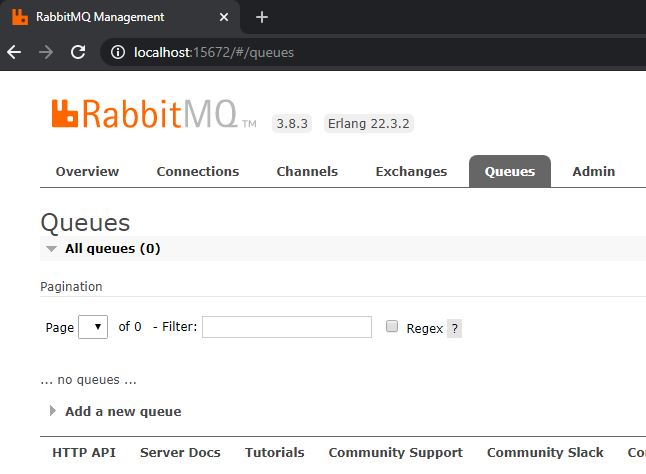
Navigate to the Queues tab and you will see that there is no queue yet.
A message was published and consumed
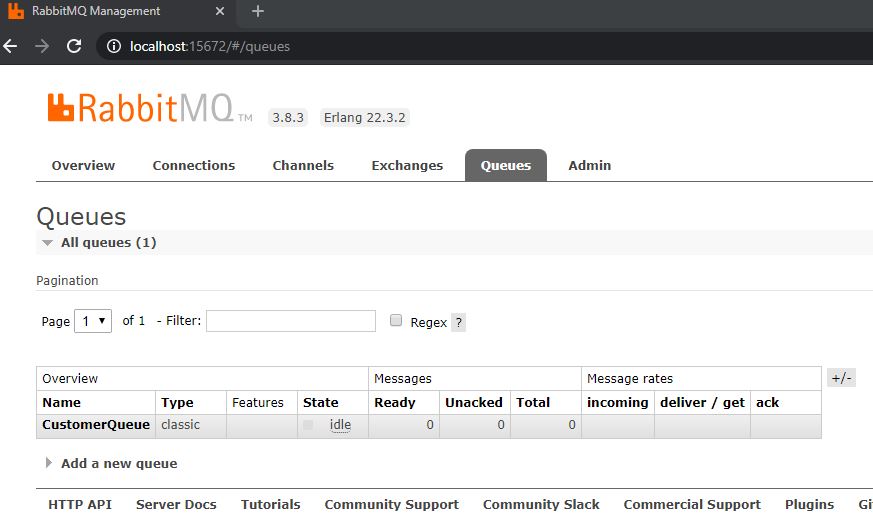
Now you can start the OrderApi and the CustomerApi project. The order of how you start them doesn’t matter. After you started the OrderApi project, the CustomerQueue will be created and you can see it in the management portal.
No queues are created yet
Click on CustomerQueue and you will see that there is no message in the queue yet and that there is one consumer (the OrderApi).
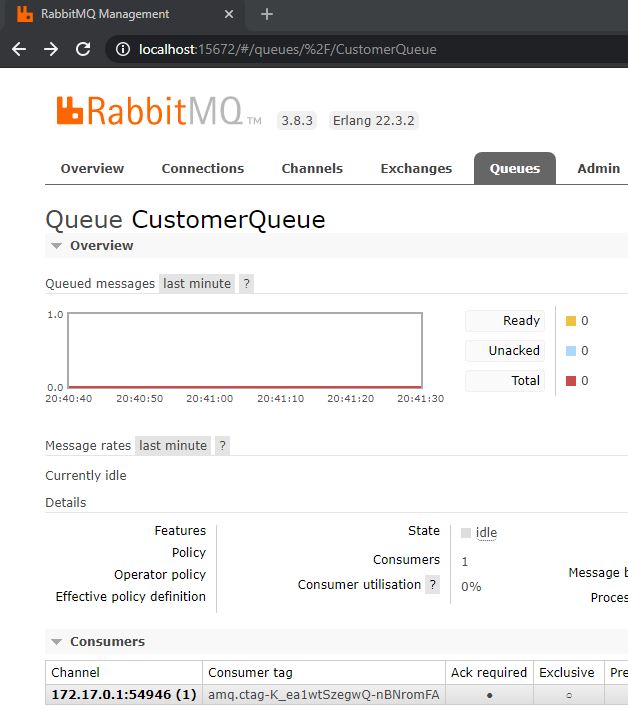
Overview of the CustomerQueue and its Consumers
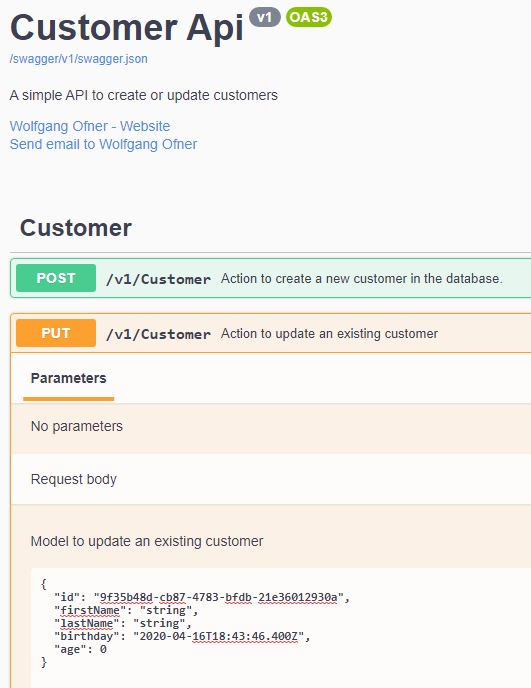
Go to the Put action of the CustomerApi and update a customer. If you use my in-memory database you can use the Guid “9f35b48d-cb87-4783-bfdb-21e36012930a”. The other values don’t matter for this test.
Update a customer
After you sent the update request, go back to the RabbitMQ management portal and you will see that a message was published to the queue and also a message was consumed.

A message was published and consumed
Shortcomings of my Implementation
In the CustomerApi, there is no real exception handling right now. This means that if there is an error while processing a message, the message will be deleted from the queue and therefore be lost. Also if there is no connection to RabbitMQ, the message will be discarded and therefore lost. In a production environment, you should save this message somewhere and process it once all systems are back up and running.
Another problem is that after the message is read, it is removed from the queue. This means only one receiver is possible at the moment. There are also no unit tests for the implementation of the RabbitMQ client.
Conclusion
This post explained why you should use queues to decouple your microservices and how to implement RabbitMQ using Docker and ASP .NET Core 3.1. Keep in mind that this is a quick implementation and needs some work to be production-ready.
In my next post, I will dockerize the application which will make it way easier to run and distribute the whole application.
You can find the code of the finished demo on GitHub.
This post is part of “Microservice Series - From Zero to Hero”.
Update: On November 27 2020, I refactored the registration of the service to make it more resilient and also change the implementation of the sender to reuse the connection instead of creating a new one for every message.
Comments powered by Disqus.