

A nice feature of Kubernetes is that you can easily set up new environments like test, QA, or production. Especially when you already have a CD pipeline, it is easy to extend it and deploy it to additional environments.
In the following post, I will add a deployment to the production environment, set up a unique URL, and also deploy the database for the environment.
This post is part of “Microservice Series - From Zero to Hero”.
Update the existing Deployment to the Test Environment
You can find the code of the demo on GitHub.
So far, I have used the CD pipeline to deploy to a stage called test. I plan to change the URL of the test environment and then add a deployment of the Helm package and the database to a production environment.
First, add a new subdomain to the URL of the test environment. You don’t have to use a subdomain but this makes the configuration of the DNS settings easier. For the test environment, I will use test as a subdomain which means the URL will be teast.customer.programmingwithwolfgang.com
Additionally, add the environment name also to the database so you can distinguish the test and production databases. That is everything you have to update for the test environment.
Add the Production environment to the CD Pipeline
Adding a new environment is quite easy. Copy the deployment of the test environment and copy it beneath it. Next up replace test with prod, for example, the DeploymentEnvironment variable is now prod.
Since I don’t want to use a subdomain for my production URL, remove it which means the URL will be customer.programmingwithwolfgang.com
Lastly, we only want to deploy to production when the deployment to the test environment is finished and was successful. To achieve that, add the dependsOn keyword and the following condition.
In the future, you could add an approval before the production gateway. This means that the production deployment is only executed when a human approves the deployment.
The finished CD Pipeline
The finished CD pipeline looks as follows:
Configure the DNS for the Test Environment
You have to add the new subdomain in your DNS settings before you can use it. To make changes easier for the future, add a wildcard subdomain in your DNS settings. You can see my settings for both my microservices on the following screenshot.

Configure the DNS settings for the subdomain
For more information about setting up the DNS configuration, see my post Configure custom URLs to access Microservices running in Kubernetes.
Testing the new Deployment
Run the pipeline and after the Helm upgrade task, you will see the URL of the test environment printed to the output window in Azure DevOps.
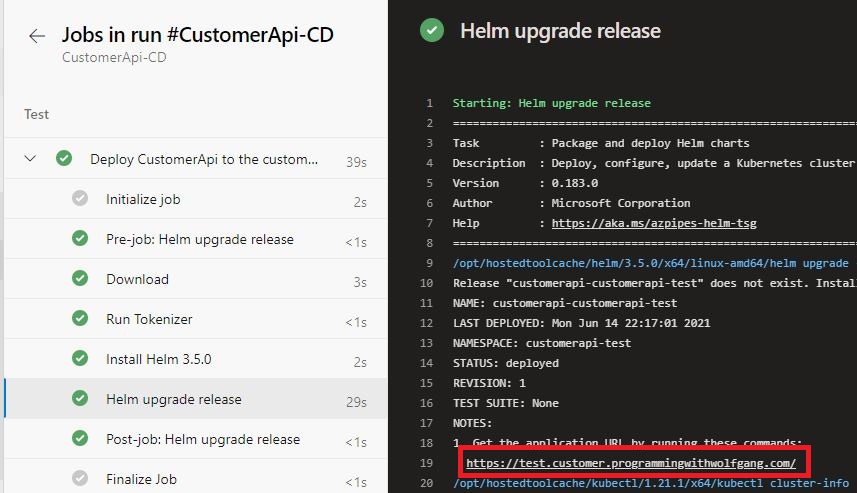
Azure DevOps prints the URL after the deployment
Click on the URL and you will see that the microservice is running and also using HTTPS with a valid SSL certificate.
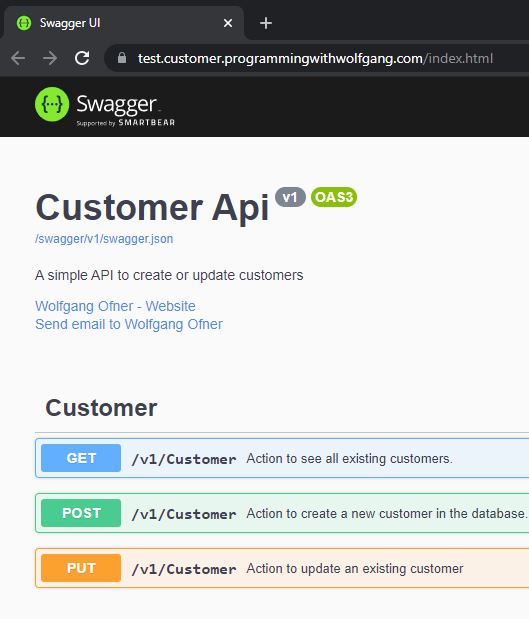
The test environment is up and running
For more information about setting up HTTPS and creating SSL certificates automatically using Let’s Encrypt, see Automatically issue SSL Certificates and use SSL Termination in Kubernetes.
Azure DevOps gives you a nice overview of the different environments and stages which gives you a nice overview of the status of all the deployments. As you can see, everything finished successfully.
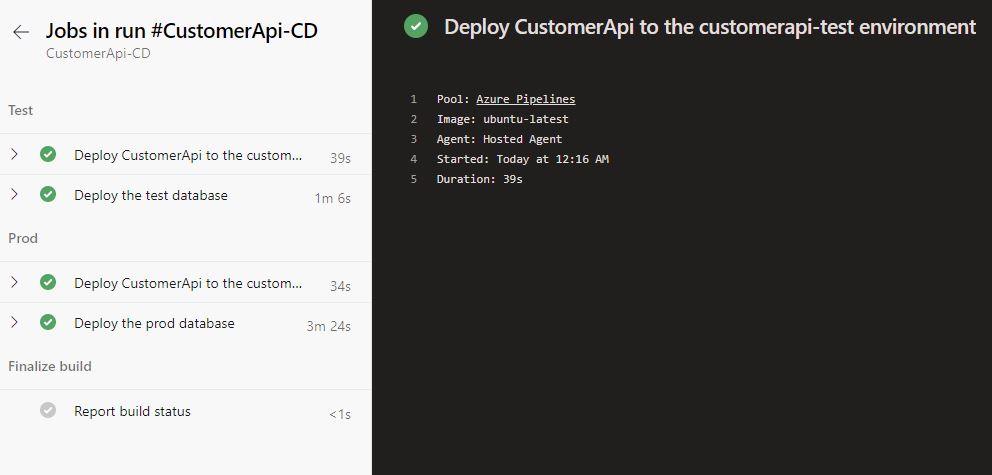
The deployment was successful
Enter your URL without the subdomain into your browser and you will see that your production microservice is also running.
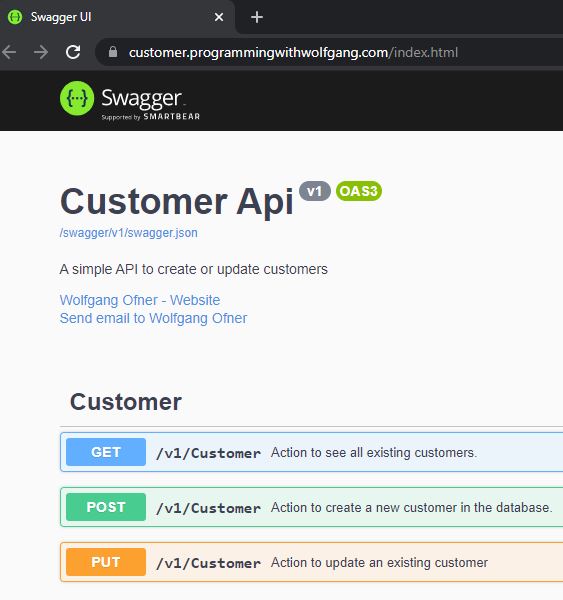
The Microservice is running
Lastly, connect to your SQL Server and you will see all four databases after the deployment (the OrderApi and CustomerApi have two databases each).
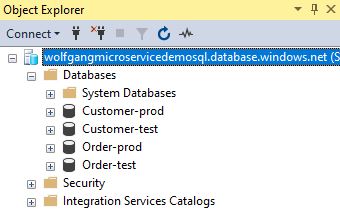
All databases got deployed
For more information on how to deploy databases in a CD pipeline, see Automatically Deploy your Database with Dacpac Packages using Linux and Azure DevOps.
Conclusion
Having a CD pipeline in place enables you to easily add new environments to your deployment. A typical CD pipeline consists of test and production deployments but you can easily add QA or other environments.
In my next post, I will show you how to deploy every pull request into a new environment and automatically create a unique URL.
You can find the code of the demo on GitHub.
This post is part of “Microservice Series - From Zero to Hero”.
Comments powered by Disqus.